Newest progress reports are at the bottom of the page
I will try and update this page with new photos at least every week. The date at the end of the caption is when the photo was uploaded. The actual progress of the layout is a little ahead of what you see here.
April 2016 - April 2019
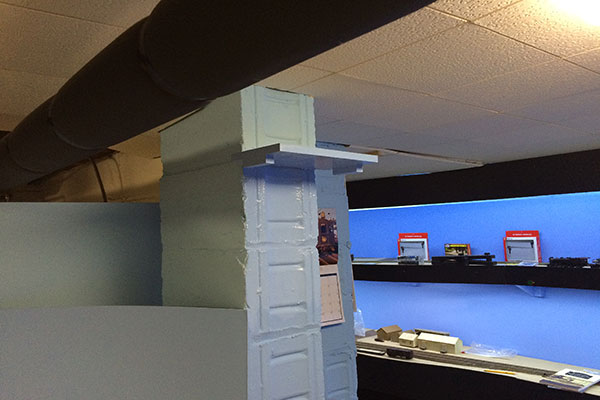
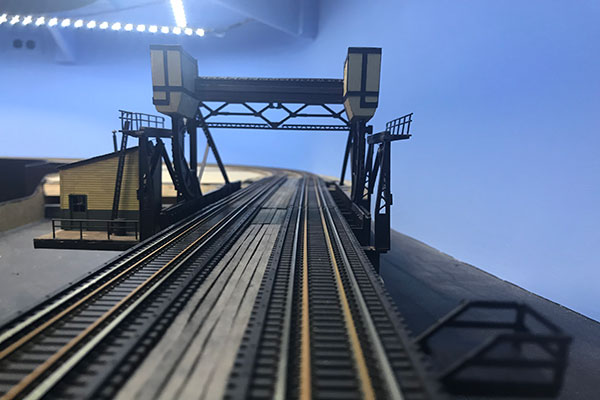
Here, I've mounted a small shelf on the cinder block column next to the Bay Head loop, and right in the center of the present and future layout. (4/11/16)
The MRC Prodigy Wireless base unit, which receives all of the wireless communications from the handhelds, will reside here. Running the wires is next up. (4/11/16)
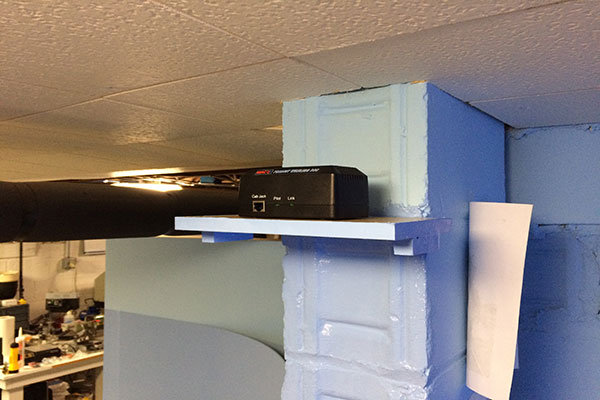
The MRC Prodigy Wireless Receiver has been officially moved to its new home and the results are very encouraging. It may not look pretty but the elevated position really has improved coverage in the basement. Now, back to track tweaking. (4/23/16)
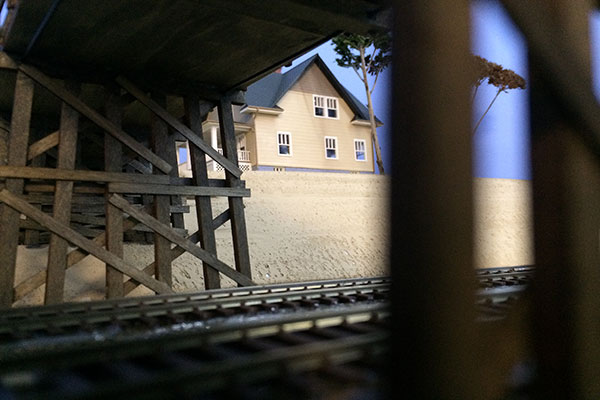
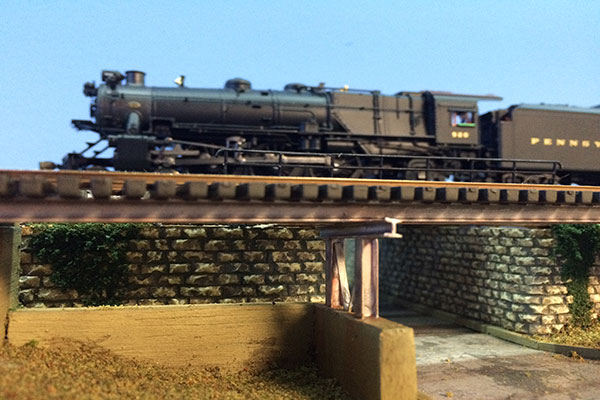
Here's a view from under the wooden Sylvania Avenue overpass in Neptune. This portion of the layout has been dying for scenery work and I can't wait to give it justice. The house on the bluff is an Atlas kit while the bridge is a Monroe Models kit. (4/23/16)
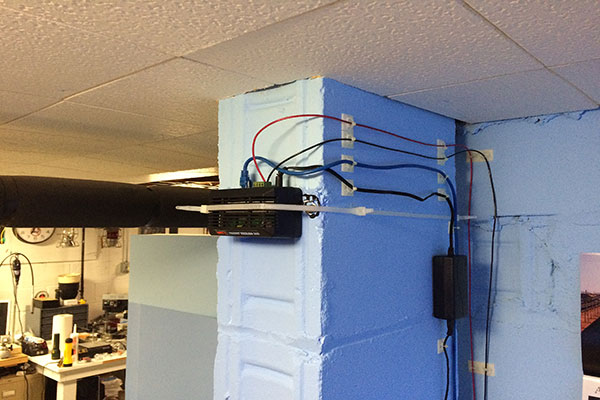
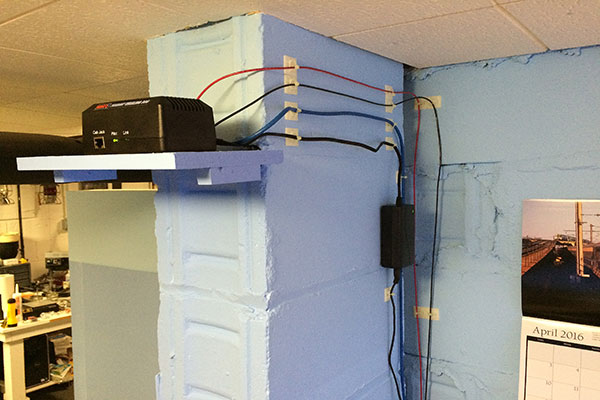
This is what happens when a plan goes haywire. The shelf for the MRC wireless base unit just didn't want to stay put on the concrete wall! The epoxy was not the culprit but the old 1920s concrete block that tended to flake rather than hold a minor weight. Bring on the ever-faithful zip ties! I'll clean it up. Not my style but I can't afford to fart around with the trivial. (5/2/16)
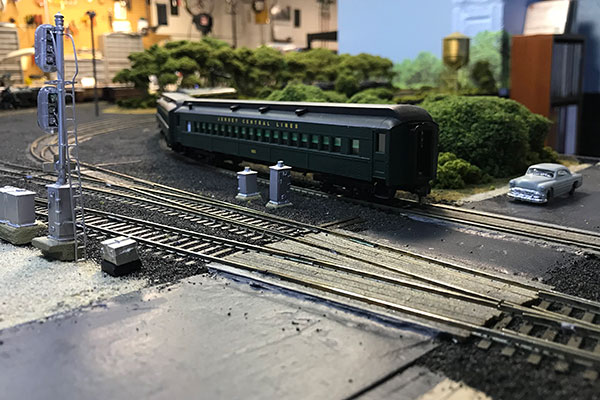
A PRR K4s-led commuter train heads westbound through Allenhurst. Track tweaking continues. For those interested, my layout will be open for tours on Saturday afternoon May 14th between 1 and 4pm. This is in conjunction with the joint New Jersey/Garden State Divisions of the NMRA meeting that day at Camp Evans in Wall Township. Email me for more info and directions. (5/2/16)

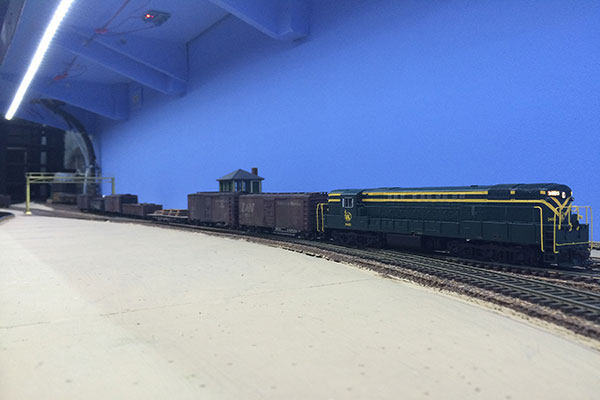
One of numerous test freights is about to depart the helix westbound for Sea Girt and beyond. Trains are running more and more reliably as kinks are worked out of the track work. The helix sits on top of large flat files that hold my historic map collection. (5/16/16)
The CNJ Fairbanks-Morse Trainmaster-led freight drill passes through SG junction with the Freehold and Jamesburg toward Manasquan. The NMRA open house two days ago was a great event! Over 70 guests viewed the layout! (5/16/16)
Earlier, the same drill heads out of Belmar over the Shark River. Realistically, a trainmaster would not be hauling freight on the line but passenger coaches instead. Can't wait to model some water here. (5/16/16)
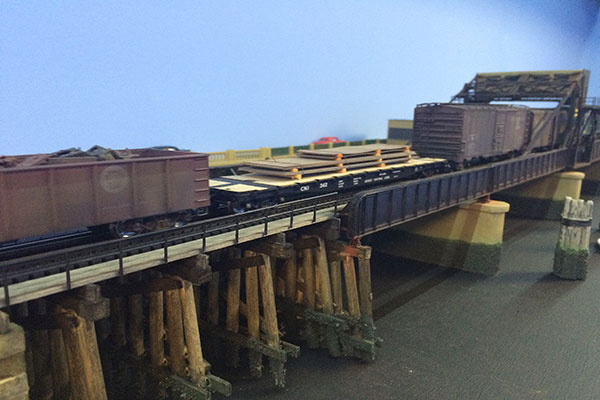
The freight run approaches the Manasquan River bridge in Brielle. The destination will be the Bay Head yard followed by the return trip servicing local industries on the NY&LB. (5/16/16)
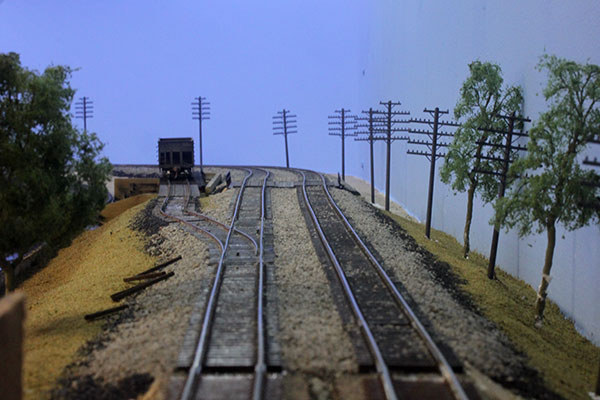
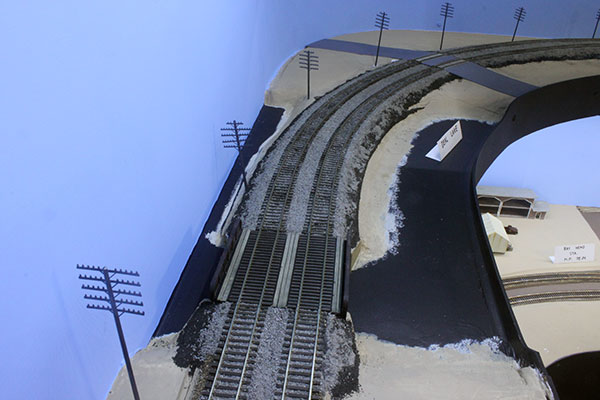
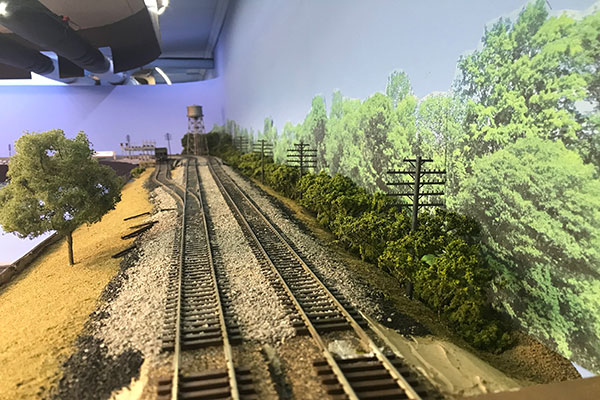
Work is progressing at a slow pace with summer in full swing. Been working on bits and pieces on the layout including more telegraph poles on the areas I want to complete first. Above is the section right before the temporary loop (bottom). (7/29/16)
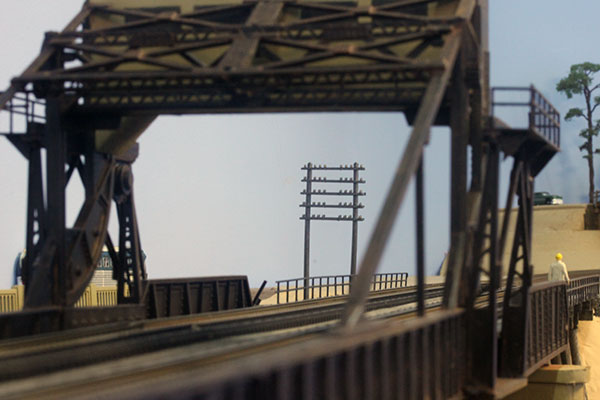
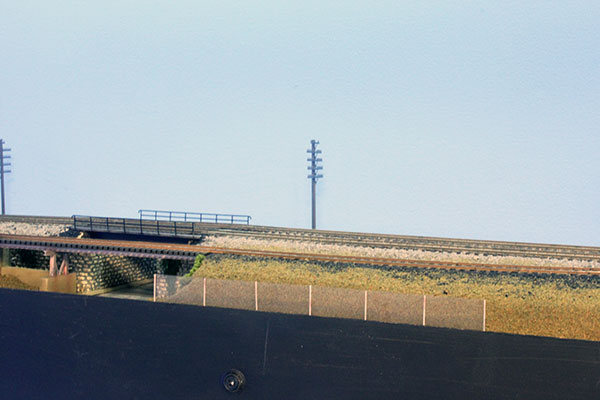
Another upper level section to be completed scenery-wise is the Shark River Bridge section. The pole line here stopped at the bridge and went submerged in the channel. I still need to build the Shark Interlocking before finishing up with water and scenery details. (7/29/16)
The Rix poles work pretty good for me. I spray paint them gray after assembly, and them wash them with an alcohol/india ink mixture. I'm on the fence right now as to whether or not to string lines on the poles. (7/29/16)
The Deal Lake section above will be the first to soon get water on the layout. This will be my first attempt at creating a water effect. I need about 3/8ths depth of relatively still water. I'm looking at Woodland Scenics Realistic Water or possibly Envirotex. (7/29/16)
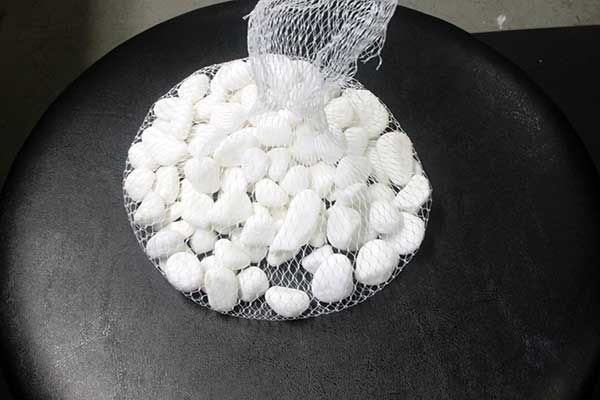
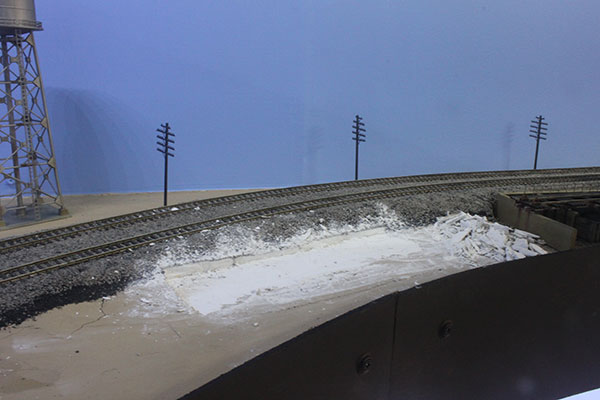
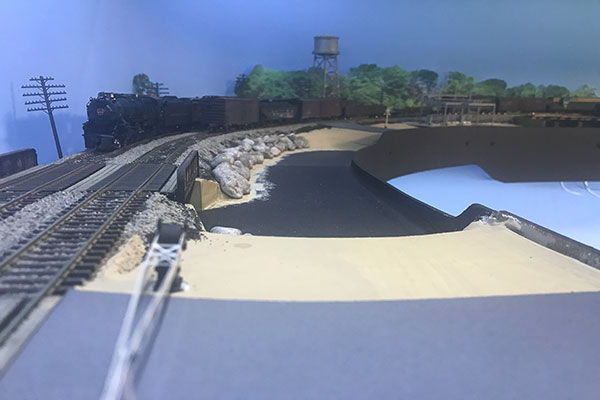
The causeway across Deal Lake was lined with rip-rap rocks by the 1950s to help prevent erosion. I found this $3 bag of white rocks from a craft store that were perfect for the job. (8/11/16)
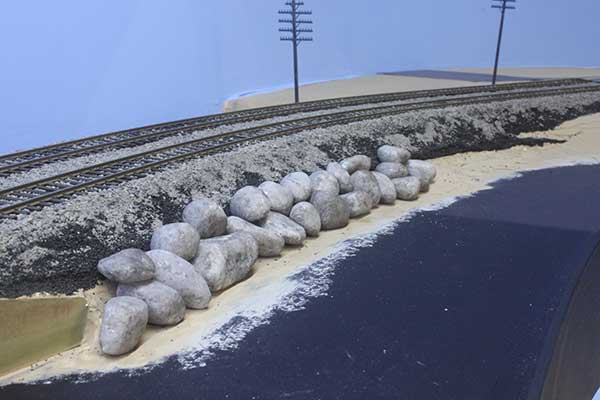
After a couple washes of alcohol/india ink mixture, the rocks looked just like their bigger granite counterparts. Some sand, weeds, bushes and water will complete the illusion. (8/11/16)
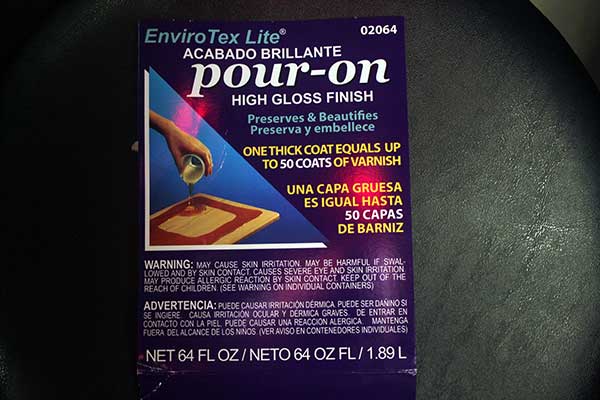
I have decided on using Envirotex Lite (above) for my major water scenes on the layout. Thanks to my friend Jerry Britton for his suggestions regarding this path for realistic water. Check out his fantastic PRR web site at http://pennsyrr.com. It is the ultimate Pennsy site! (8/11/16)
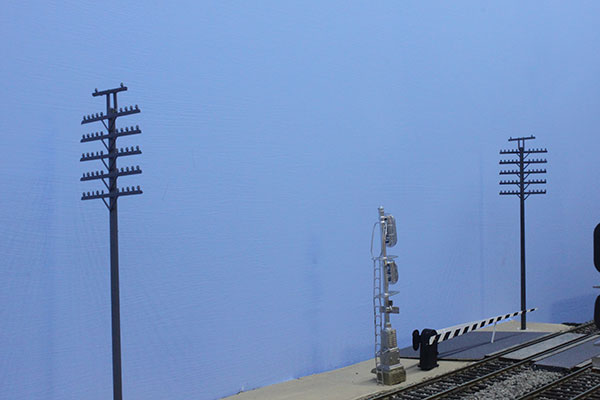
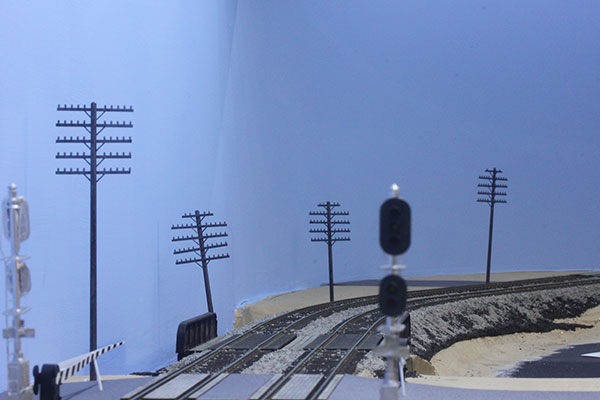
I've also been continuing work on the pole line. Any purist of the NY&LB will recognize the high voltage pole toppers shown here in Asbury Park. My wife has convinced me to wire these poles, saying they will look more realistic. Can't argue with the CFO, can I ;-)? (8/11/16)
While prepping Deal Lake for water, I've finished a couple of ongoing projects. Above is a chain link fence along the r.o.w. in Allenhurst. (8/16/16)
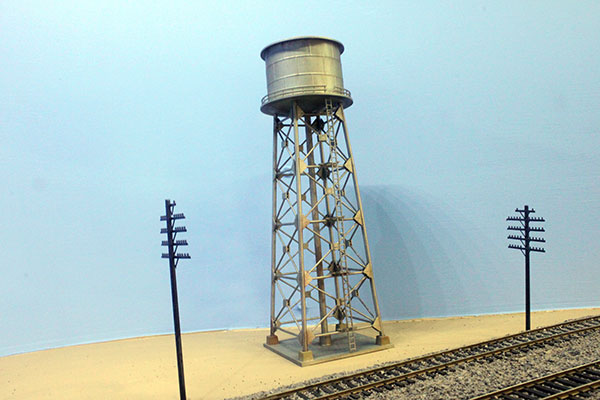
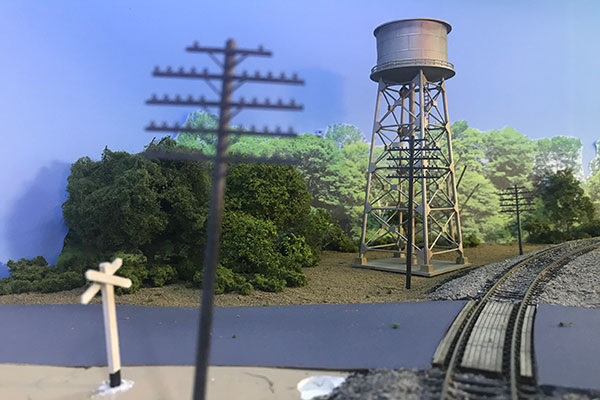
Above is the Allenhurst water tank. I used a Korber kit for this structure and weathered it using chalks, then a spray of Dullcoat. (8/16/16)
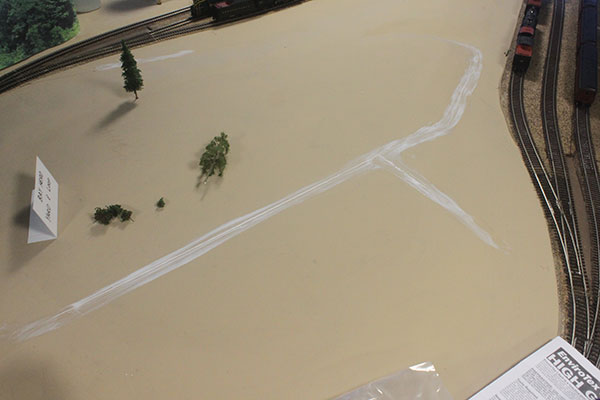
Even though space is tight between the tracks and fascia, I wanted to put SOMETHING here. First I needed to level the area. (9/11/16)
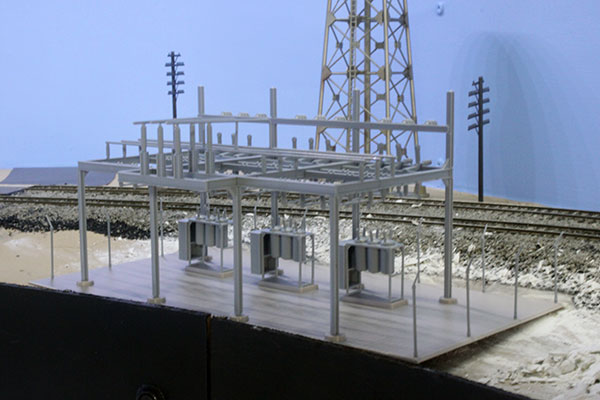
Yes, it's a JCP&L substation, a Walthers kit. Every local knows that the area power company, Jersey Central Power & Light, has a large presence in Allenhurst. (9/11/16)
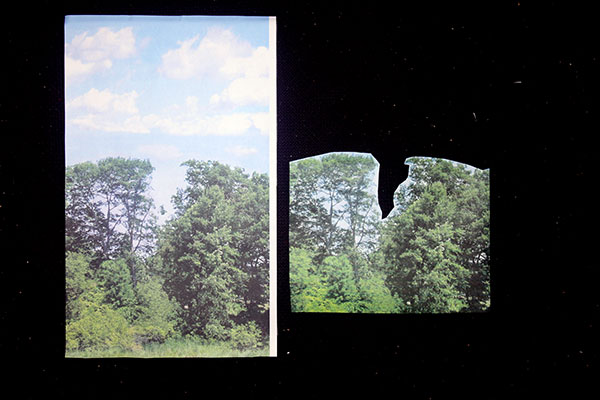
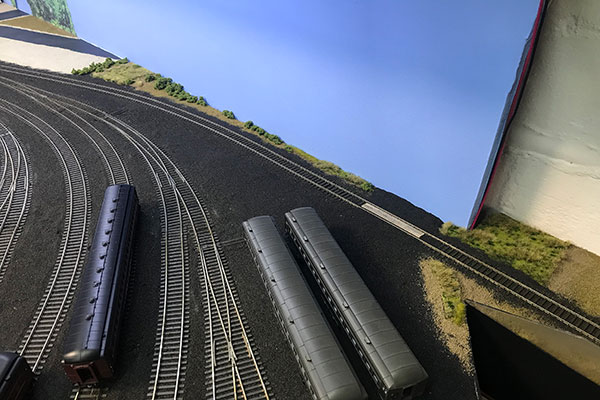
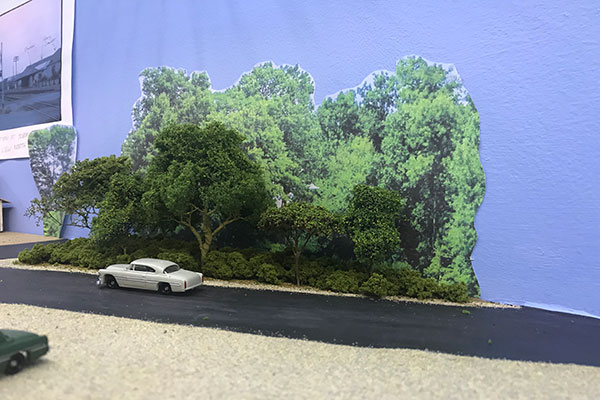
I have decided to move forward using photo backdrops on the layout where feasible. Several years ago I had purchased the hardwood forest backdrop kit from the now-defunct SceniKing. One of 9 panels is on the left and a cut-down one is on the right. (9/18/16)
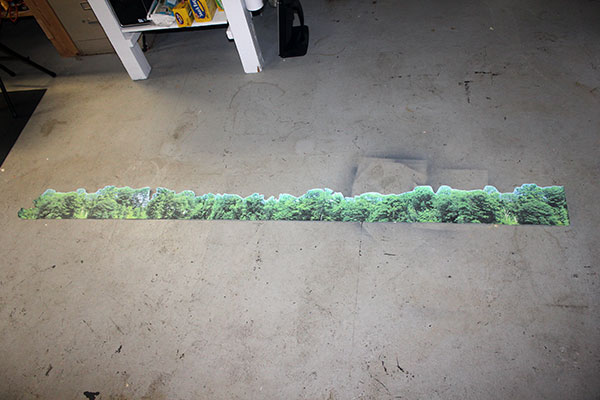
Here is over 8 feet of forest backdrop with the blue sky and the bottom inch and a half cut out. I used stick glue to paste the panels together. The seams are practically invisible. I scanned the original panels into the computer and printed new ones shown above. (9/18/16)
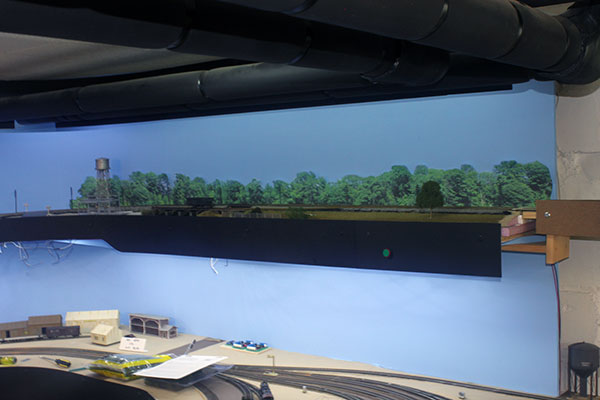
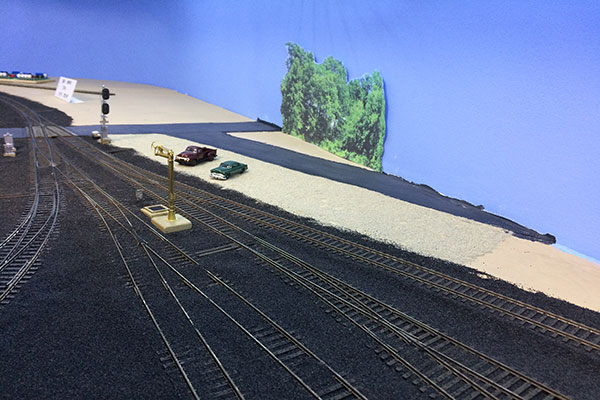
Up on the layout the stark blue background in the Allenhurst section was instantly transformed. I can now make as much forest background as I need. (9/18/16)
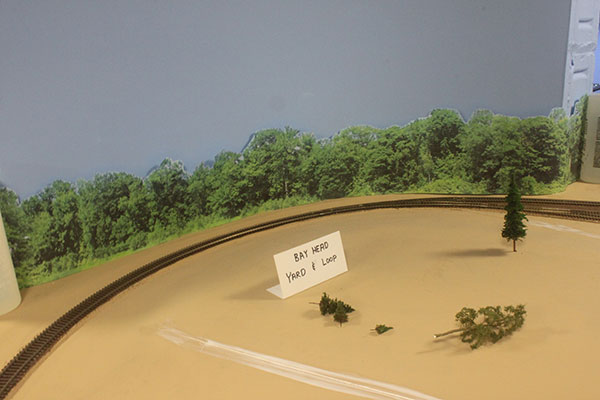
Another view of the background trees. I still need to attach the forest to the wall but already the effect is quite amazing. Water in the foreground is coming soon. (9/18/16)
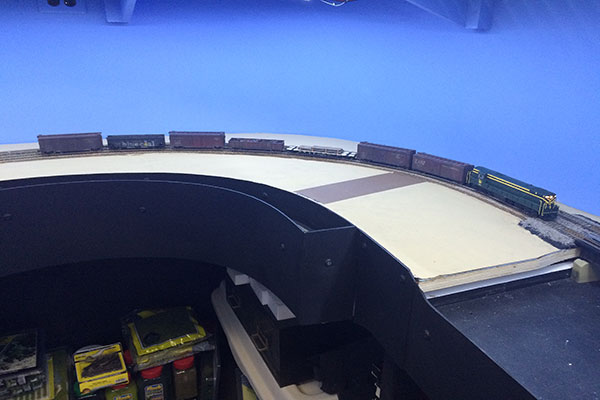
I recently found that the foam base inside the Bay Head loop has developed cracks along the seams, some as much as 1/8 inch wide. This foam is glued to the plywood sub-base. Not sure which, or both, are moving but I suspect the foam which is not as stable as was once believed in the modeling circles. The cracks are now caulked. (10/21/16)
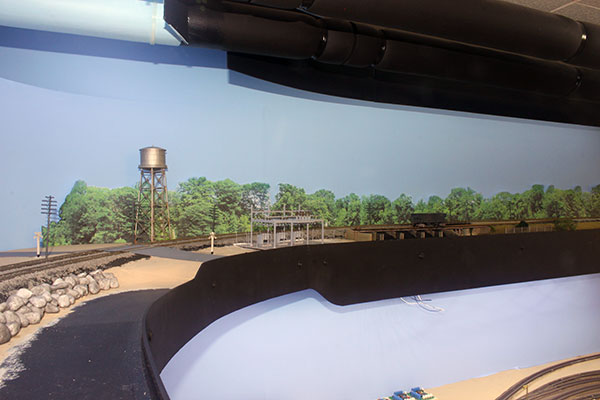
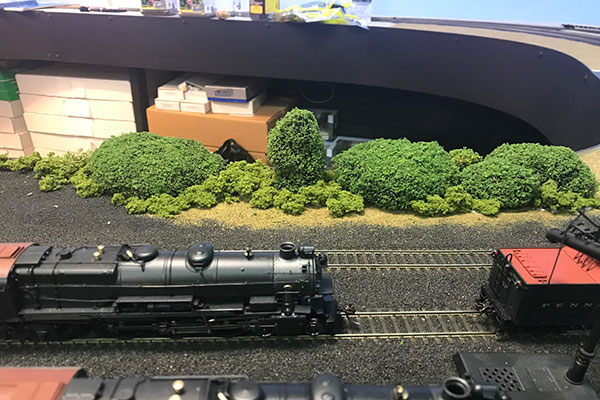
Recent articles on using the pink construction foam for a model railroad base have suggested that it is subject to the same shrinkage and expansion as other materials often used. Above, I have put together another backdrop of forest along the outer edge of the loop track. The inner forest of real miniature trees is fast approaching. (10/21/16)
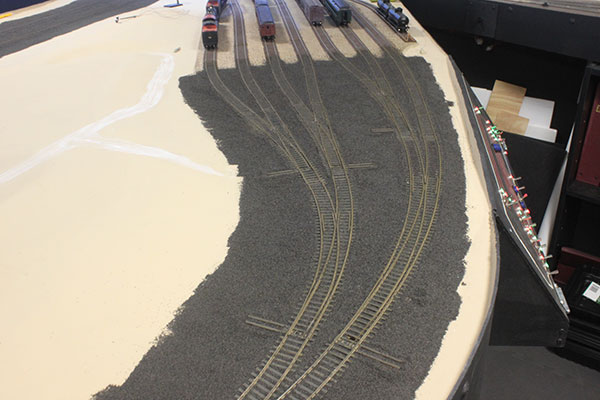
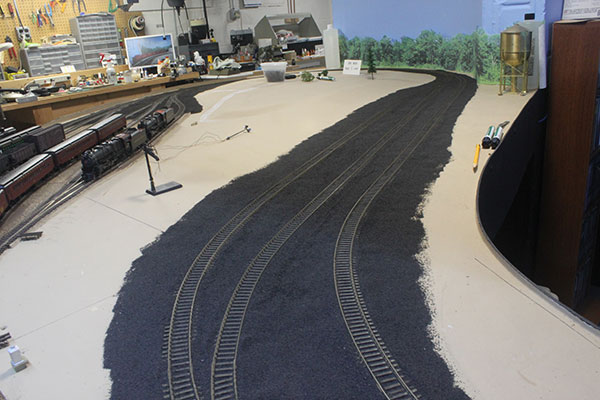
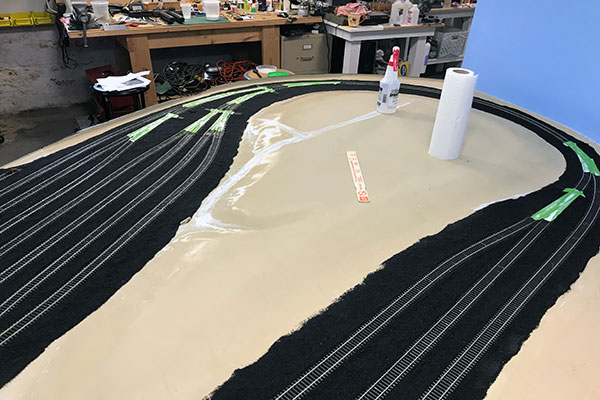
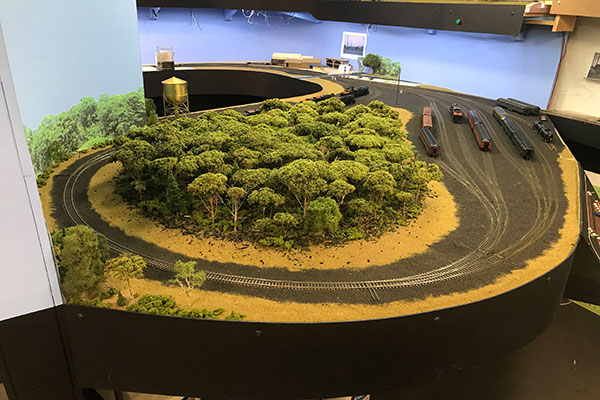
My attention on the layout has now focused on the Bay Head loop, finally! I dug up all of my bags of Woodland Scenics cinders and have ballasted 2/3rds of the loop. But first I needed to paint the ties and rails. I also needed to build head block ties for all of the turnouts for future embellishments. The real Bay Head loop facility was ballasted entirely with cinders back in the 1920s and 30s and remained in that state in the 1950s, albeit in a state of neglect, which will also be modeled. The forest in the middle of the loop (left) will come next. That will be comprised of mostly sedum plant trees with other varieties mixed in. (10/31/16)
I worked my way around the loop and into the engine storage/service tracks (above). This section was a mess by the 1950s with not much more than the rails exposed, what with all of the cinder dumping and on-the-fly sand and coal loading, when needed. The cinders are a base here with more to come on top, coal and sand piles. This weekend, Nov 5, is the annual Garden State Railroad Prototype Modelers Meet in Scotch Plains, NJ. Many great local layouts will be open that weekend, including mine. I'll be open that Sunday from 10am to 3pm. Email me for directions. I'd love to see you and share your thoughts and enthusiasm! (10/31/16)
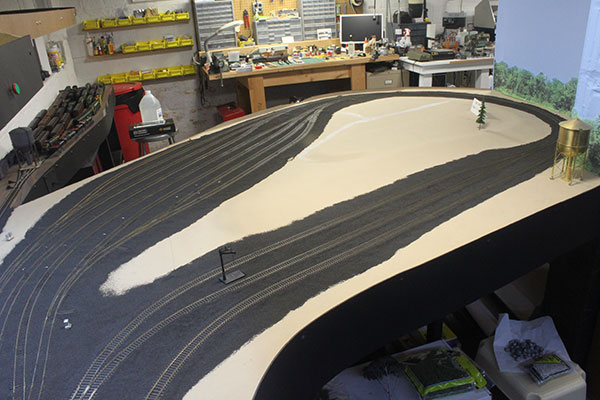
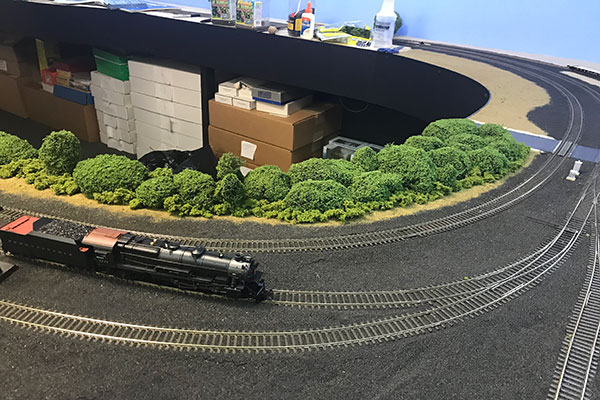
Last Sunday's open house, in conjunction with the increasingly popular annual Garden State Railroad Prototype Modelers Meet, was really nice. There was a steady flow of fellow modelers here through most of the day. Thanks to everyone for your suggestions and encouragement! Since the meet, I completed the cinder ballasting of Bay Head loop and yard. (11/8/16)
As of now, all of the cinder base you see above needs to be groomed and cemented. A big task ahead. Once that job is completed, I'm planning to build the forest in the center of the loop seen above. I plan to have a lot of fun building and planting a canopy of trees starting from the center and working out to hero trees along the fringe. Stay tuned for more........ (11/8/16)
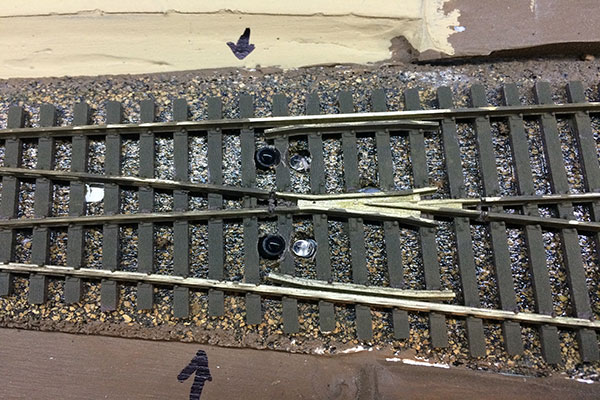
Before completing the ballasting of the Loop area of the layout, I needed to install infra-red emitters and receivers on the tracks leading to and from the Osborn Avenue grade crossing. Some are located inside turnouts (above). (11/15/16)
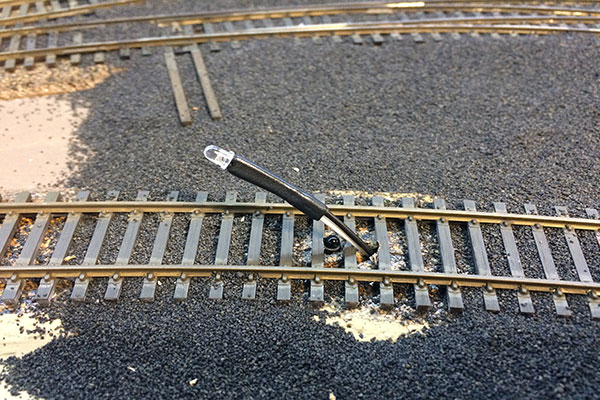
I drilled two holes, a crosstie apart and at a 50 degree angle toward each other, for each of the Logic Rail Technologies sensor pairs. A total of 14 sensor pairs and three Grade Crossing Pro modules are needed for the complex trackage at this crossing. (11/15/16)

I next installed the crossing planks and taped the edges of Osborn Avenue using a thin 3M double-sided tape. The road is about 22 scale feet wide. A single flashing signal in the center of the street protected this crossing in the 1950s. (11/15/16)
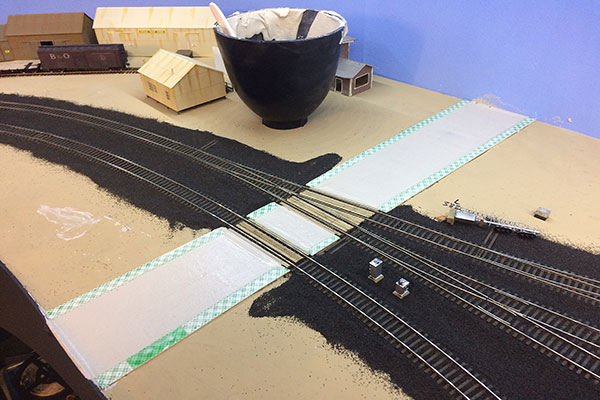
I had a container of Woodland Scenics Smooth-It on hand so I decided to use it for this project. It mixed well and was easy to pour and smooth out between the tape edges. (11/15/16)
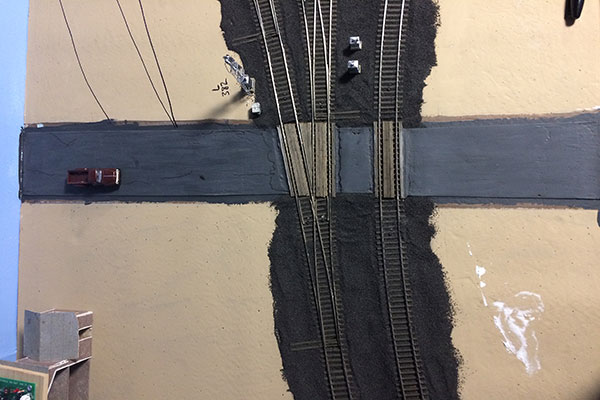
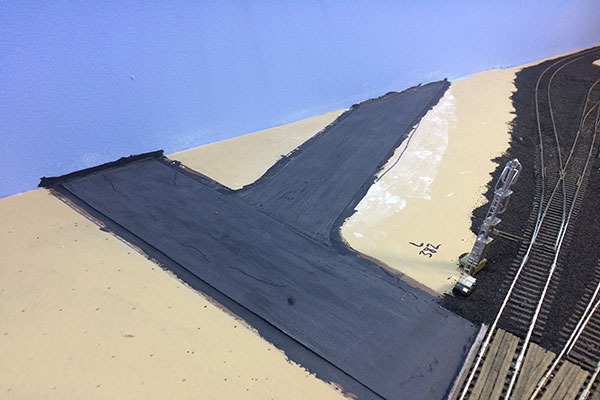
Here is an overhead view of the almost completed Osborn Avenue just north of the Bay Head loop. I painted Woodland Scenics asphalt topcoat over the plaster roadbed. Very happy with the results. (11/21/16)

After everything was dry, I sanded the road with steel wool to get a weathering effect, followed by tar filler in the cracks using a fine marker. The shoulders of gravel are next. (11/21/16)
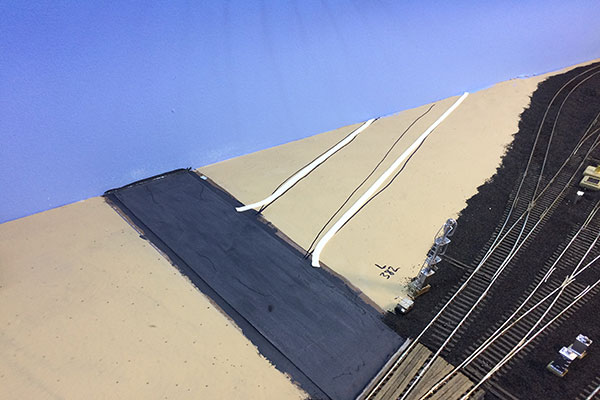
Woodland Scenics Paving Tape outlines Twilight Road in Bay Head where it intersects with Osborn Avenue. A layer of Smooth-it is next. (11/28/16)
The weathered end result. The area between the road and the tracks will be a gravel parking lot for the Bay Head station. (11/28/16)
Parking lot gravel goes down over a layer of latex paint for the Bay Head Station. A spray of alcohol followed by matte medium to glue it all down follows. Osborn Avenue is to the left...Twilight road cuts diagonally across. (12/4/16)
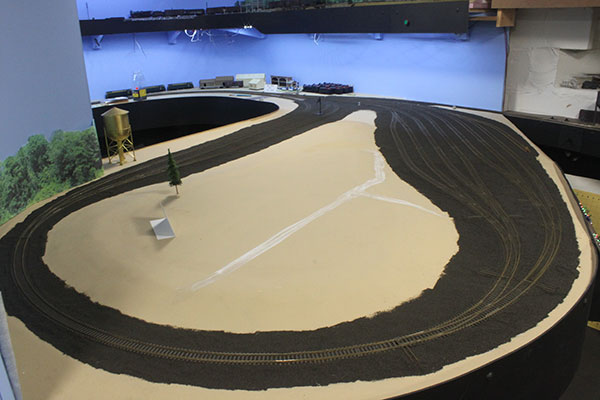
The finished lot with a bank of background trees. I've decided to complete this section with scenery to gain experience and confidence before tackling the loop forest. The loop cinders above still need grooming and gluing. (12/4/16)
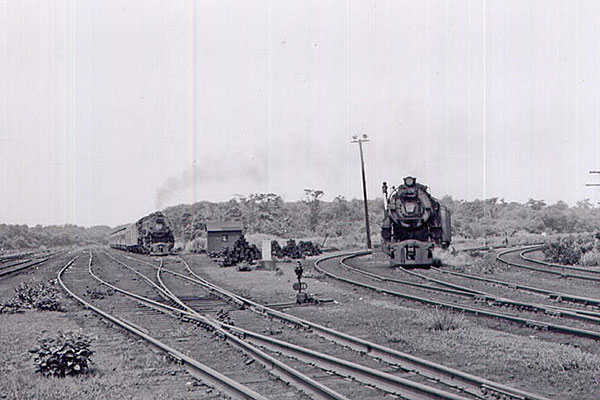
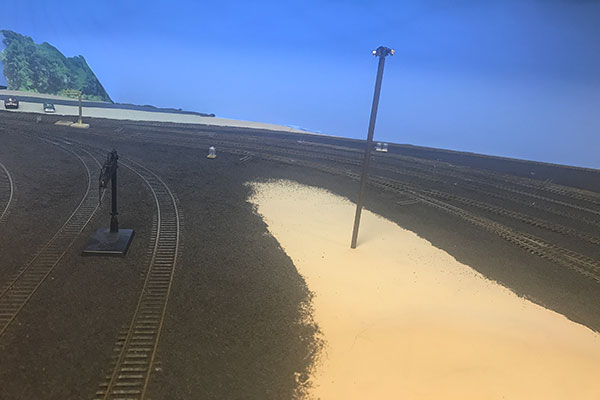
This 1955 view of the Bay Head Yard shows my latest modeling effort....the twin floodlights on top of the 50 foot cedar pole just to the left of the Pacific. The perpetual stacks of ties and the shed are next. (1/16/17)
Local osprey loved to build nests on these poles, prompting the railroad to place upright branches on the cross arm to deter the native bay hawks from nesting between the lamps. (1/16/17)

To model this flood, I took an N scale Miniatronics double searchlight and cut off most of the mast. I then extended the leads to reach under the layout. I really want the floods to operate instead of being a static model. (1/16/17)
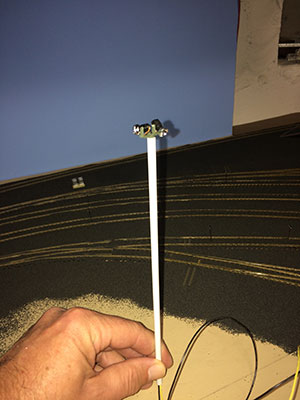
The light assembly was then placed on top of a styrene tube the diameter of the cedar pole. Painting and weathering will follow before the pole is planted. A toggle will operate the flood. (1/16/17)
The finished Bay Head Yard floodlight is shown above. I used a modeling saw to scrape wood grain into the styrene tube which was painted primer grey and then dusted with brown chalks and sealed with dullcoat. Looks better than the photo shows. I also cemented the Bay Head yard cinders after some unexpected snafus..... (2/27/17)
A westbound PRR commuter run passes a CNJ freight in Allenhurst. Before I went to glue down the expansive cinder in Bay Head yard, I found little footprints in the cinders - mice! I had to smooth out everything again and set traps! Also, some family emergencies and some tricky real estate projects have stymied further progress for now. (2/27/17)
Months of life's distractions have kept me out of the basement and away from this site. Sorry about the long wait. The mice are long gone and the real estate nightmare is behind me, but now elderly parents are eating into my precious free time. But hey, this IS a hobby after all! I really think about the layout and what needs to be done every day. (6/13/17)
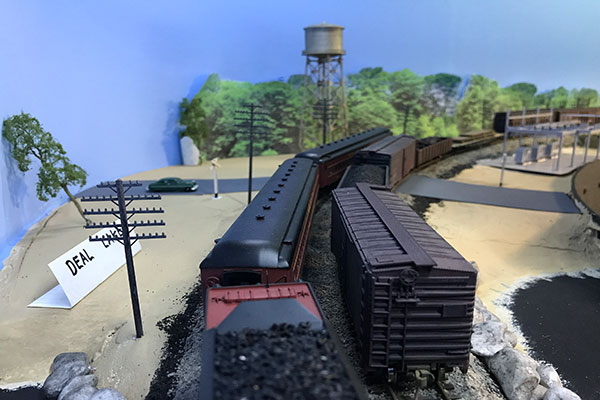
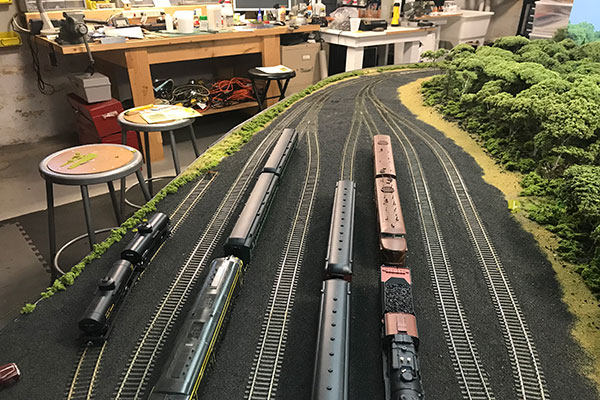
One unpleasant task I recently tackled was to clean all of the rails in the Bay Head area that got painted and cinders. Some of the cinders are now glued, some not yet. Above I temporarily placed two old Athearn CNJ coaches in the yard as offices like the prototype. I'll get to modifying them down the road. (6/13/17)
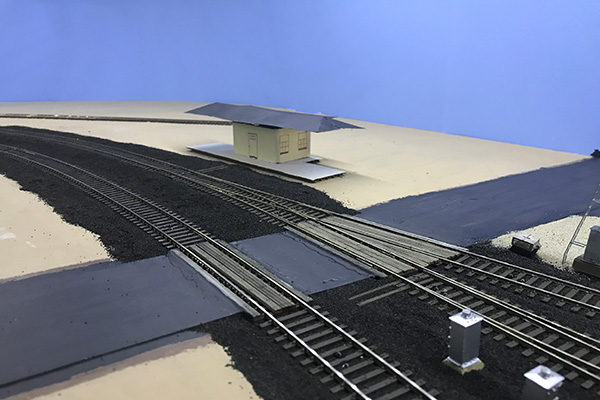
Had some free time on this Sunday and headed to the layout. More cementing of the expansive Bay Head loop cinders? Or something creative? The decision was a quick and temporary cardboard throw-together of Bay head station above. Still needs some additional embellishments, but will serve the purpose until a permanent model is built. (7/16/17)
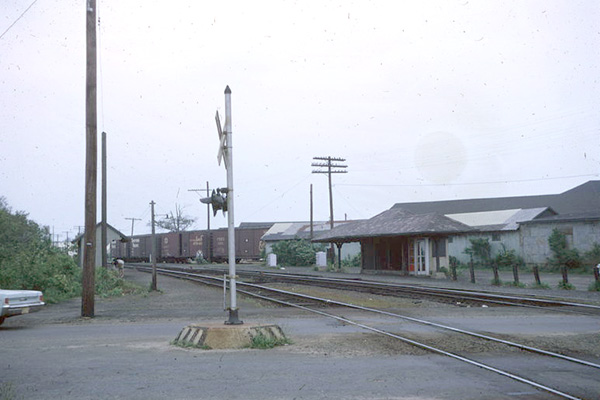
Here is the real deal in 1964. This station was officially designated as Bay Head Junction, recognizing the junction of the NY&LB with the PRR. Notice the PRR-type passenger shelter across the track from the station on the left. In the background is Ferry Lumber and the string of boxcars servicing it. (7/16/17)
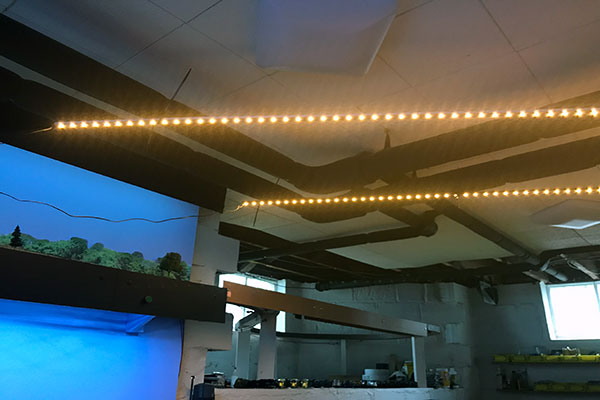
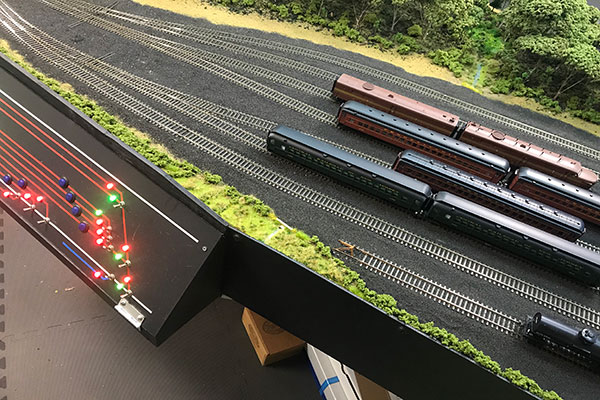
Well, the kitchen renovation has put a big halt to the layout the past several months. I'm trying to squeeze in some work, like the LED lighting over the Bay Head Loop area (above). (10/9/17)
Oops! Had these strips kicking around for years now and turns out they're WARM white leds! Off they come, since the strips weren't fully installed. A daylight led strip is on its way! (10/9/17)

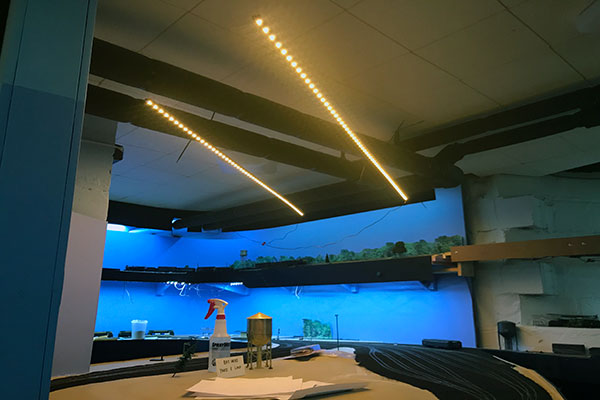
The new daylight led strip arrived and is now installed on the two wood mounts attached to the black heating pipes. What an improvement! (10/20/17)
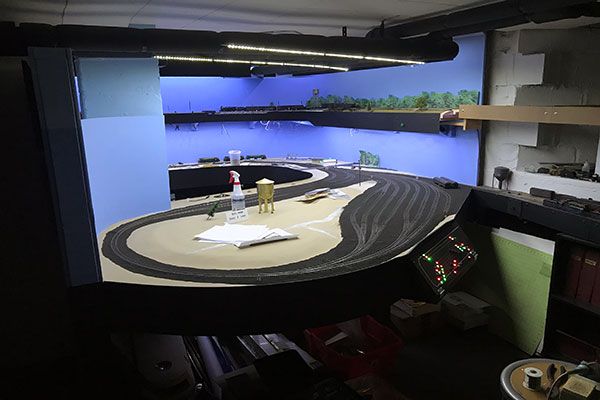
The color temperature is perfect - better than the rest of the layout. These pics were taken with just the layout lighting on at night. Very happy. (10/20/17)
Decided to spend a day off and wrap up some long overdue projects on the layout. First up - cementing the remaining large areas of cinder ballast. (10/25/17)
I taped over switch points and entire turnouts that were already cemented, then wetted with alcohol before spraying diluted matte medium (Hodge Podge). (10/25/17)
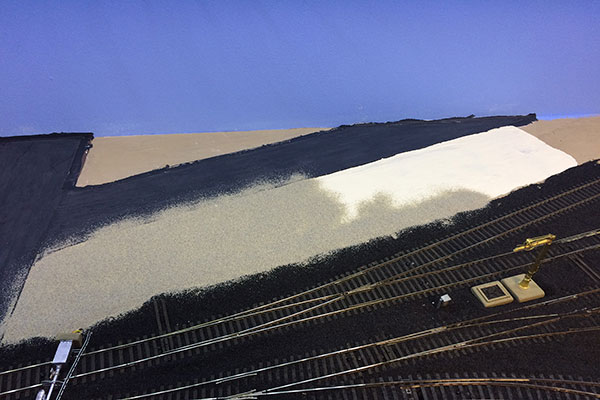
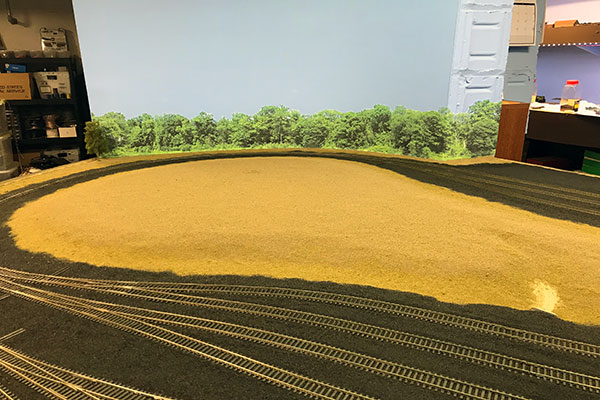
After things were the way I wanted it I proceeded to spread ground cover over the remaining areas that will be grasses and forest (the darker color). (10/25/17)

The finished loop area with cinders and ground cover before a final cementing. It felt great to make some real progress for a change! (10/25/17)
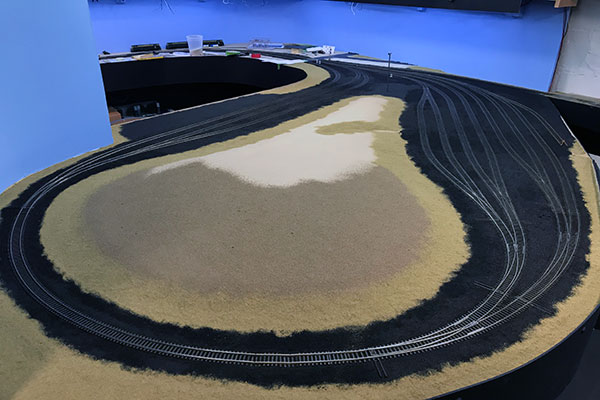
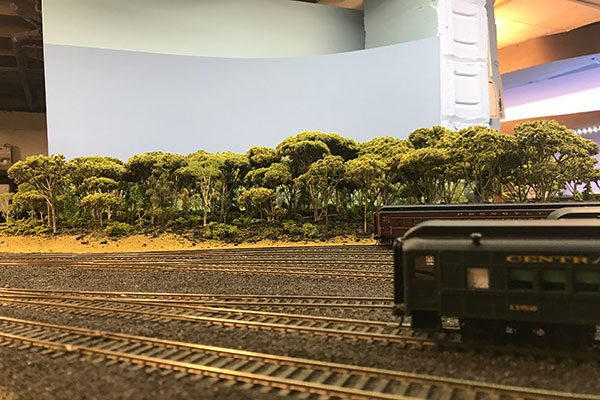
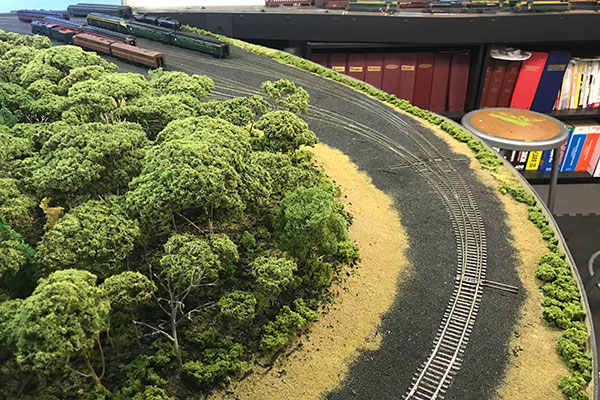
The past few days were spent touching up ground foam and cinders before I finally glued the forest backdrop in the loop area (above). I used Elmer's spray adhesive which gives you a little time to position and spread the six feet of paper trees. I hope to start assembly of the trees for the forest in the center of the loop this week. I'm planning to use dried sedum for the tree canopy with hero trees on the perimiter. (10/29/17)
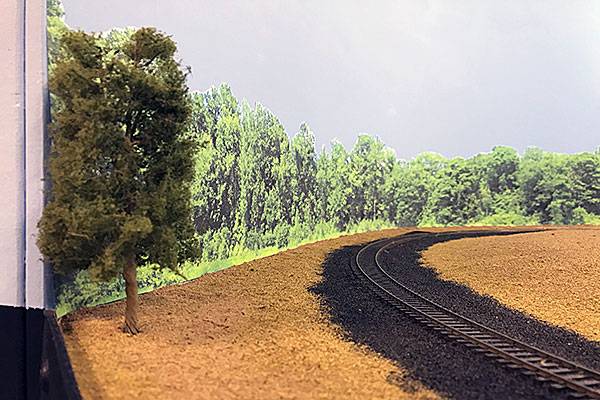
The first permanent real model tree is planted on my NY&LB! This is a JTT Sycamore tree. This weekend, Nov 4, is the annual Garden State Railroad Prototype Modelers Meet in Scotch Plains, NJ. Many great local layouts will be open that weekend, including mine. I'll be open that Sunday the 5th from 9am to 1pm. Email me for directions. I'd love to see you and share your thoughts and enthusiasm! (10/29/17)
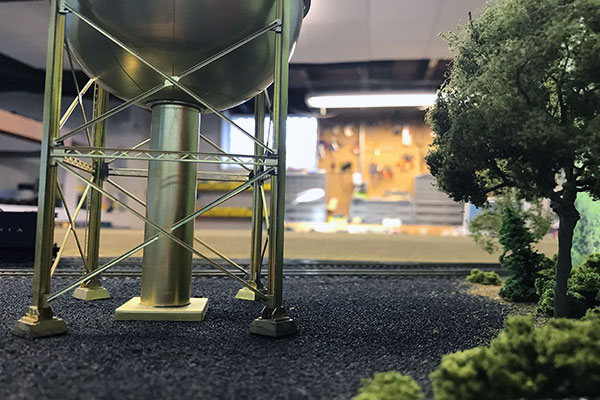
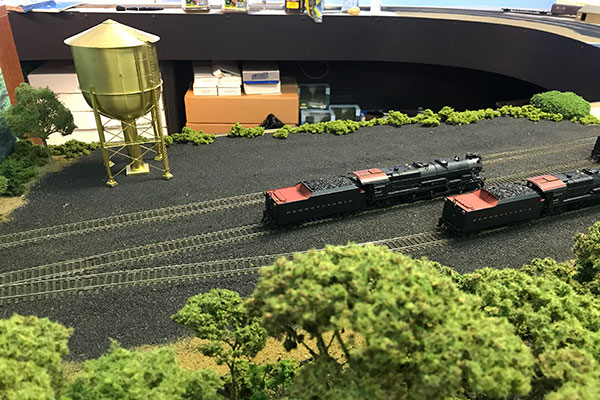
I've been sprucing up the layout for this weekend's open house. Trees and shrubs are being planted as seen above at the engine servicing tracks in Bay Head. The water tank is begging to lose the shiny brass look to a drab flat black. Test running found some dead tracks which involved soldering rail joints and adding additional power feeders. (11/2/17)
Undergrowth and trees along with a PRR commuter run add to the previous shot of the same area. Trees for the forest inside the loop are about to be constructed. A glitch - running a baby trainmaster around the layout uncovered a half dozen ground throws that are too close to the tracks! Ordering some extended throws tomorrow. (11/2/17)
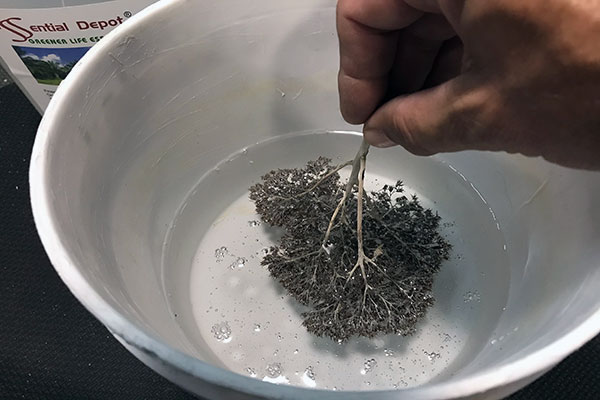
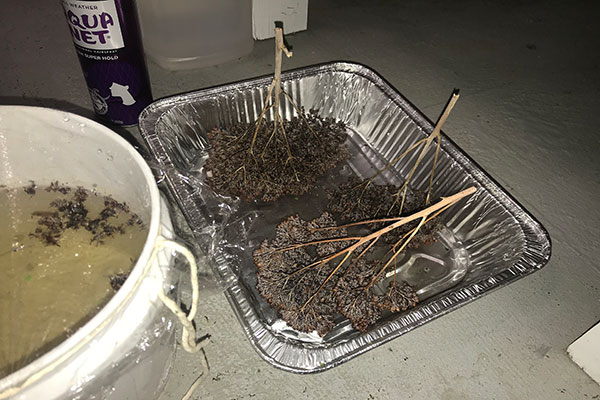
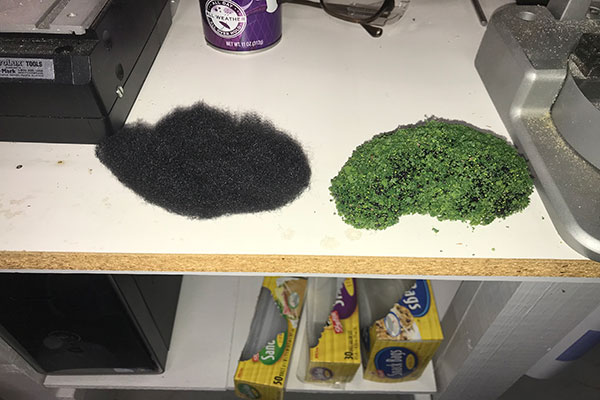
For the forest canopy in the center of the loop, I'm using dried sedum plant blooms. After a couple years of drying out, they need to be stabilized to prevent further deterioration. My plan is to dunk each tree into a glycerin/water mixture (50/50) as seen above for ten minutes. (11/5/17)
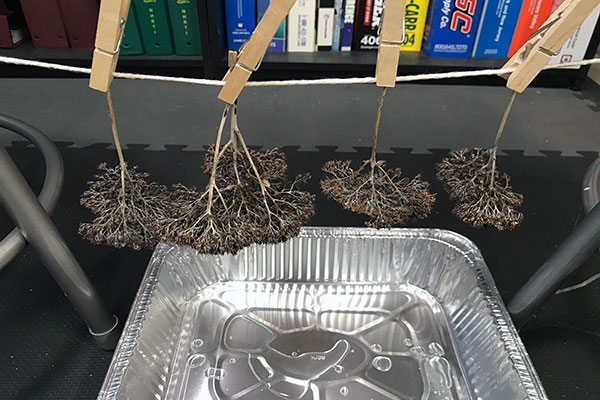
After shaking off the excess, the test sedum trees are hung upside down to dry. The blossoms will then be sprayed with hair spray and rolled in flocking to simulate mid-summer leaves. If the results are acceptable, a tree assembly line will commence in the basement. (11/5/17)
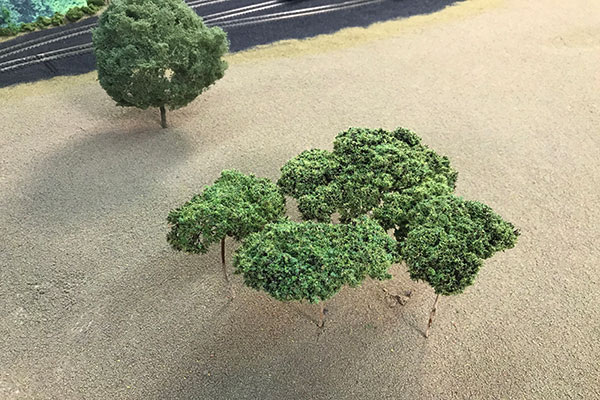
Tree-making has been progressing. I've been making trees in batches of four - dunk, dry, spray, roll in flocking and then a final spray of hair spray. The results are very promising, at least for a forest canopy. The first batch is shown here. (12/10/17)

Another view shows how the darker sedum blooms contrast with the green flocking creating depth. The trunks won't be visible here so they are untouched. The background tree is a JTT ready-made oak. (12/10/17)
The forest starts to expand! I found that forest floor debris and bushes were needed since the base could be seen between the varying tree heights and small gaps. (12/10/17)

A closer view shows big and small trees, a pine, a dead tree next to the pine, and varying tree heights. The textures vary as well which adds greatly to the realism. (12/10/17)
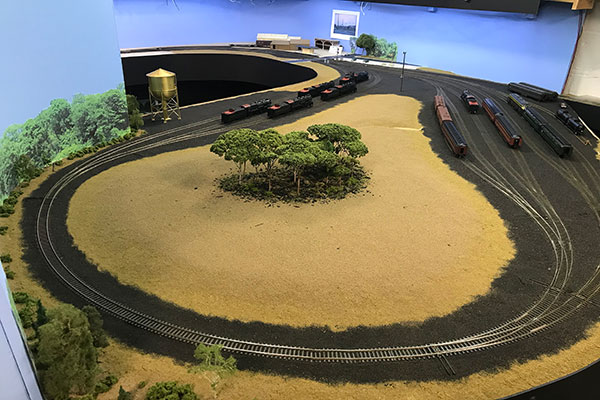
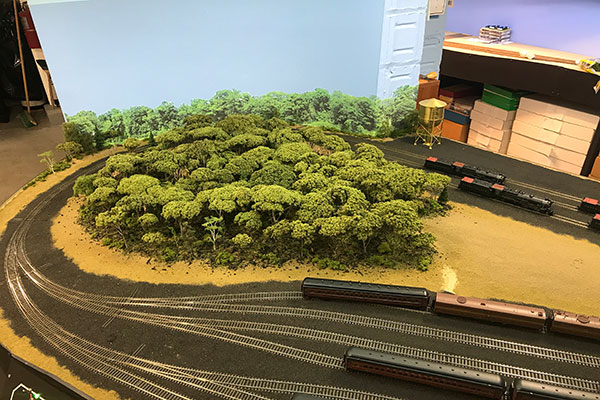
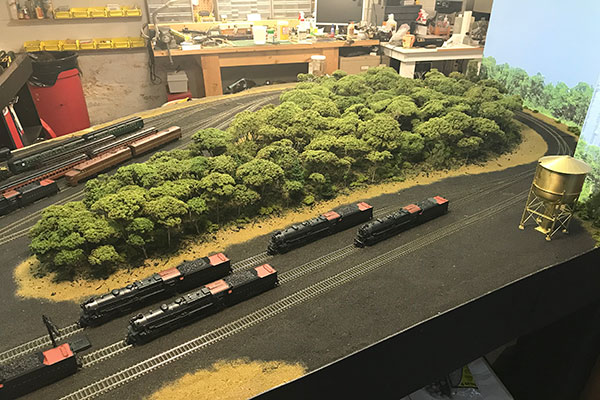
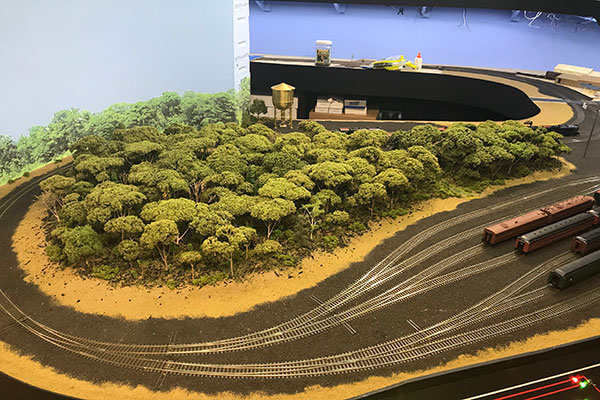
And the forest continues to expand! I have really enjoyed planting these trees and making the inside of the loop come alive. (12/15/17)
A view from the engine holding tracks. The perimeter of the forest still needs to be filled in with brush to make it less see-through at track level. (12/15/17)
The land between the forest and cinders will next be covered with brush and grasses. (12/15/17)
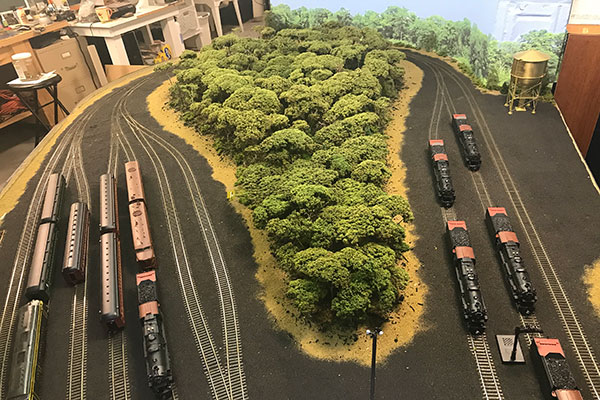
Another view from the coach yard. The tree heights match the trees on the backdrop. (12/15/17)
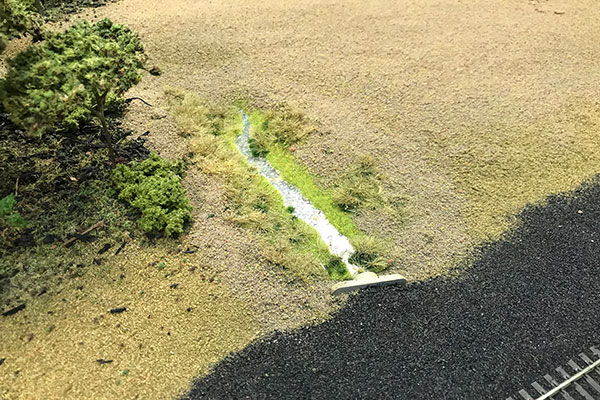
A small creek needs to be constructed (right center) before the rest of the forest can be planted. (12/15/17)
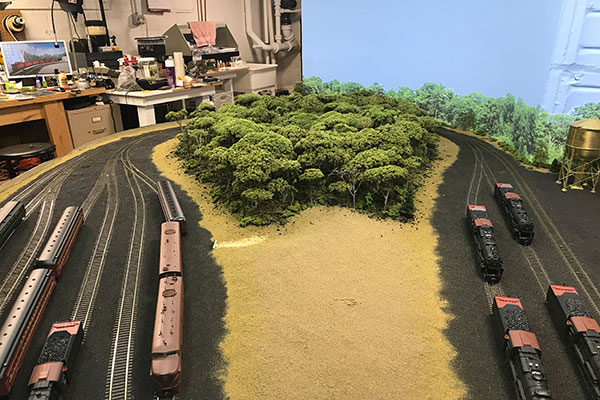
The forest will continue down past the creek and effectively separate the engine and coach yard tracks. (12/15/17)
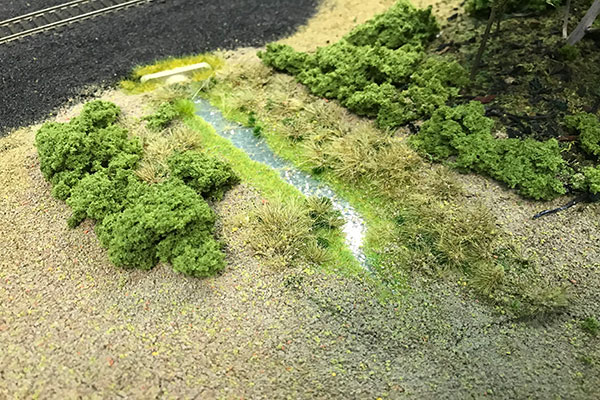
I had a sheet of pre-made ground cover with a stream running through it (Busch 1313) which I thought might work good for the loop creek. I cut it down to size and glued it into the depressed creek bed. (12/20/17)
I used Walther's Goo to glue down the mat while pressing it into the carved ravine. I then spread ground foam around the perimeters and over much of the green mat. A spray of alcohol and scenic cement followed. (12/20/17)
After everything dried I planted weeds and bushes around the stream and culvert. Tall grasses and reeds will come next. (12/20/17)
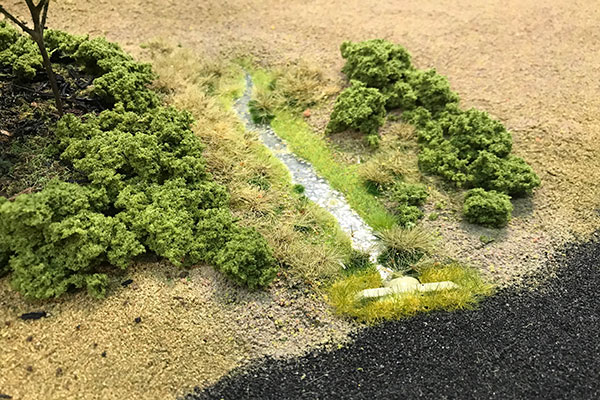
Another view of the project. I plan to cover the area upstream near the top of the photo with reeds and grasses....as soon as I can find a material that will fit the bill. (12/20/17)
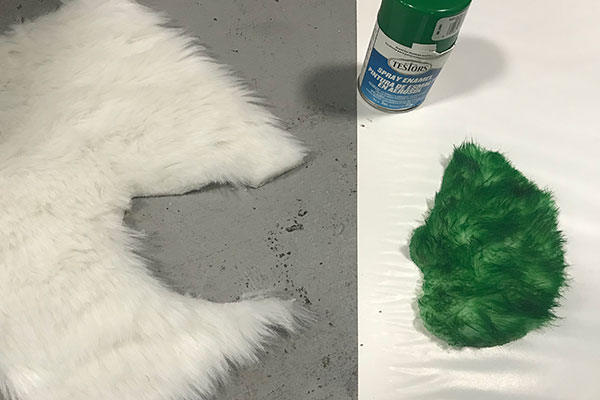
I needed some quick and dirty upstream grass meadows and bought some faux fur from the craft store to try. I cut out the area I needed, spray painted it with green enamel, then textured it up with a wire brush (right). (12/26/17)
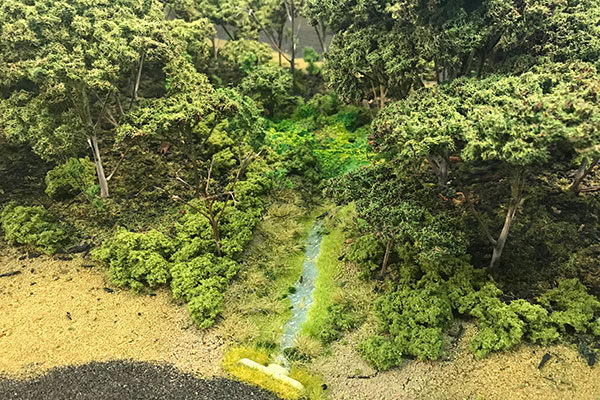
I 'planted' the fur (center) but it was too fake looking until I doctored it up with ground foams and weeds. Above is the end result with a continuation of the loop forest on the right. Not perfect but I'm satisfied. (12/26/17)
Another ground-level view of the stream. It still needs plenty of work but that can come later. (12/26/17)
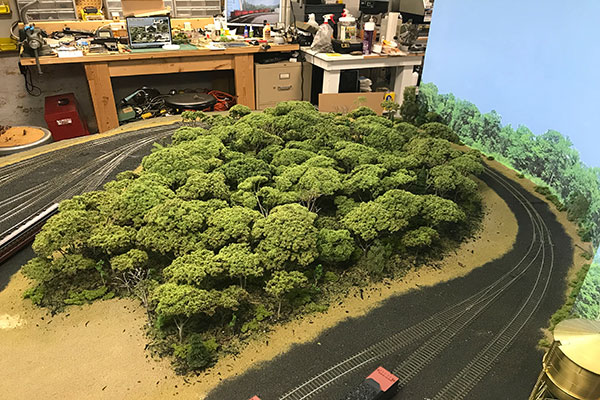
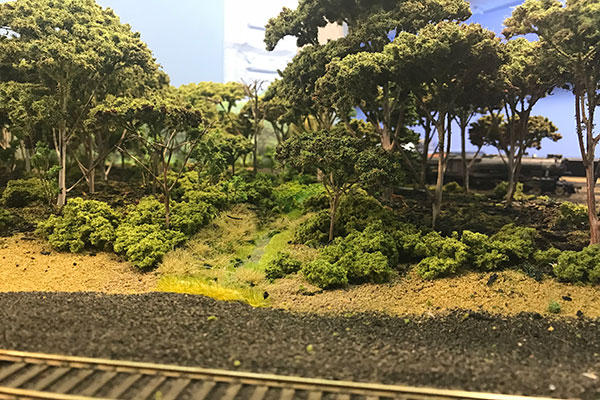
The forest is essentially done! Dozens of smaller trees and brush still need to be planted around the perimeter. (12/26/17)
The tan areas on either side of the ballasted track are ready for static grasses and brush. Another area of scenery untested by me yet. (12/26/17)
I'm considering planting the static grasses on strips which would then be glued to the layout along the forest edges. We'll see- (12/26/17)

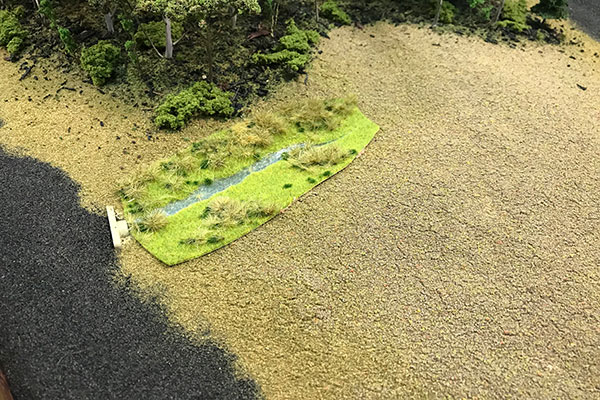
I pretty much finished the loop forest this week and set sights on the other side of the coach yard. Here I modeled the stream as it comes out of the east side of the yard from the culvert. This stream empties into Twilight Lake among tall grasses and salt marsh reeds. (12/31/17)
Here is the finished scenery along the edge of the layout and in reality along the western edge of Twilight Lake. This looks much better in person as it frames the coach yard with scenery. Still needs some tall grasses and reeds as soon as I figure out what to use. (12/31/17)
The next forest to be planted will be along the opposite side of the engine servicing tracks between the water tank and Osborn Avenue. These trees are low height with a lot of brush. Sedum dries in the pan after a long dunk in glycerin. (1/2/18)
While trees are getting the treatment to make them plyable, I planted scenery along the entrance track to the PRR Atlantic Division. No trees here but more detailing to do. I'm still looking for shorter passenger cars to model the Bay Head offices (bottom). (1/2/18)
I also planted scenery along the eastern edge of the coach yard (left), which is mostly salt marshes - brush and reeds. Twilight Lake in Bay Head is off the layout to the left with the Atlantic Ocean beyond the work bench in the real world. (1/2/18)
Another view showing the brush planted along the edge of the layout. Almost all of the tan colored areas in the loop section will be getting medium to tall grasses and reeds when I reach the fine detailing point in this section. (1/2/18)
This area along the edge of the layout is due next for scenery. Because it's between the yard and operator, I don't want tree armatures here. In real life, this area in the 1950s had low trees and tall brush near the tracks. How convenient! (1/7/18)
After throwing out the idea of planting more trees in a high traffic area, I decided to model this area using clumps of black poly fiber (left). After dousing with hair spray and rolling in ground foam, the end result is pretty convincing (right). (1/7/18)
The very edge of the woods along the engine servicing tracks has been modeled above. After a couple of small structures are placed in the open area, it will be filled in with brush and weeds. (1/14/18)
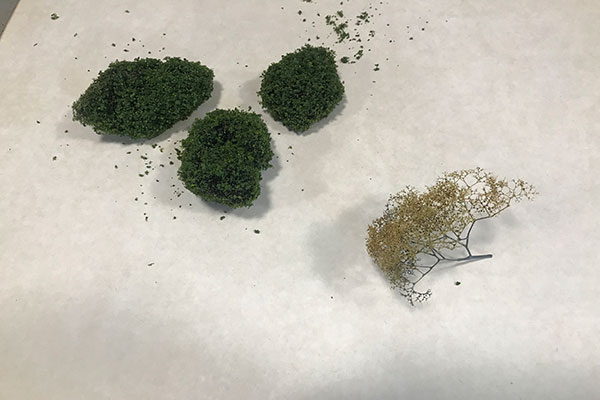
In the meantime, more poly fiber is prepped for the layout, along with a small "super tree" from Scenic Express. I forgot I had a huge box of these tree pieces from years ago. Will be experimenting further with these soon. (1/14/18)
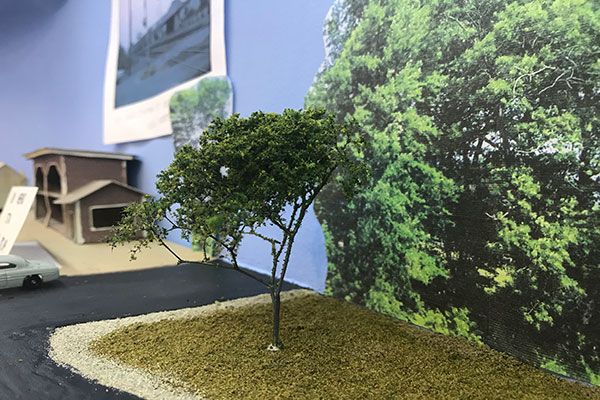
The flocked super tree is planted and looks better than the photo shows. Looks like I need to de-fuzz some of the branches. This small lot will be completely populated with bushes and trees to blend in with the printed backdrop. (1/14/18)
Back at the engine facility, low trees and bushes are spreading around the bend toward Osborn Avenue. Due to the anticipated high reach traffic in this area, these poly balls are flexible enough to take the expected abuse from future operators. (1/14/18)
The small lot along Twilight Road has been populated. Still some detailing to be done at a future time but right now I'm pretty happy with the result. (1/15/18)
Also, the puffball tree line has reached Osborn Avenue. With this, I have completed the initial scenery phase of the Bay Head Loop. (1/15/18)
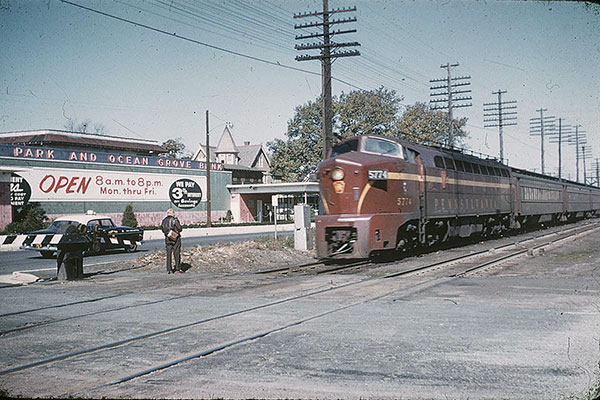
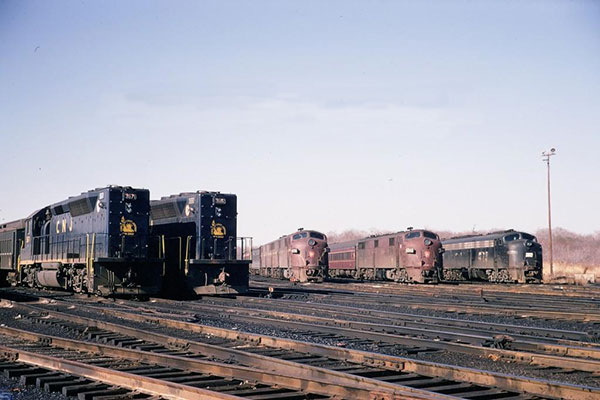
Work on the layout will resume this week after a nice 2+ week vacation in a warmer climate. I still want to touch up the loop area and resume work on the upper level. Above is PRR shark 5774 westbound in Asbury Park in 1957. (2/4/18)
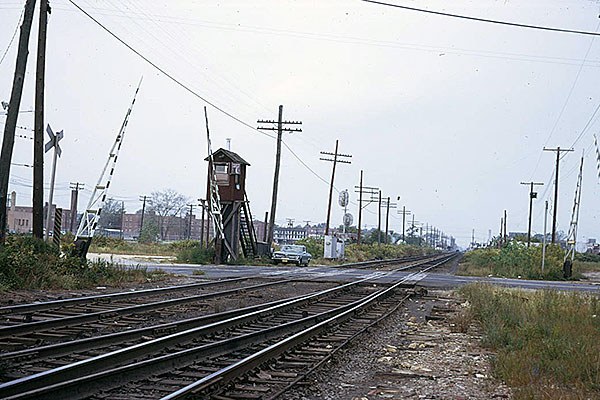
Pneumatic crossing gates still were in use along parts of the NY&LB through the 1970s and even into the 1980s. Even a two story crossing shanty still stood watch in Asbury Park in 1973 (above). (2/4/18)
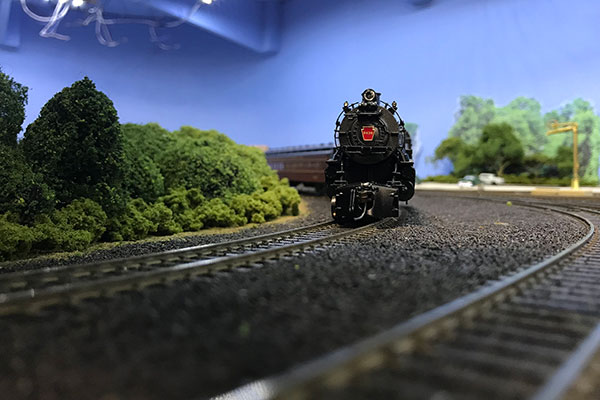
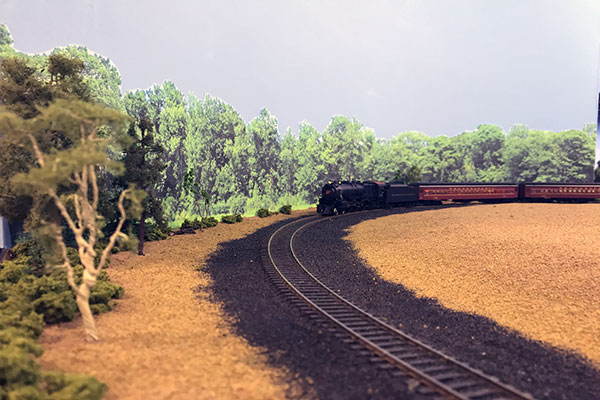
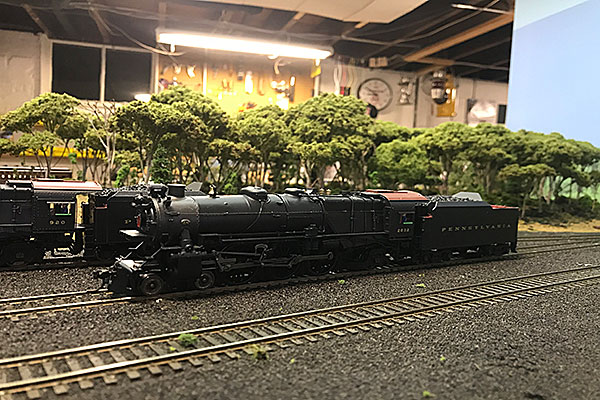
A PRR K4s Commuter run rounds the sharp entrance into the Bay Head loop. Trees and underbrush are presently being manufactured for the Allenhurst section on the upper level over the yard. (2/11/18)
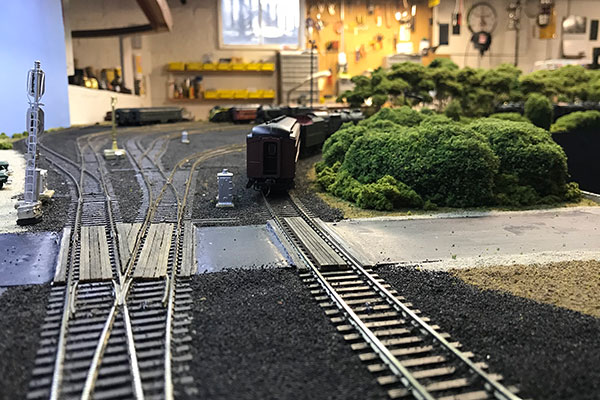
The tail end has cleared Osborn Avenue and will disappear around the bend. All of the scenery above is still in the preliminary phase. The crossing will get flashers activated by IR sensors installed in all of the approach tracks shown above. (2/11/18)
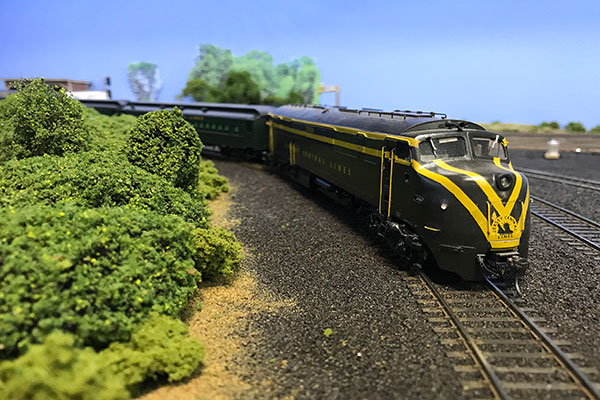
A CNJ Baldwin double-ender creeps ahead on the tight entrance curve to the loop. The new scenery on the left still needs grasses along the perimeter. (2/11/18)
The same train as viewed from the Bay Head passenger station. After seeing how even simple scenery greatly enhances a layout, the present scenery trend continues. (2/11/18)
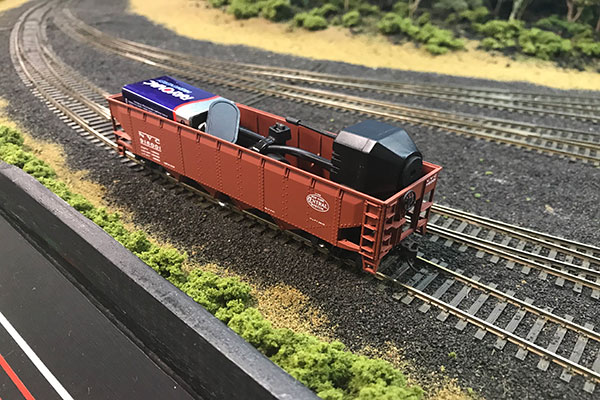
Work lately has involved making some scenery off line to be planted soon and building this video car that will tour the layout. (3/29/18)
This is the point of view from the video car. I plan to post the video shortly once I finish re-building the manual turnout throws, which is also under way. (3/29/18)
Scenery construction is under way on the upper level in Allenhurst. This section needs to be completed as the access is limited. (4/11/18)
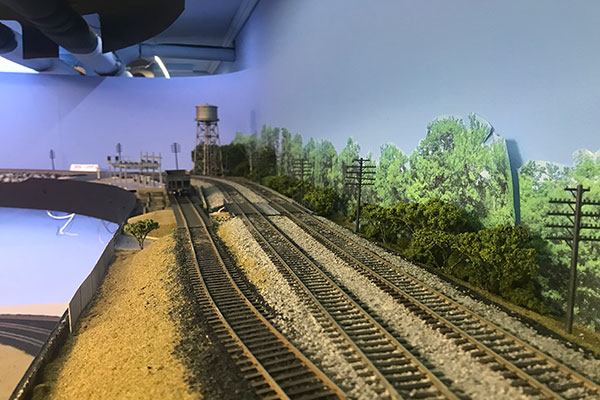
Trees and shrubbery goes in along the photo backdrop, which also needs some re-gluing at the seam above. The front will be next. (4/11/18)
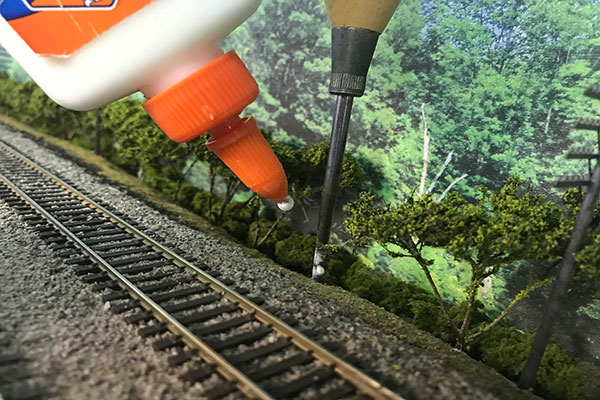
Planting trees is pretty straightforward with a foam base. Punch a hole with an awl and dab a bit of white glue in it. (4/15/18)
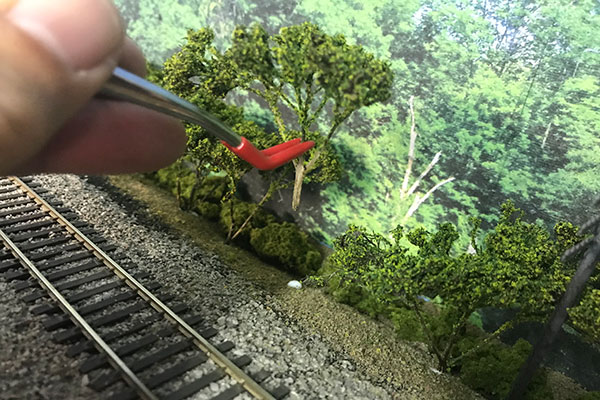
Then plant the tree in the hole. A pair of large tweezers are good for smaller trees such as this one next to the backdrop. (4/15/18)
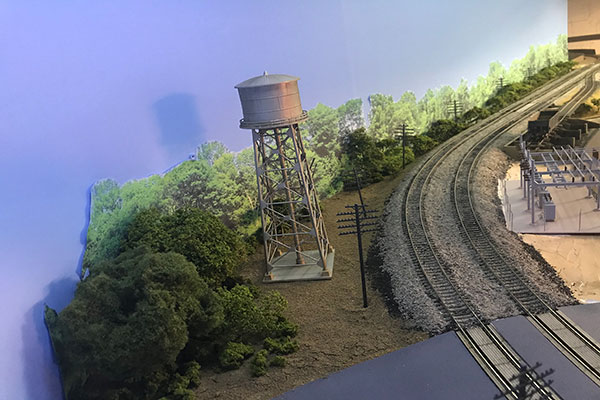
Except for some work around the water tower, the rear portion of this section of the layout has its initial scenery completed. (4/15/18)
I'm considering wiring the telegraph poles next before starting on the front (left) side of this layout section. This also includes completing the JCP&L substation. (4/15/18)
Spring and major outdoor projects have, of course, put a halt to the layout progress. When I get back to the layout, I want to finish this small section between Sea and Osborn Avenues with ground foam and ballast, as well as the crossing sensors for Sea Avenue. (6/10/18)
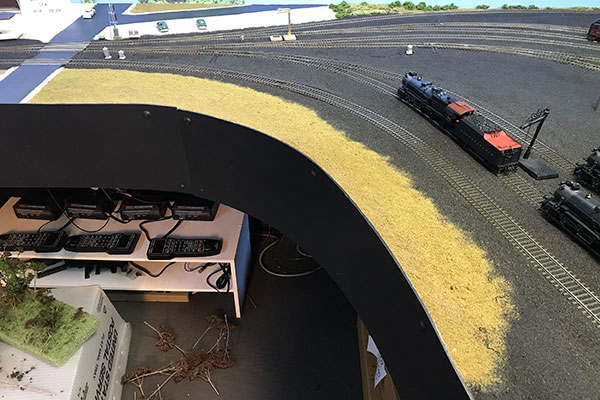
During the summer, the mechanicals above will be hidden with a removable wall across the front. Against this wall will be my new, and smaller, workbench. The binds and shelving in the background will also be going. (6/10/18)
All of the benches above will be going to the garage this summer. This is where the next phase of the layout will be built hopefully starting this fall and winter. (6/10/18)
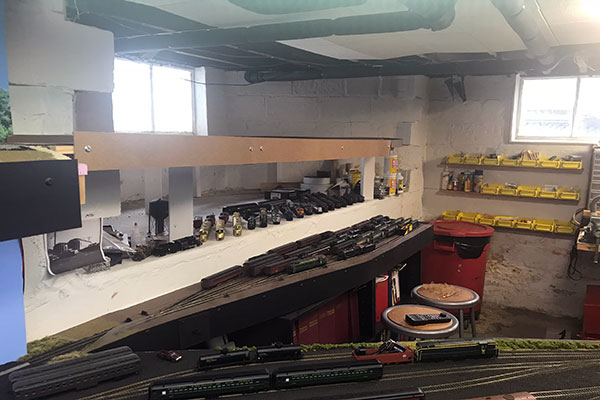
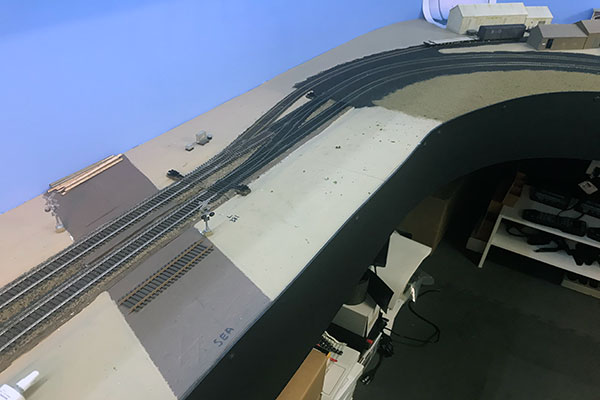
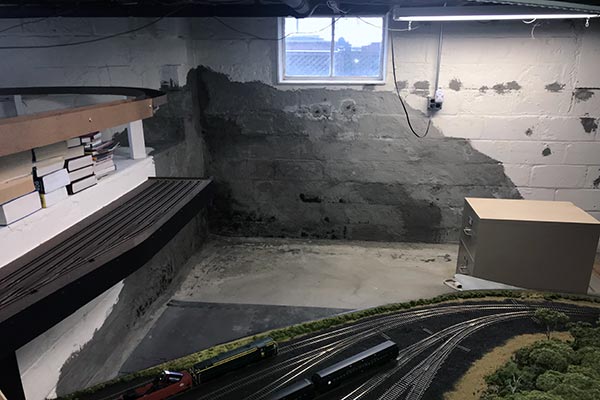
The temporary loop will go as well. The future of the staging below is still in debate. Notice the concrete wall.....some remediation work is ahead before the layout expands. (6/10/18)
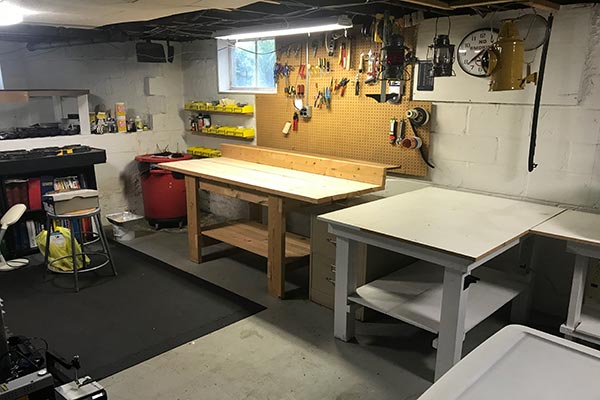
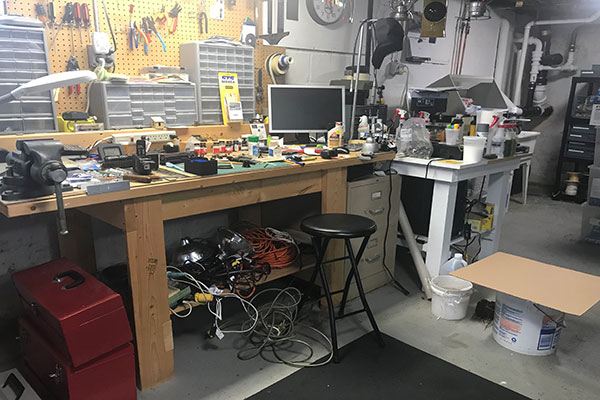
Hi everyone! It was a busy summer for me and although I did little work on the existing layout, I worked very long and hard on the future expansion. That being said, my detached two car garage needed a major makeover before I could move my work area there from the basement. I'm sorry for the lack of posts the past few months but things are beginning to take shape. Above, I cleared out my workbench and tool table prior to moving them out of the basement and to the garage. Not an easy task. Thanks all for your patience! (10/8/18)
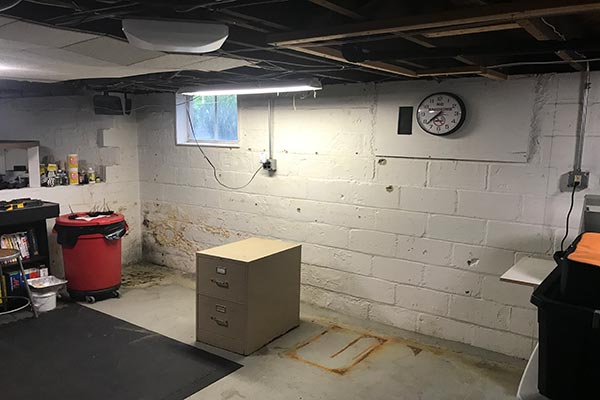
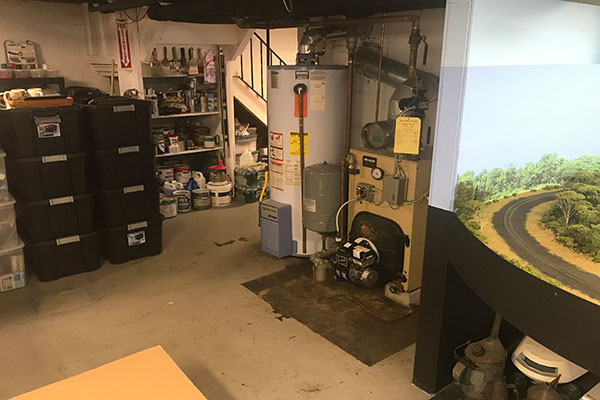
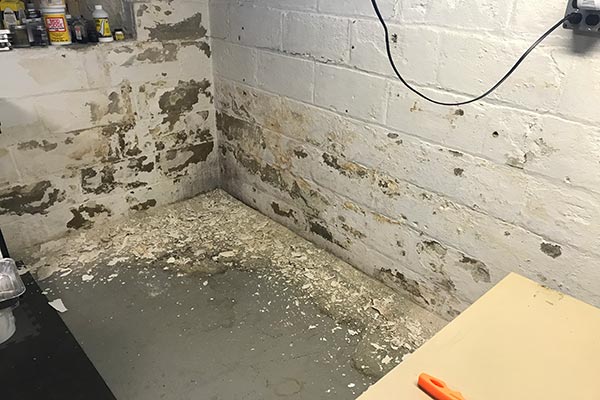
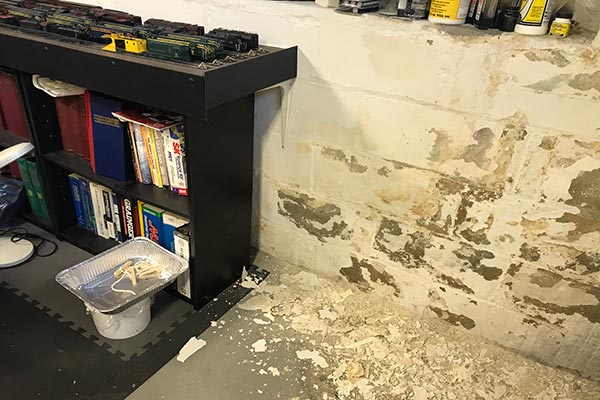
Here is the same area as it looks now, The file cabinet holds my layout files and will stay. This half of my basement has always had a minor water problem during very heavy rainfalls, as can be attested by the condition of the concrete in this corner and the opposite corner off to the right, as well as the rust where the file cabinet resided. These areas need to be addressed next, after I finish transplanting my workshop. Progress has been slow but steady and I should be back to updating the site with construction news very soon. (10/8/18)
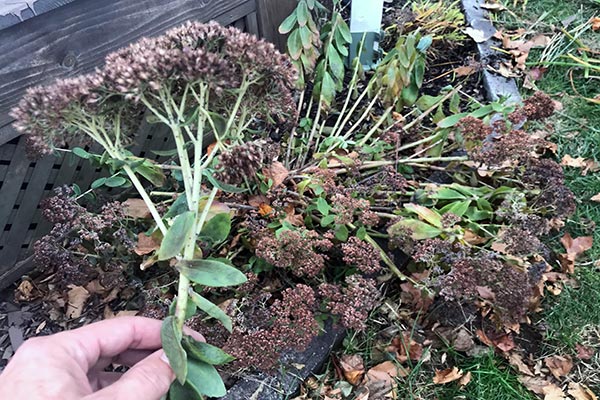
Well the garage renovation is finished and the workshop is up and running. In the meantime, I harvested my annual tree crop from my backyard sedum plant above. These cuttings will dry out for a year before becoming layout trees. (11/25/18)
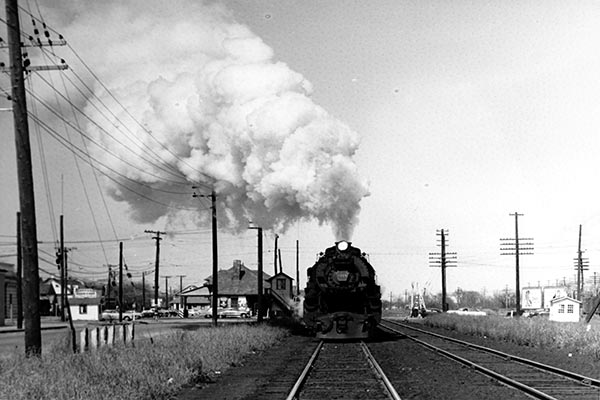
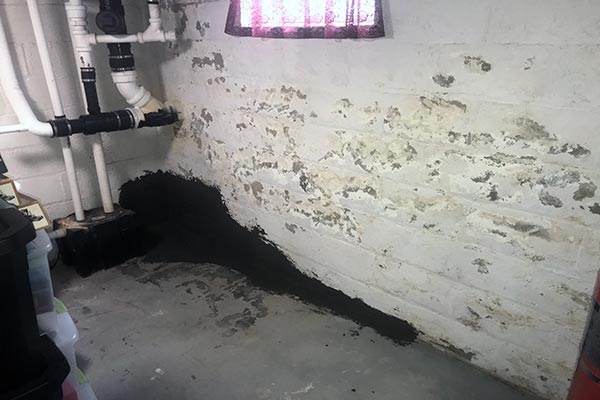
Above is PRR K4s 5318 pulling out of Point Pleasant Beach station on its way to Bay Head in the late 1940s. Concrete work in the basement is about to begin as soon as the latest mini-flood from heavy rains evaporates. A dirty job ahead.... (11/25/18)
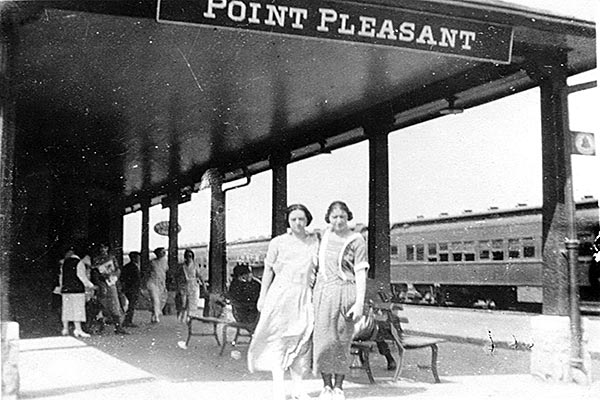
Above is a view at the Point Pleasant Beach station circa 1920. This station was built in 1903 and torn down in 1966. Note the PRR P70 coaches on the mainline. Health issues with my elderly parents have held up work again on the layout. The rainy weather has also deterred work on the basement wall. (1/10/19)
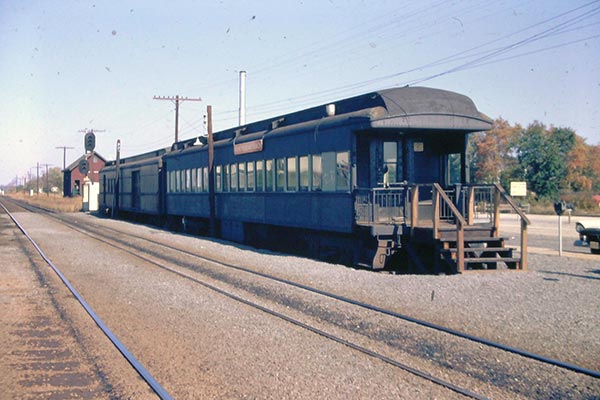
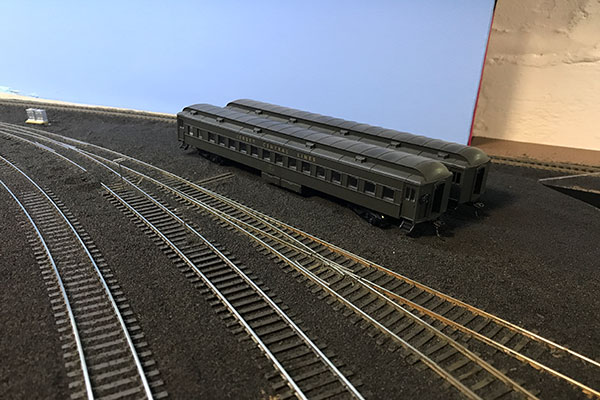
To replace the grand PPB station, the NY&LB set two CNJ cars on the east side of the tracks a bit north of the former station. These are the former "Blue Comet" observation car "Temple" and RPO car #74. This was the temporary setup until a permanent small concrete block station was constructed nearby. (1/10/19)
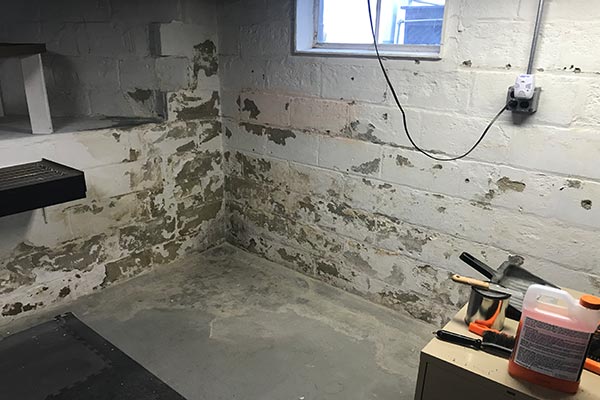
The wall is dry and work has commenced! After scraping off several layers of paint and a layer of waterproofer I painted on some 20 years ago, I'm happy to report the concrete block foundation underneath is in very good shape. I had my doubts. (1/15/19)
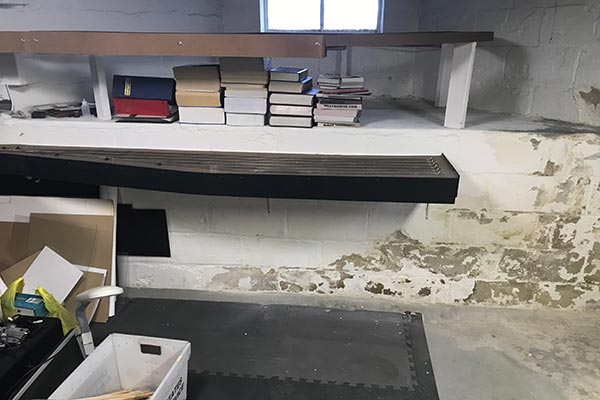
Another view under the temporary loop shows the work in progress. Unfortunately, the work needs to extend to the left behind the book cases under the staging. So they will both be emptied and moved shortly. Damn! (1/15/19)
A family crisis halted basement work for a few weeks but it has resumed. I have found as the concrete block dries I can remove more old paint. I'm trying to get as much off as possible before coating the wall with hydraulic cement. (2/18/19)
The book cases are gone as are the engines on and above the staging area. The outdoor gutter drain in this corner is being diverted away from the foundation to help avert future issues. Needless to say the whole basement is a mess right now. (2/18/19)
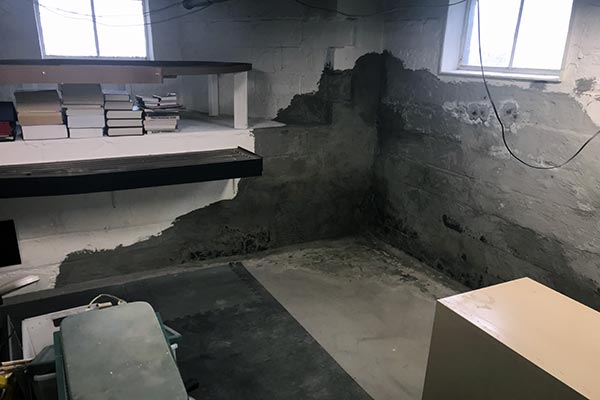
The repair project to the basement wall is nearing completion. Hydraulic cement has been applied to the 'problem corner' of the basement with promising results. (4/3/19)
The cement is cured now and awaits a final coat of waterproofing mortar. This project was long anticipated but, as usual, took way longer to complete than thought. (4/3/19)
In the meantime, the other problem corner/wall needed more work than I thought, but less in the way of hydraulic cement repairs. Getting close! (4/3/19)
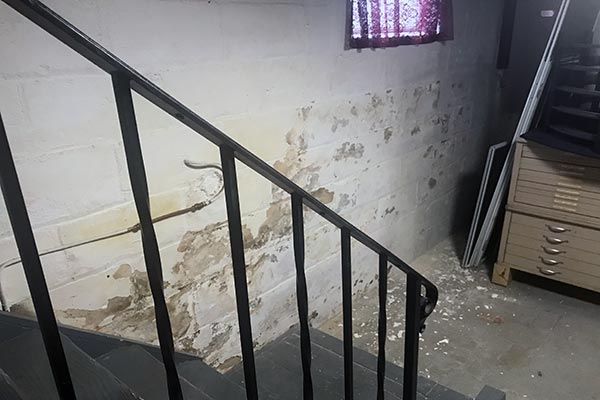
Work continues on the other side of the stairs near the helix (right). This entire wall will get a coat of waterproofing mortar and a coat of paint. Can't wait! (4/3/19)