Newest progress reports are at the bottom of the page
I will try and update this page with new photos at least every 3-4 days. The date at the end of the caption is when the photo was uploaded. The actual progress of the layout is a little ahead of what you see here.
January 2011 - November 2011
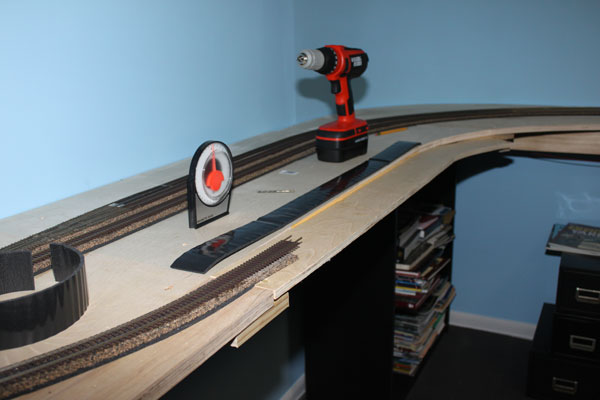
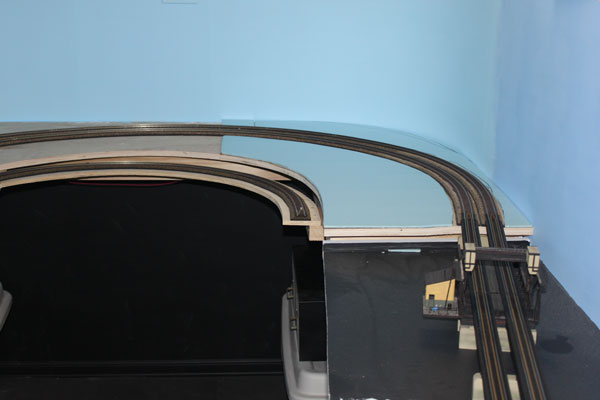
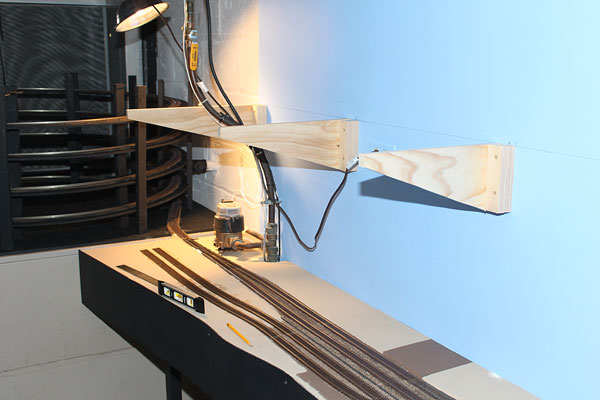
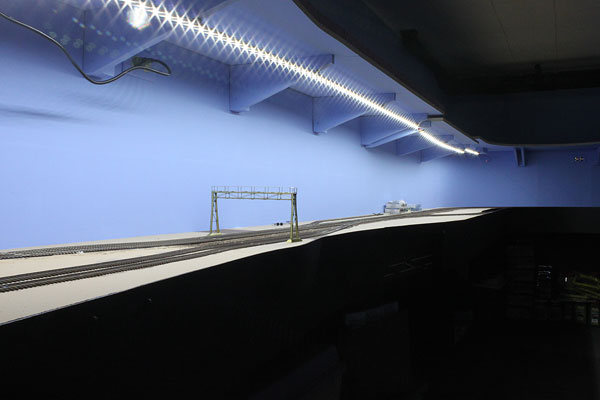
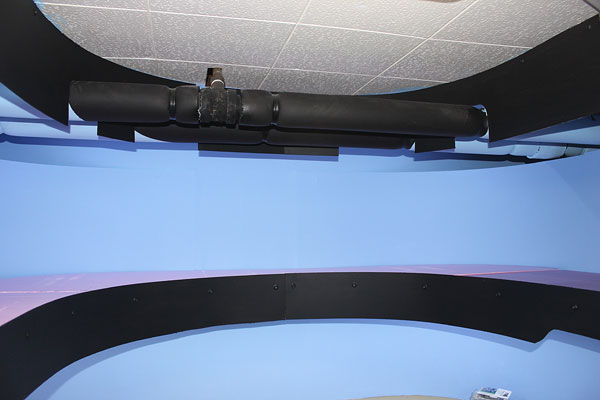
This is the first section of ramp that leads to a short staging track for the Freehold and Jamesburg branch of the PRR. Since all the trains coming and going from this line in the 1950s consisted of only two or three cars, length isn't an issue here. The track will continue around most of the 180 degree turn below layout level and camouflaged as not to distract from the layout behind it. (1/5/11)
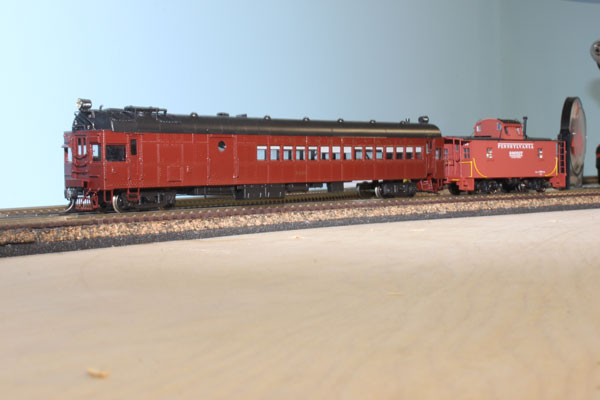
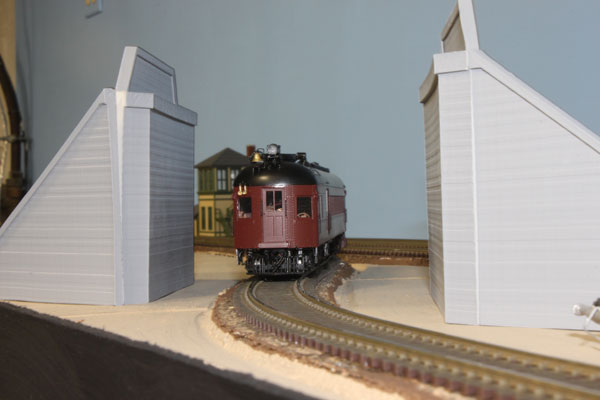
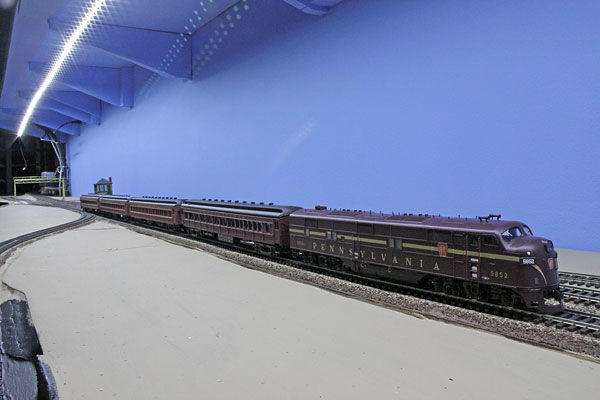
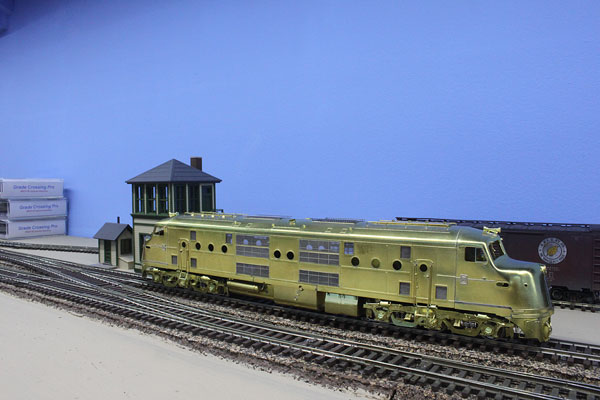
This is PRR Brill Gas-electric #4666 coming east off the F&J Line and onto the NY&LB eastbound at Sea Girt. During the 1950s, the doodlebugs almost always had a trailing PRR cabin car or coach to help shunt the ABS on the NY&LB. The doodlebugs ran up to Red Bank (for the most part) where they were stored, serviced and readied for the next day's return trip west across New Jersey. (1/5/11)
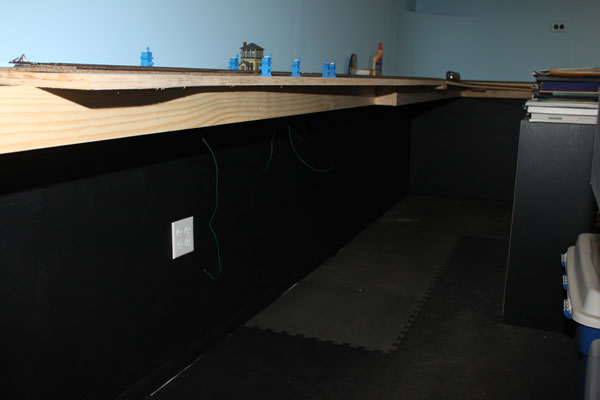
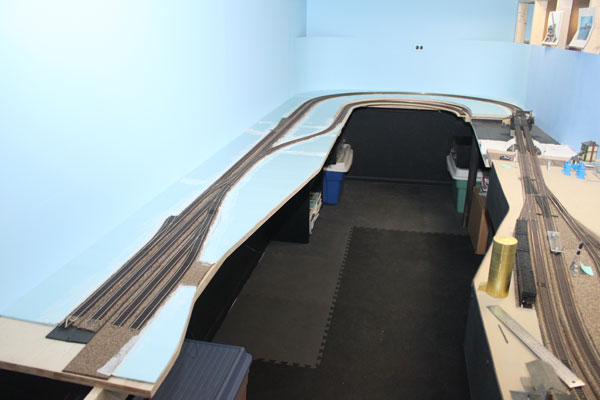
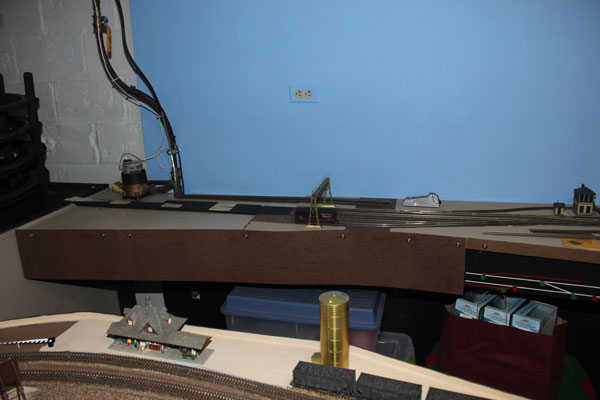
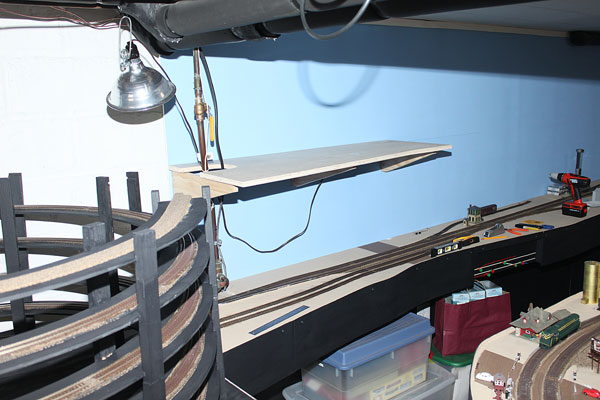
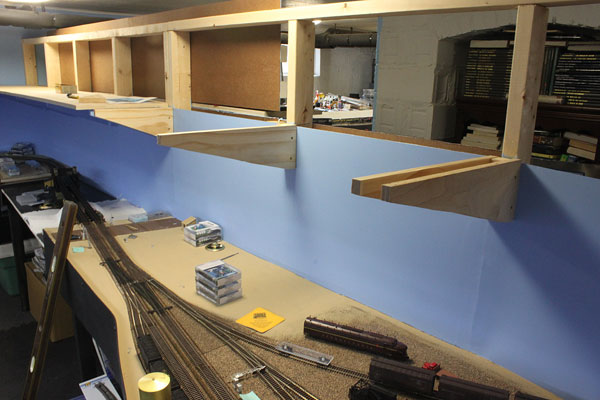
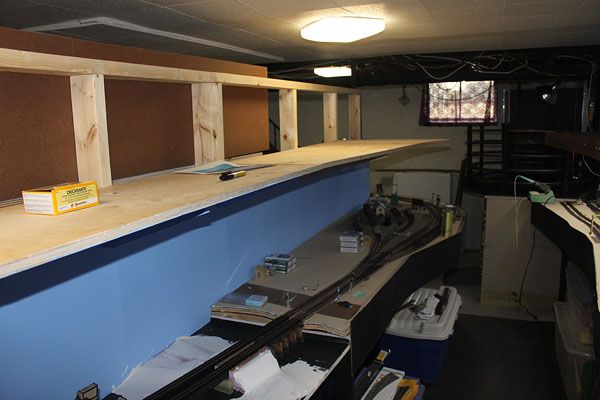
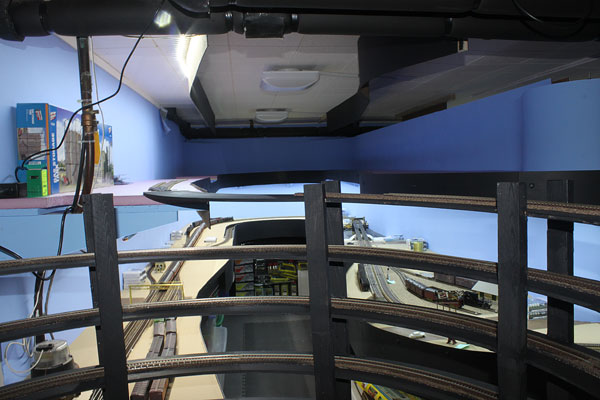
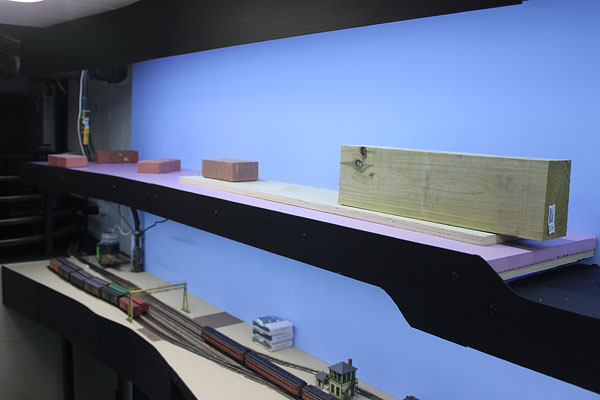
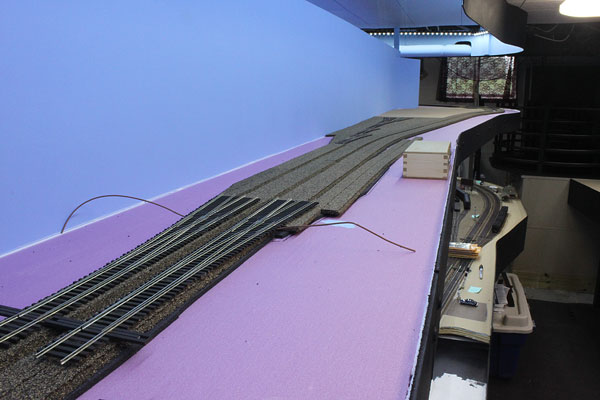
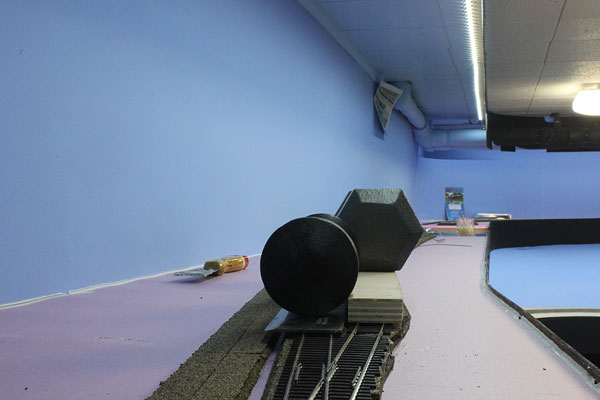
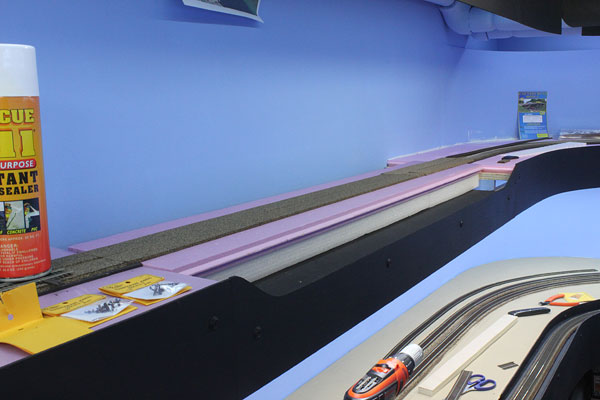
The walls under the new section of the layout got a coat of black paint this weekend. What a difference it made visually. I also played around with some Blue Point turnout controls (seen on top of layout) which are going to control all of the interlocking turnouts at Sea Girt. (1/9/11)
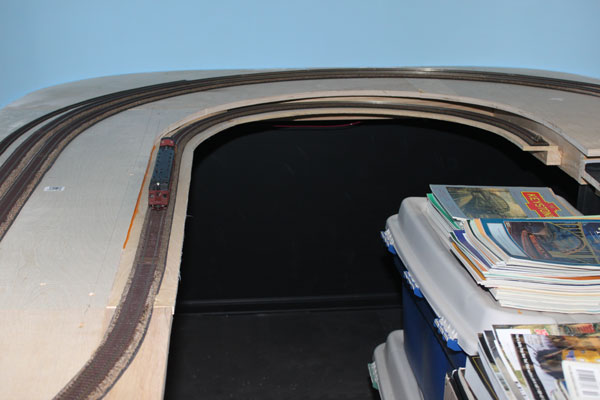
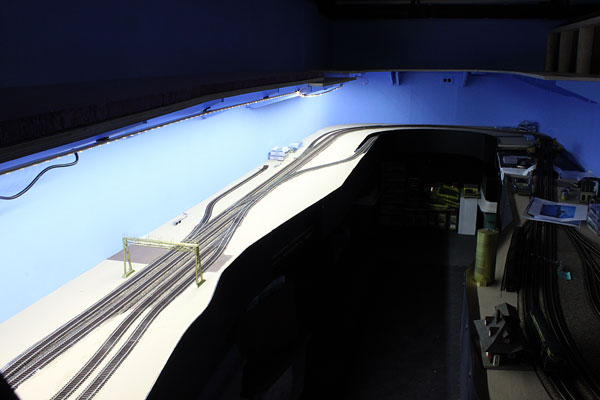
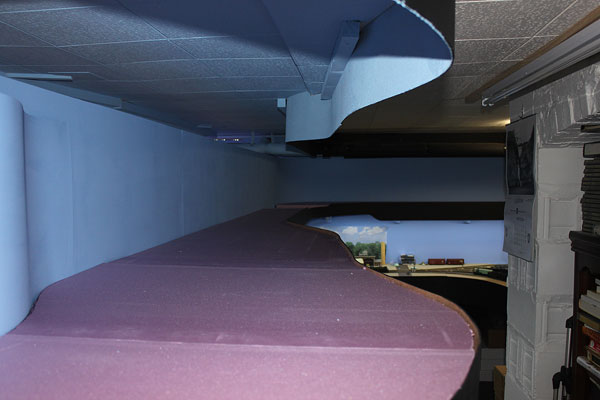
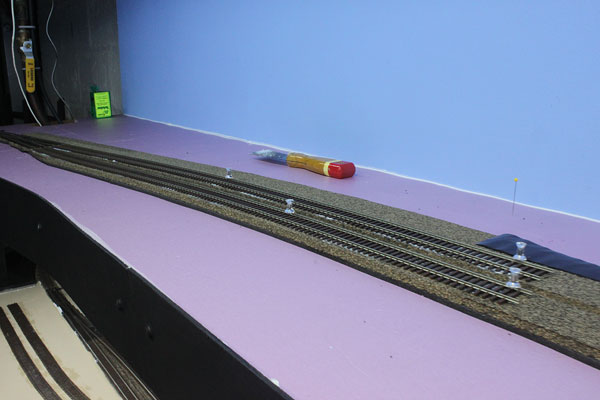
I also completed the Freehold and Jamesburg Branch staging track which wraps around the front of the layout while descending below grade and ending near the Manasquan River. This is all the trackage the light traffic on the branch needs for staging. (1/9/11)
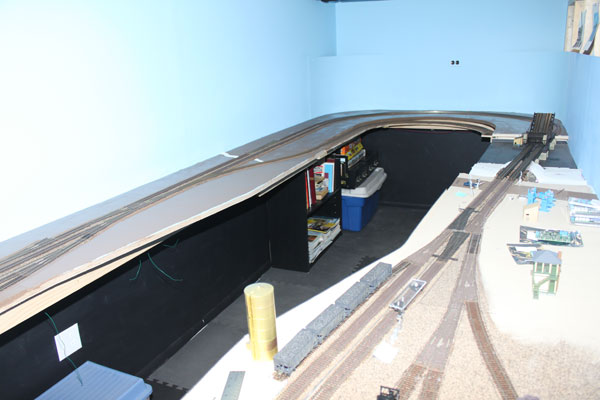
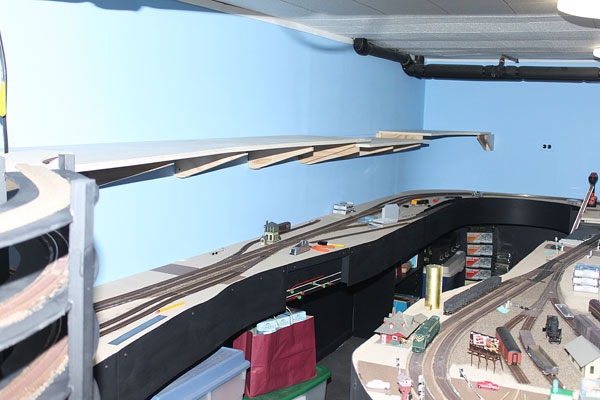
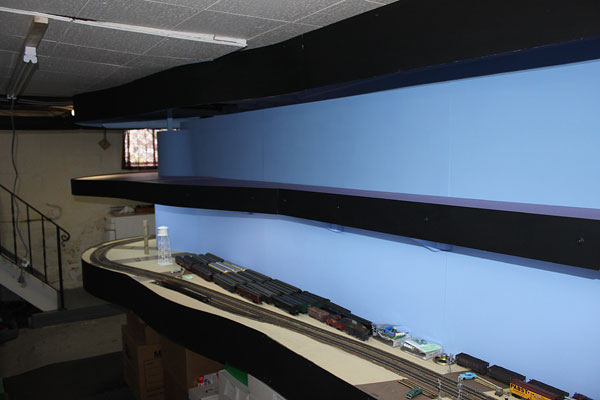
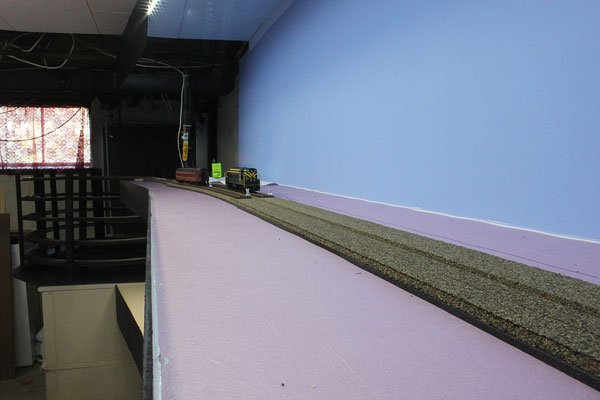
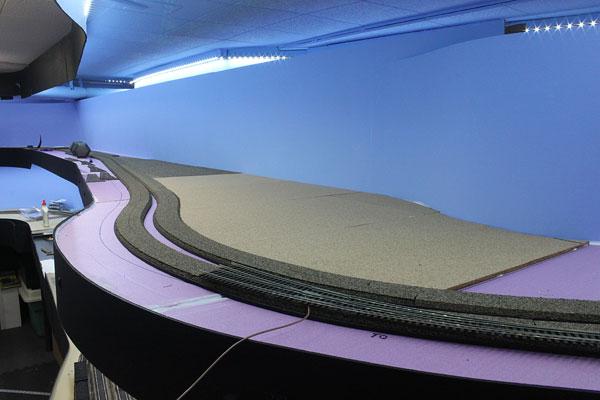
Layout work this week involved installing the 1/4 inch foam ground base over the new construction. I have really been satisfied with this foam as a scenery base. It brings the ground level up a little bit while creating a ditch along the mainline ROW. (1/12/11)
The foam ground is completed as well as the plaster contouring along the mainline. This foam really does a good job representing the ground. The way I glue it results in a small undulations along its surface and conveniently removes the ultra-flat plywood look. (1/12/11)
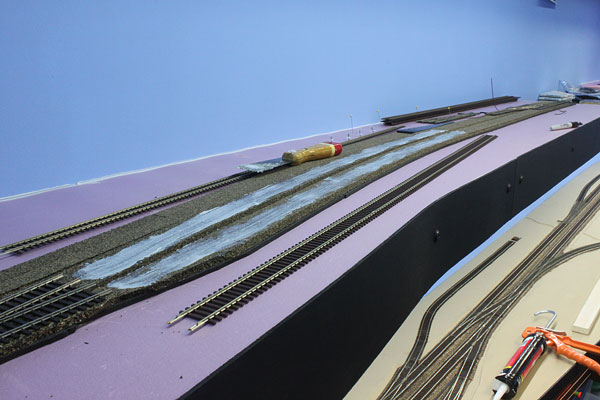
A little bit of spare time allowed me to paint the base coat (dark brown latex) on the blue foam ground. This first of two steps really makes the new construction start to look like a model railroad. The light tan top coat will be applied this weekend between football games. (11/14/11)
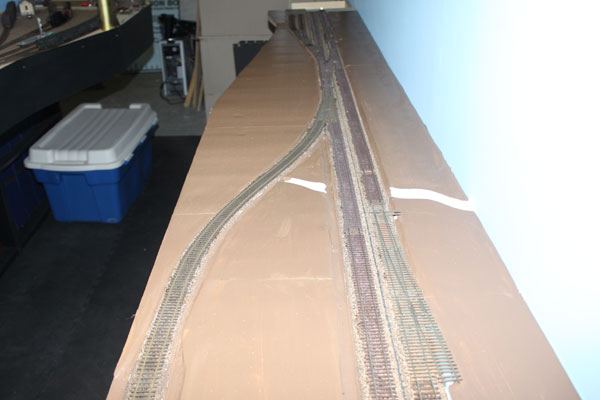
Looking north toward Sea Girt with the Pennsylvania's Freehold and Jamesburg secondary line to the left. The mainline is bisected by a small stream which feeds Stockton Lake (off to the right). Nothing more than a break in the foam base contoured with plaster. Neat! (1/14/11)
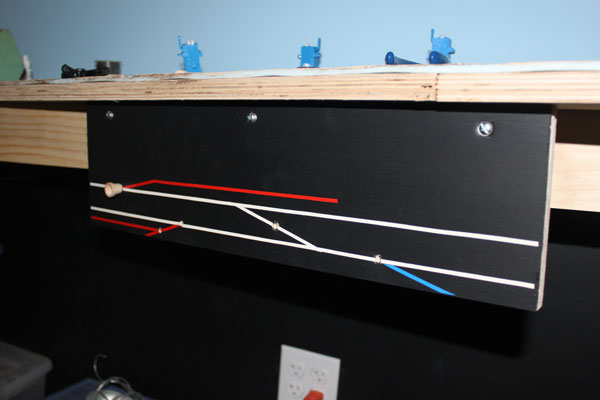
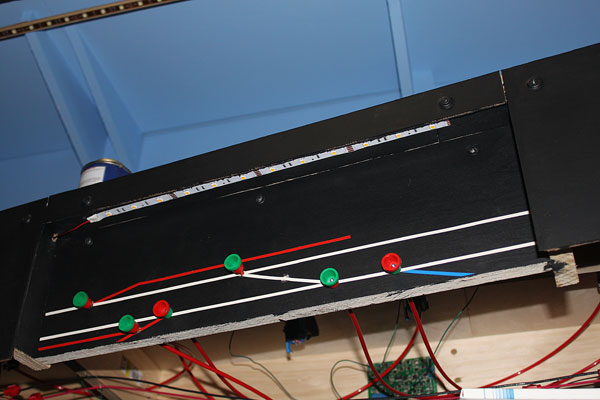
Work on the layout this weekend included the construction of this recessed control panel for the PRR junction at Sea Girt. The mainline is depicted in white, sidings in red, and the Freehold & Jamesburg line in blue. The Sea Girt Interlocking was controlled by the PRR's SG Tower and this board duplicates that long-gone interlocking. (1/16/11)
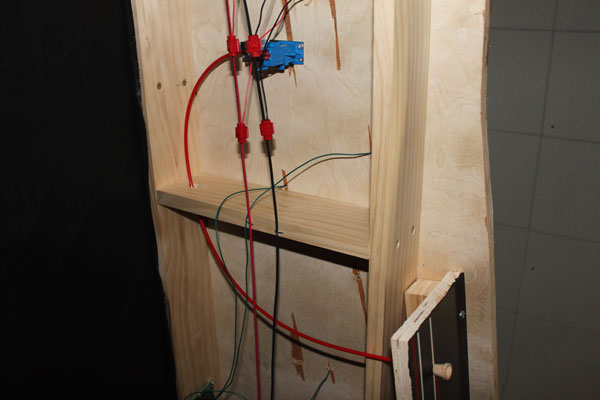
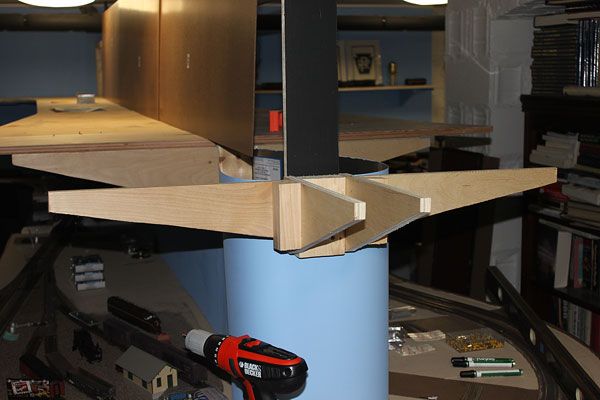
This view shows the underside of the layout at Sea Girt. The Blue Point switch controller operates the military siding with the red Flex-Link tubing connecting it to the knob on the control panel. The Red and Black wires are the DCC bus while the green wires run from the turnout frogs back to a Hex Frog Juicer. (1/16/11)
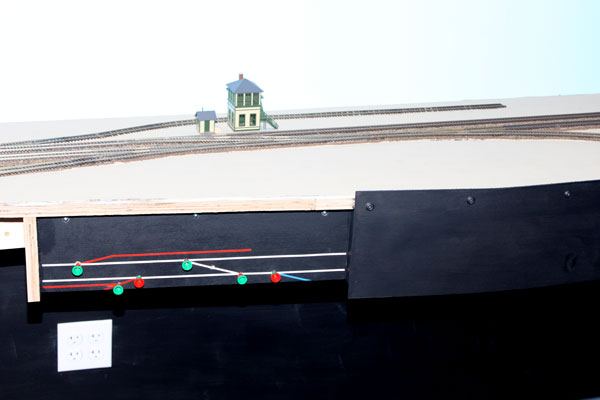
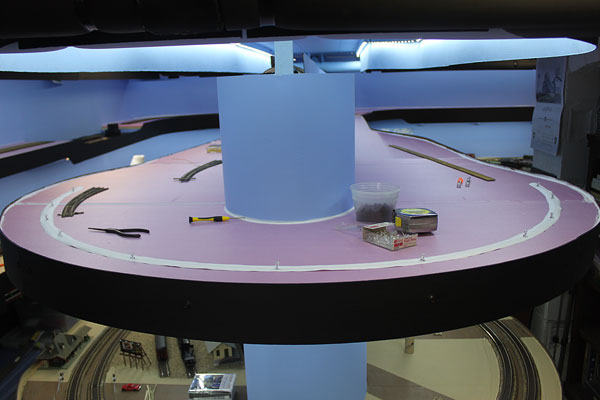
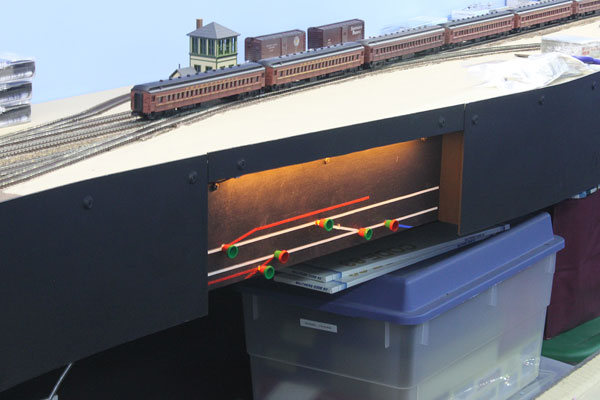
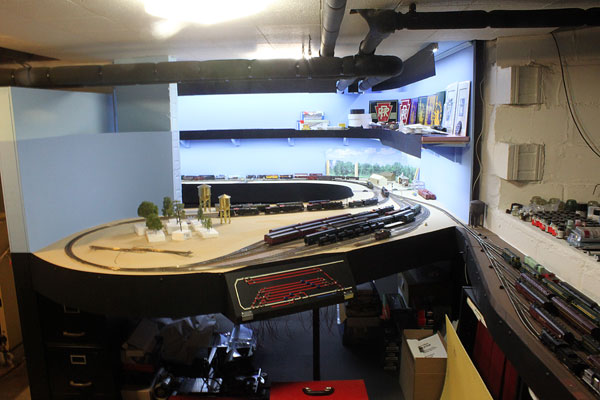
Basic construction of the Sea Girt peninsula of the layout was completed this week (for the most part). This view shows the recessed SG Junction control panel utilizing Blue point switch machines and associated parts. The green knobs extended would indicate turnouts are clear for the mainline while the red knobs are opposite. The whole panel is recessed and works quite well. Control panel labeling will come later when I decide how to go about it. (1/20/11)
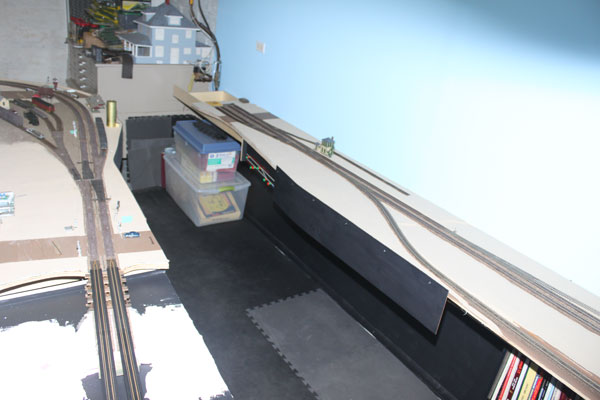
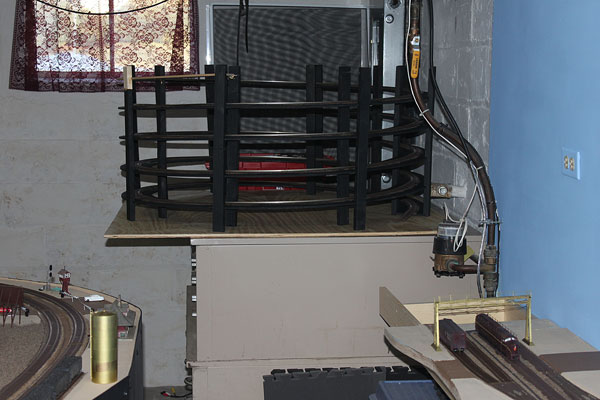
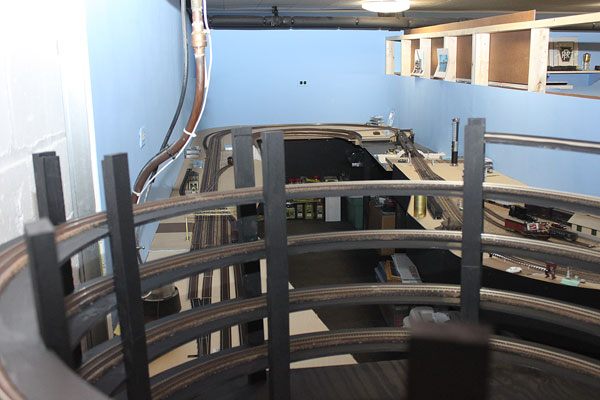
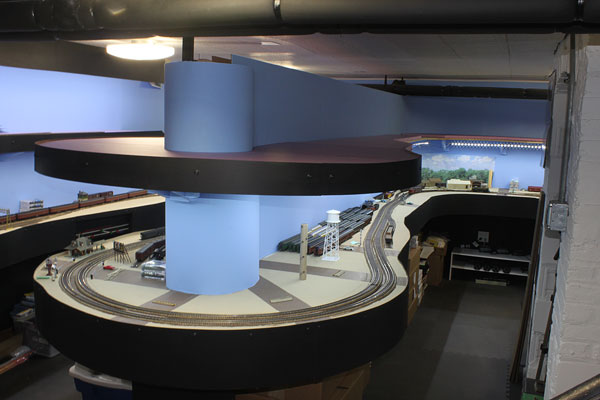
The layout has now reached its farthest extent on the lower level. The future second level will be reached via a double-track helix with a rise of approx. 22 inches while maintaining a grade of no more than 2%. This overall view shows Sea Girt on the right and Point Pleasant Beach/Manasquan River on the left. Immediate construction priorities include the completion of the fascia in this section and preliminary signal work. (1/20/11)
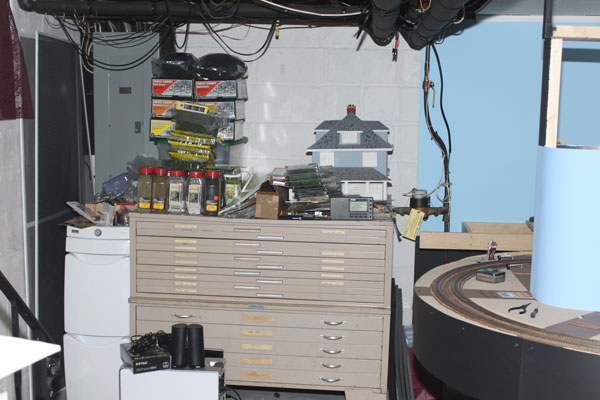
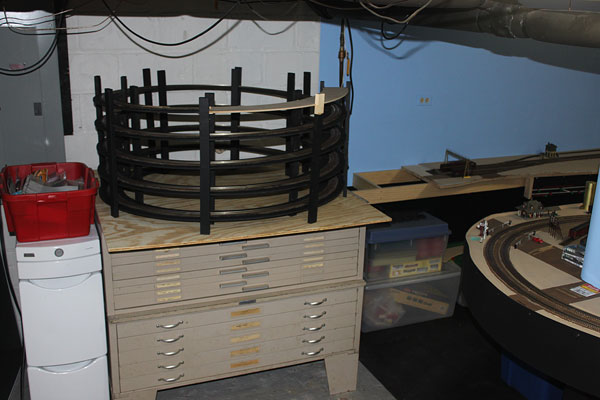
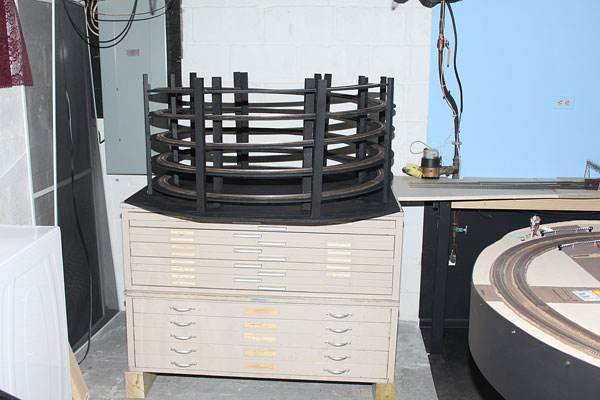
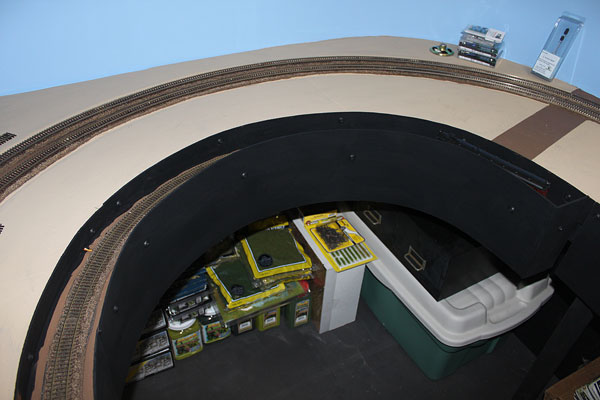
The helix will be located over the flat files shown here. I first need to lower the files by removing the legs. Due to space constraints, the helix will be tight with a projected 20 inch inside to 22 inch outside radius, 2 percent grade. Untested grounds and it will be a neat trick, I'm sure! (1/20/11)
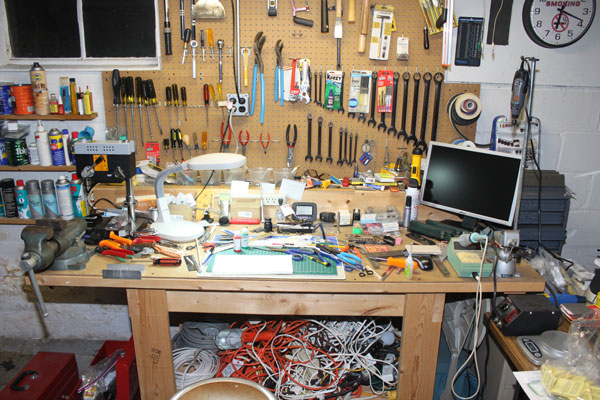
Aside from the already constructed layout which has been documented over the past several months, the heart of it all continues to be my work bench. Despite the layout looking clean and neat, I'm like most every other modeler at the nerve center. Need I say more? (1/20/11)
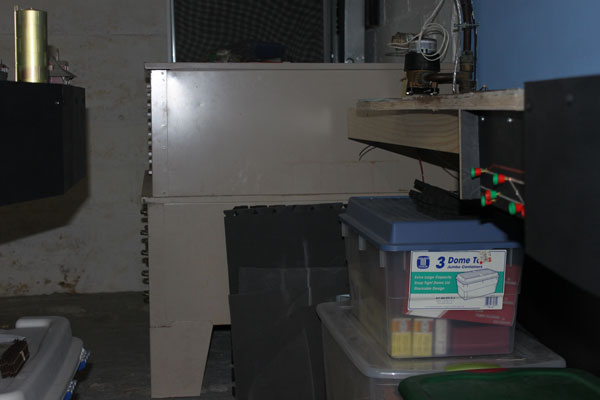
Prep work continues for the impending helix construction which I hope to begin in the next week. Here we can see the large flat files and the height relationship with the end of the layout bench work. With the legs off and the files placed on 2x4s, I will have the necessary clearance above for the helix. I also have to deal with the water meter too (on the right). (1/24/11)
Layout detailing is progressing with the Freehold & Jamesburg Branch track and ties getting weathered. This view shows a PRR Brill gas-electric passing under a roughed-out Route 71 overpass. SG Tower is in the background. The original line here was double-tracked through most of Manasquan before it became a single track line the rest of the way west to Jamesburg. (1/24/11)
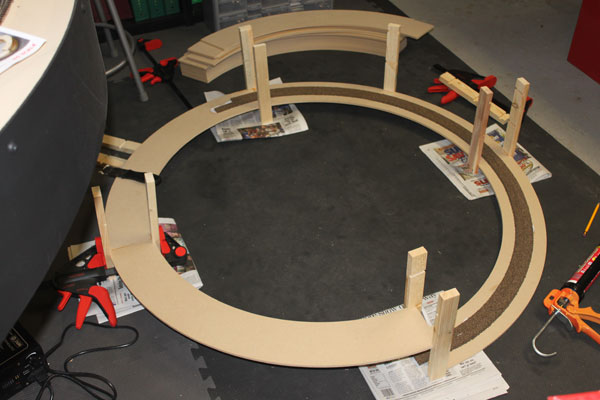
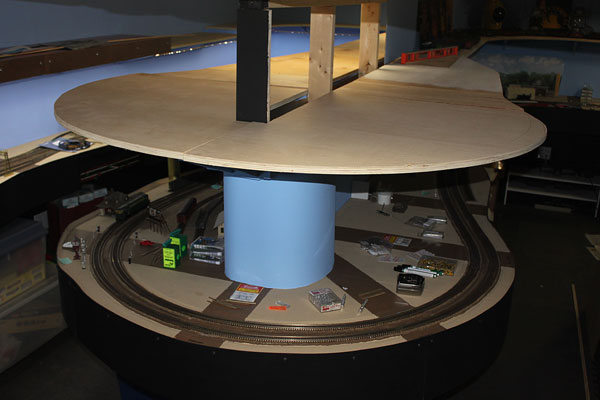
The main focus of construction on the layout this week has been the helix. I decided to go with the Ashlin Designs helix kit to expedite construction. Because space is tight, I had to get the smaller of two kits offered in HO by Ashlin and scratch the double track helix plan because of the tight radius of 22 inches. A double track just won't work using anything larger than standard length freight cars with this size helix. The first 360 degrees is shown here. (1/29/11)
To make things as easy as possible, I am building the helix a little at a time while laying the cork roadbed and then code 83 flex track with soldered rail joints. This process makes construction a lot easier, but really slows down the whole job waiting for every process to dry before continuing. This first helix will rise 11 inches while the second kit will be built and set on top and bring the track up another 9 inches to the second level. So far, so good. (1/29/11)
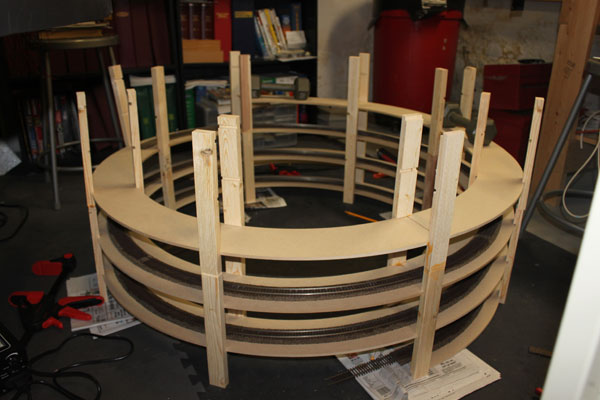
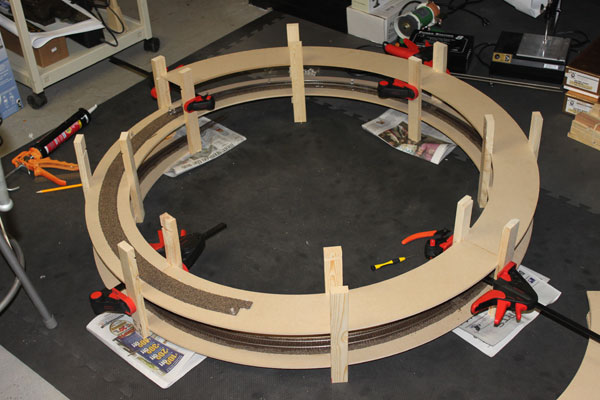
The helix is now up to four levels. Once more around and I'll reach the required 20 inch rise with the entrance and exit tracks in the right positions. Carpenter's wood glue was used to build the helix and it is very solid. The grade is two and a half percent and the overall width of the helix is 47 inches. Other than having to single track it, I'm happy with the results. (1/30/11)

In the meantime, I placed a 4-track brass signal bridge over the line at Sea Girt to check the fit. The original plastic NJI kits of the bridge have been scratched due to lack of availability (on backorder for over 2 years!). The brass bridge is not quite the same as the original and will need some minor modifications later. It'll be good enough, though. (1/30/11)
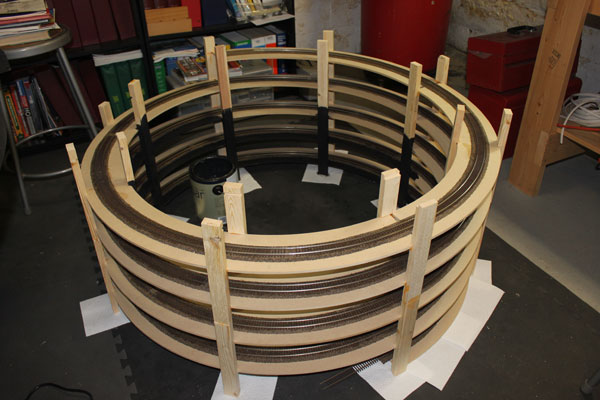
Construction of the helix has been completed. Here, it is getting a coat of flat black paint to help all of that wood to become a little more invisible next to the layout. Over 50 feet of cork roadbed and track went into this thing! I decided to use the cork road bed to help cut down on the track noise verses laying the track right on the wood helix. I think the extra effort and cost will be worth it. After painting is finished, it's time to install this 4 foot wide beast! (2/5/11)
At the top of the helix and the beginning of the second level will be Belmar. Some of the 1950s landmarks modeled at Belmar will be the large gas holding tanks, a couple of freight sidings, the Belmar passenger station, and the Shark River bridge (above), featuring another rolling lift bridge (oh, joy). This bridge rested mainly on wood pilings with concrete under the draw. The parallel Route 35 bridge is just to the west (toward the backdrop)...so TWO bridges here! (2/5/11)
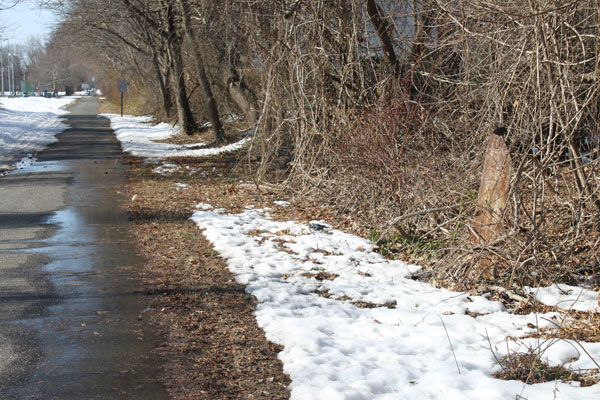
The present R.O.W. of the Pennsylvania Railroad's Freehold and Jamesburg line is seen here looking west in Wall Township near the border with Manasquan 48 years after the single track line was torn up. Today it is a bike/walking path between Manasquan and Allaire. The only known trackside artifact that still exists is a classic PRR cast iron mile marker to the right of the photo just beyond the patch of snow. (2/6/11)
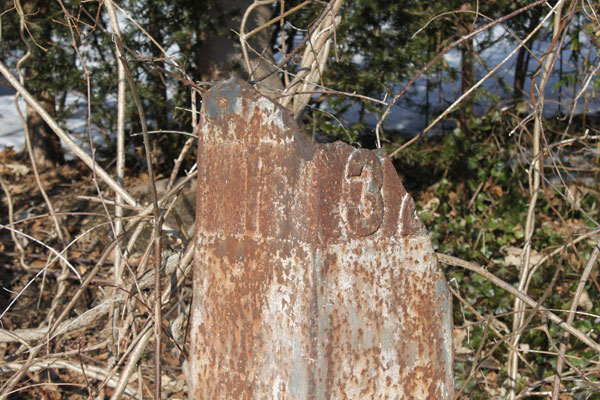
There are several stone culverts and small concrete bridges still existing on the former line between Manasquan and Farmingdale, including the Routes 34 and 35 overpass bridges, but this mile marker seems to have escaped destruction. The two-sided marker shows 1 mile remaining to SG tower at the junction with the NY&LB, while the other side (westbound) indicates 32 miles to Monmouth Junction. The top of marker was broken off years ago leaving the jagged edges. (2/6/11)
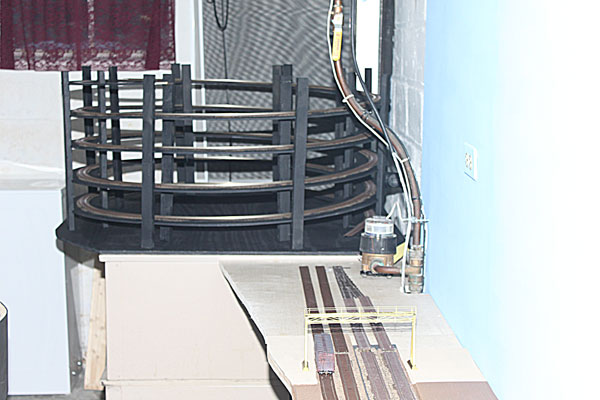
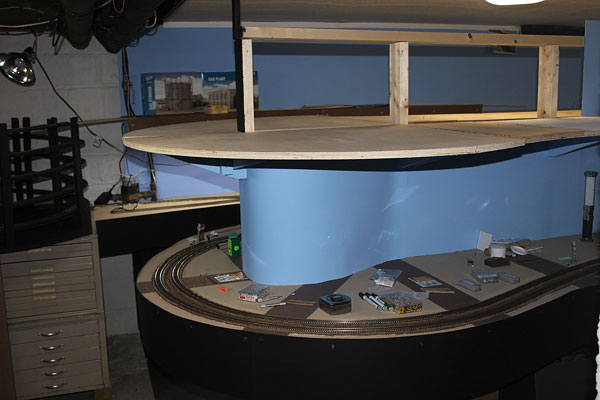
Back on the model...the helix has been positioned on top of the file cabinets to check the fit, as well as the entrance and exit positions. A final ramp section was then added (unpainted) and everything seems to check out ok. Note the 4x4 plywood base which will be trimmed. (2/6/11)
The double track mainline will diverge to a single track and enter the helix beyond the water meter. The exit into Belmar will swing around below the yellow water valve. The next step is to empty out the file cabinets and lower them to the correct height. Not looking forward to that! (2/6/11)
The file cabinets have been lowered onto a pair of 4x6 legs and the helix is in position on top. The helix can be accessed from three sides. I'm not sure yet how to contain any mishaps on the helix such as a derailment causing cars or a loco to take a dive to the floor. (2/8/11)
The helix sits on a 1/2 inch plywood base which in turn sits directly on the files. It is pretty solid and can be removed fairly easily, if needed. I also extended the lower level to the helix, thus officially completing my lower level bench work with a small celebration. (2/8/11)
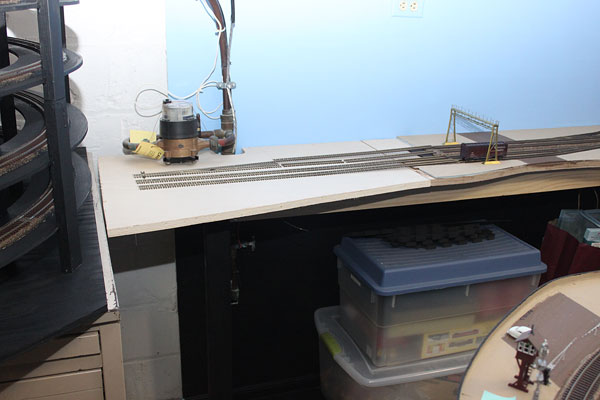
The final portion of the bench work just fit under the water meter. Sea Girt Station will be located here with the freight station across the tracks. (2/8/11)
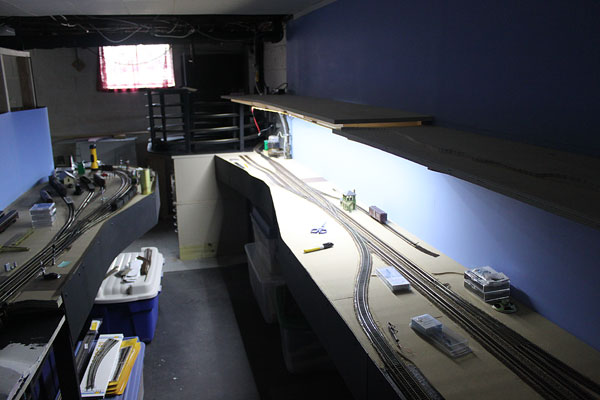
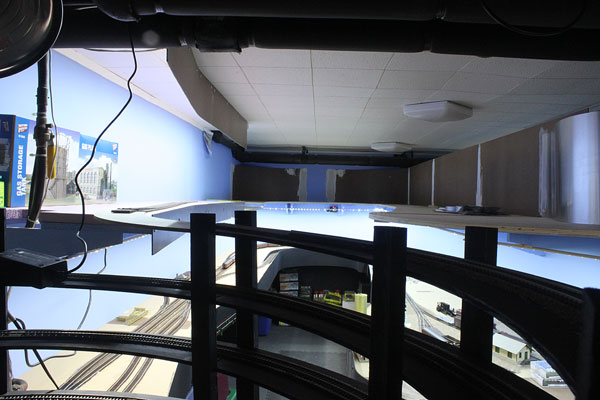
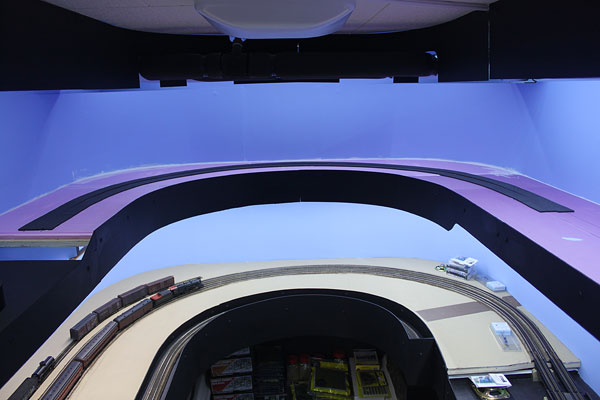
From the helix, here is an overall view of half of the layout between Point Pleasant Beach and Sea Girt. The second level from Belmar to Long Branch is waiting in the wings. (2/8/11)
Transitioning the mainline from the lower level of the layout to the helix involved a bit of work. The base of the helix is a little over an inch higher than the track on the lower level of the layout. I also anchored the plywood base for the helix with a couple of sheet metal screws so any unexpected nudges don't knock everything out of whack. (2/11/11)
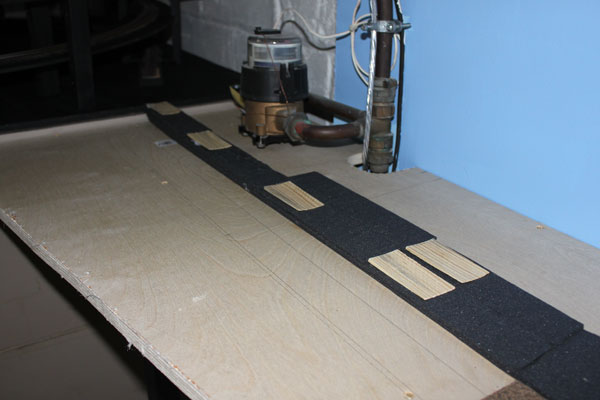
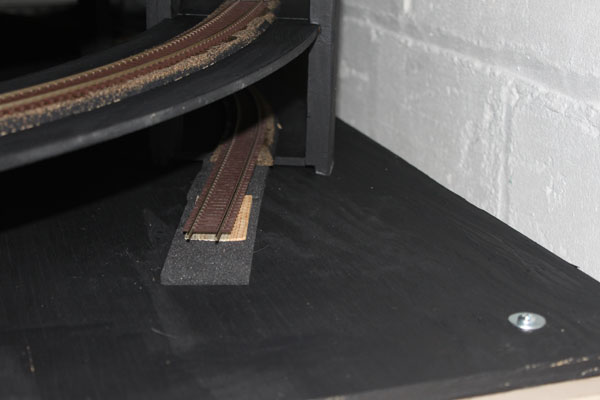
The approach to the helix involved building up the roadbed on an incline of about 2-1/2 percent, the same as the helix. Here, I stepped the camper tape foam sub-roadbed every 10 inches or so, transitioned with wood ramps. Topped with the cork road bed, the transition looks to be pretty smooth. The track will go down this weekend and put the helix on-line. (2/11/11)
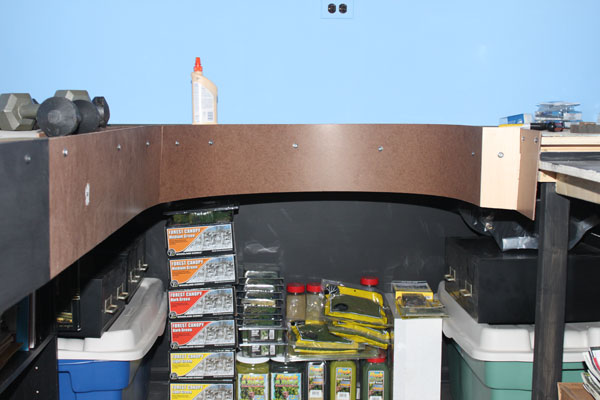
While I did a bit of work on the entrance to the helix this weekend, I decided unexpectedly to finish building the fascia for the lower level. Here it is before painting it flat black. My stockpile of tree-building supplies are under the layout bench. (2/13/11)
The fascia at the end near the helix. My old circa 1969 Atlas passenger station is subbing for the Point Pleasant Beach station, which will be scratch-built in the future. The brass oil storage tank is also a temporary stand-in at the Pt. Pleasant-Bay Head Ice and Coal Co. siding. (2/13/11)

An overall view of the newest part of the layout with the completed fascia. Work on the helix will resume this week with a couple of other surprises. (2/13/11)
Here is the Freehold & Jamesburg staging track, hidden by the new fascia. A PRR gas-electric doodlebug is barely visible in the canyon on the right. (2/13/11)
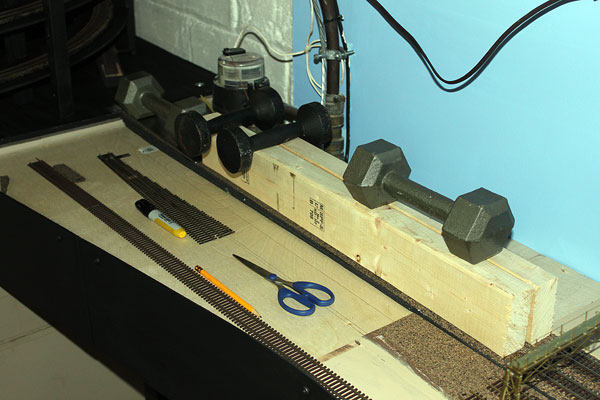
Here, the cork roadbed has been glued down to the foam and wood shim sub-roadbed. The two 2x4s weighted down compressed everything to make a nice and even grade coming out of Sea Girt and into the helix. (2/16/11)
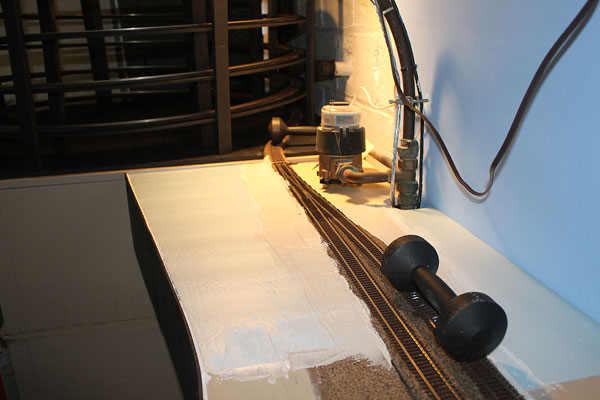
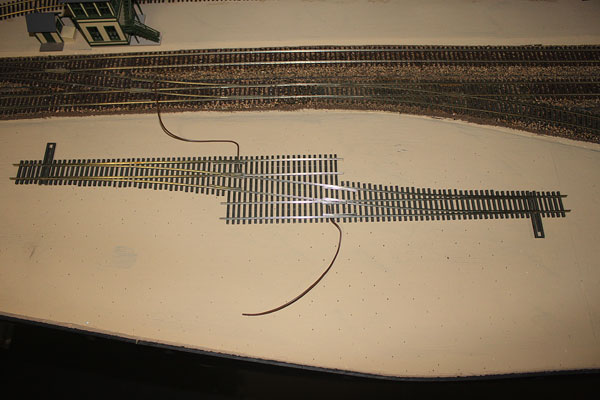
Once the cork roadbed dried, I glued down the track using the same process. I also added the 1/4 inch foam ground base and formed the inclined roadbed base with compound. The weights are securing some additional adhesive that was needed. The turnout is a Walthers #8. (2/16/11)
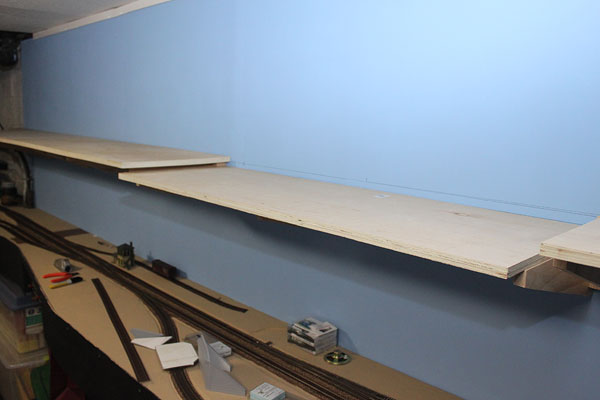
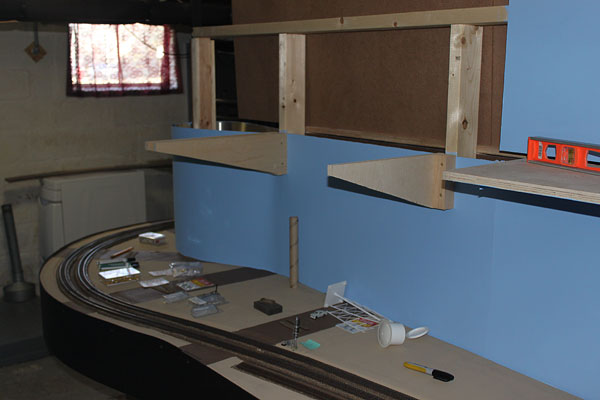
The support brackets are up for the first four feet of the second level coming off the helix. This was preceded with the completion of the lower level track work when the two Sea Girt freight sidings were extended. (2/20/11)
The first section of 3/4 inch birch plywood base is down. The interface to the helix looks great and there's plenty of room for the Coast Gas Works in Belmar just to the right of the water pipe. A CNJ Trainmaster (at Pt. Pleasant Sta.) was run up and down the helix in celebration. (2/20/11)

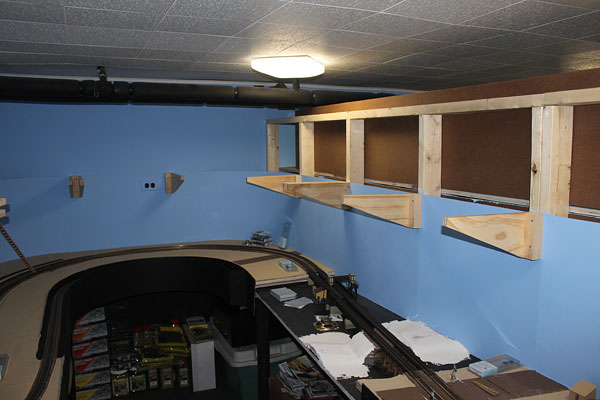
Since things were going so well, I decided to continue the second level construction. Here, the supports are all installed and awaiting plywood. I used 1x6 pine screwed onto 2x2s which in turn were screwed into the wall studs (see my previous 2nd level construction pix). (2/20/11)
The plywood is on and ready for the 1/2 inch foam top. I'm increasing the foam thickness on this level because of the increasing variations in the terrain as the line heads further north along the Jersey coast. I would've built more, but I ran out of lumber! (2/20/11)
This section is where the Shark River will be. Similar to the Manasquan River, it is spanned by the NY&LB with a wood trestle (1950s) and another Scherzer rolling lift bridge which will need to be scratch-built. The second level here is 16 inches wide, 20 inches above the lower level. (2/20/11)
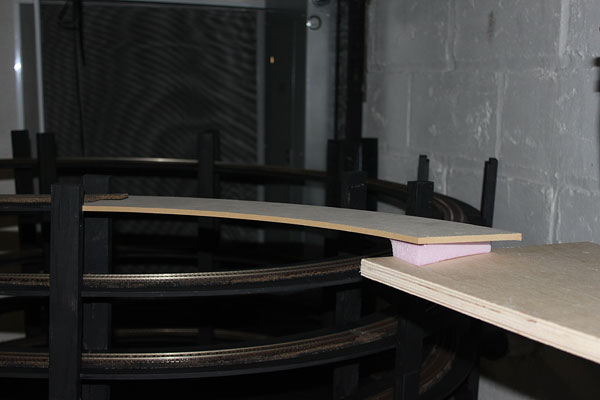
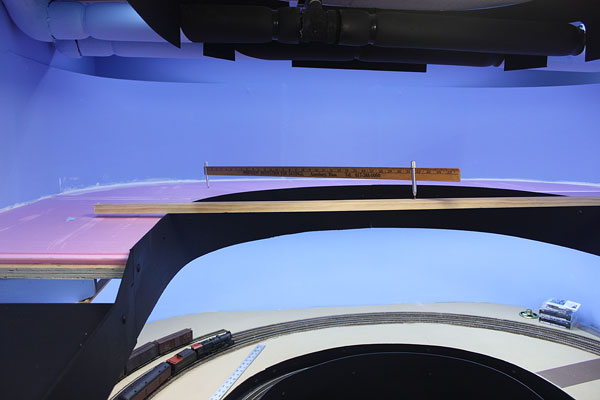
The transition from the helix to the second level is seen here. The pink foam will top the upper level plywood. The ramp will transition into the camper tape foam sub-roadbed topped with the cork road bed. (2/20/11)
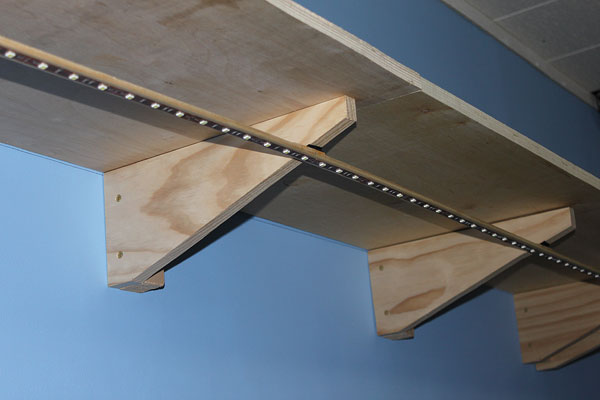
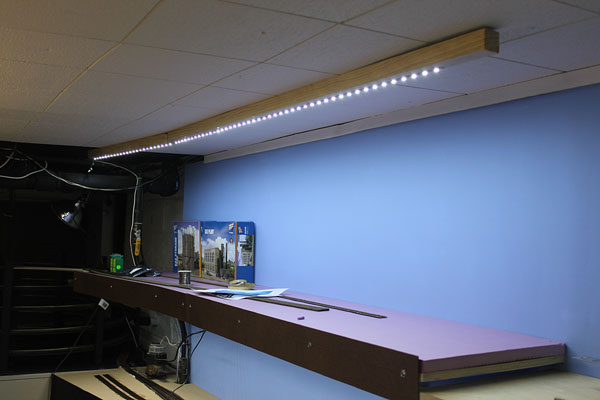
From the start, I planned to use led lighting for the layout. Here, a flexible led strip is attached to an 8 foot piece of stripwood that is secured to the supports for the upper deck. Very lightweight, it was a snap to install with velcro and can be easily moved around if necessary. (2/21/11)
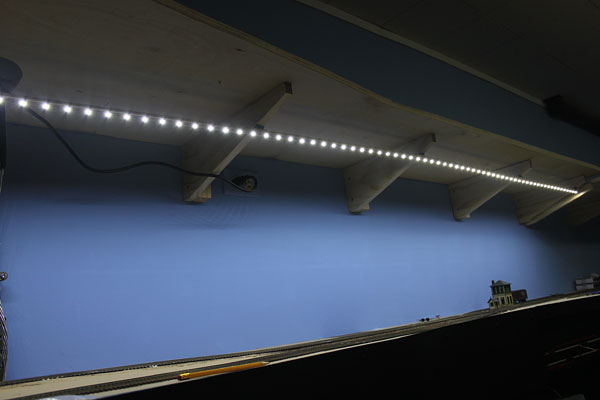
The 16 foot length of led ribbon light will cover one whole side of the layout, can be cut and spliced, and has a profile of about 1/8 inch. The 16 foot strip contains 150 high output leds with a rated color temperature of 5500K, the same as full sunlight. Power use...35 watts. (2/21/11)
The illumination is perfectly even along the layout and backdrop using this strip and I'm convinced this will be my method of lighting the rest of the layout in the future. (2/21/11)
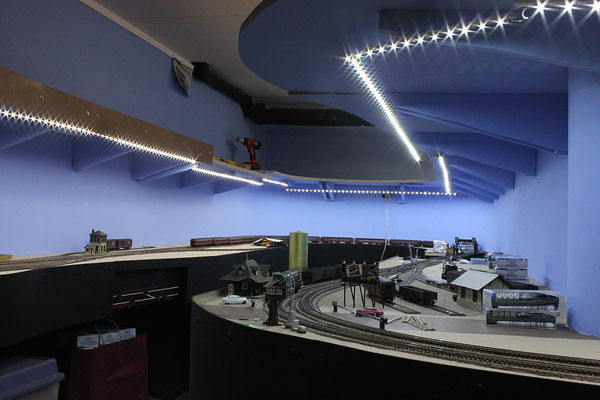
This is a good indication of the brightness of these leds with the basement lighting turned off (no flash). The upper level fascia will contain some of the lighting getting into the aisle. (2/21/11)
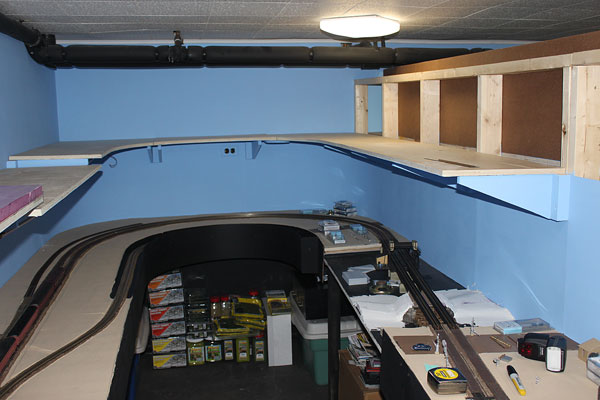
Second level construction continued this week with the support brackets installed around the far end and half way up the center peninsula. (2/23/11)
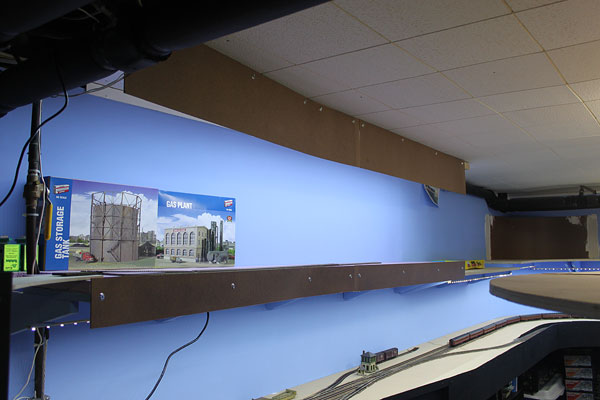
All of the brackets and the underside of the plywood base were then primed followed by a coat of the sky blue paint. Construction got safely past the Manasquan River bridge. (2/23/11)
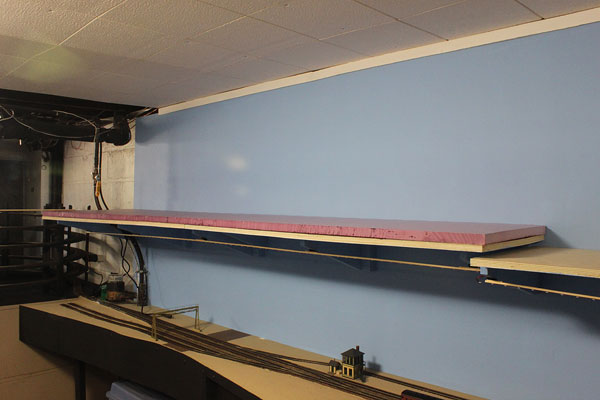
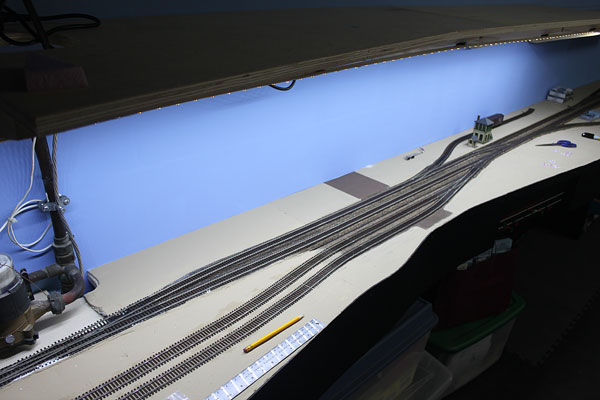
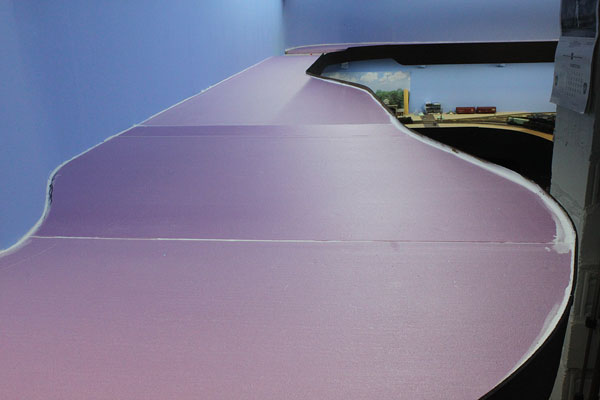
The pink 1 inch foam scenery base sits over the plywood shelf in the Belmar section of the layout between the helix (left) and the Shark River. This foam topping will allow me more leeway in shaping the ground contours as the line heads farther north. (2/23/11)
In the meantime, the LED lighting has been installed along the entire length of the wall. The velcro mounting idea doesn't look like it will hold up in the long run, so the strips will need to be secured with glue while being moved out to near the end of the brackets. (2/23/11)
With the fascia, floor and lower walls all painted black, the lighted part of the layout looks like it's floating when the basement lights are turned off. Really nice! (2/23/11)
A short commuter train heads south out of Sea Girt. Another 16 feet of ribbon lights is on its way for next week while the future Neptune Yard upper level bench work is being planned. (2/23/11)
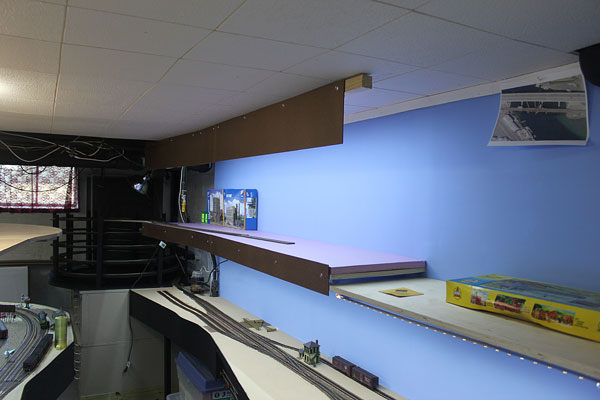
While household chores took precedence this weekend, I did manage to extend the upper level a bit. Here, the cantilevered supports are installed and awaiting the 3/4 inch birch plywood top. What's left of the old CNJ terminal at Point Pleasant Beach during the 1950s is below. (2/27/11)
The second level deck now extends to near the end of the peninsula. This part of the layout will include the Bradley Beach passenger station to the left. Then the Neptune yard and Freight Station will fan out beyond to the 180 degree turn followed by Asbury Park on the other side. (2/27/11)
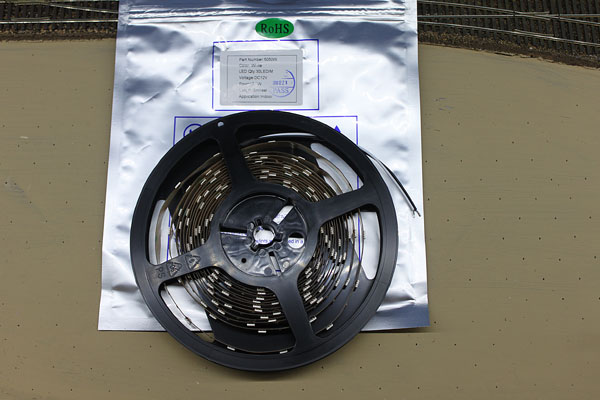
The second 16 foot length of LED ribbon lights for the layout has arrived. This is how they ship it...rolled onto a reel like an old 8mm film. I did notice some minor construction and packaging improvements since I bought the first reel a couple of years ago. Let there be light! (3/1/11)
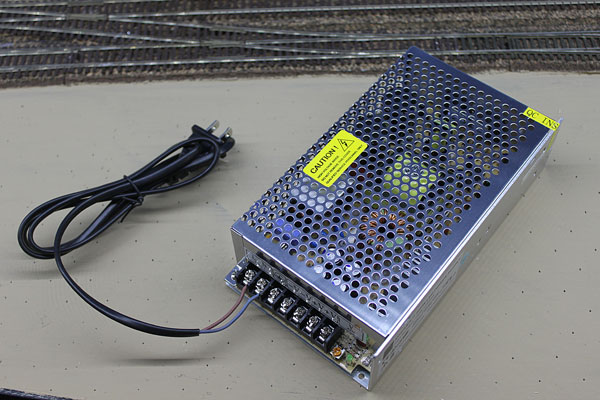
I also purchased a larger 12vdc power supply (APS200) from the same co. ( TheLEDLight.com). With a 11.7 amp working rating, this should be enough for the entire first half of the layout lighting needs. Each 16 ft length of lighting will be connected in parallel to the PS just to be safe. (3/1/11)
For the first time since last September, construction resumed on the Bay Head side of the layout. The pre-existing second level on this part of the layout is being extended and widened in preparation for the 180 degree turn of the mainline. (3/2/11)

This end shot of the peninsula shows both ends of the upper deck. The upper deck mainline will have the same radius curve as the lower deck. Neptune yard will be located on the left while the Asbury Park station will be on the right of the upper level. (3/2/11)
One more 4x8 sheet of plywood will finish off the bench work construction for this half of the layout, now nearly 50 percent complete (bench work, that is). The somewhat complex end supports have been completed and mounted. (3/2/11)
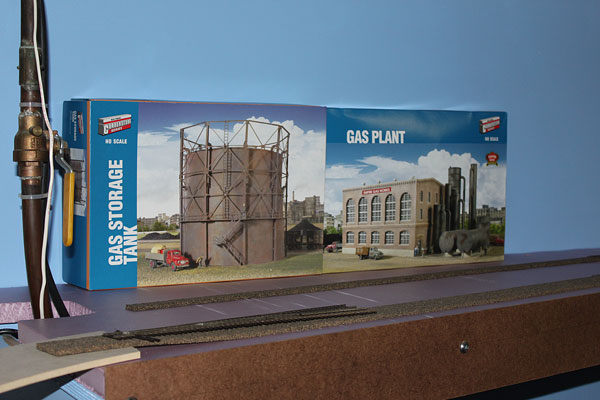
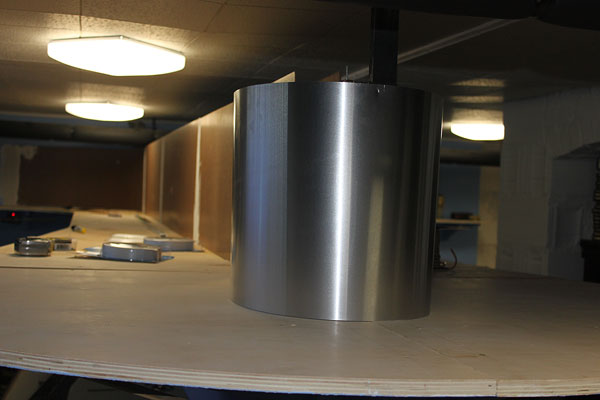
Trains exiting the helix eastbound into Belmar will pass these structures at 16th Avenue. The storage tank was painted silver in the 50s and still used by NJ Natural Gas. The gas plant was by now decommissioned and occupied by Jersey Central Power & Light. (3/2/11)
A red-letter day on the HO NY&LB! The bench work for the first half of the model railroad is now completed. The final two sections of 3/4 inch birch plywood form the 180 degree turn at the end of the peninsula. All this still needs to be fastened to the supports. (3/3/11)
The plywood base will be secured as the led lighting is installed, which hopefully will be completed under the upper deck all the way to Bay Head Yard in a week or so. This will be followed by 1 inch foam over the plywood before track laying can begin. Yee haw! (3/3/11)
Installation of the lower level led lighting has been completed. I had budgeted for this type of layout lighting several years ago during the planning stage, so the hit on the wallet wasn't too bad. (3/7/11)
The lighting continues up to and along the loop area off to the right. After moving a couple of light fixtures and installing more 1 inch foam base, track work will resume at Belmar. (3/7/11)
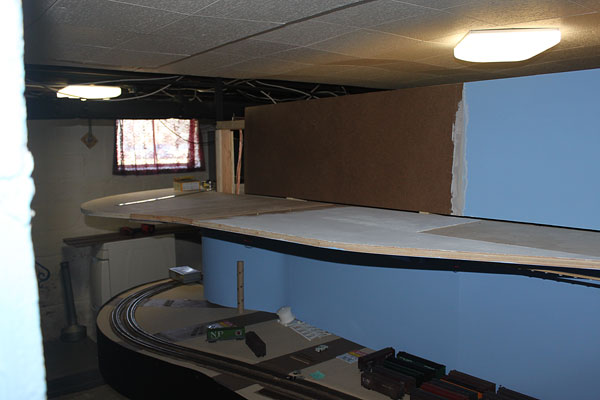
The last piece of 1/8 inch hardboard backdrop has been installed on the Bay Head side of the peninsula. I never thought I would see this day! (3/8/11)
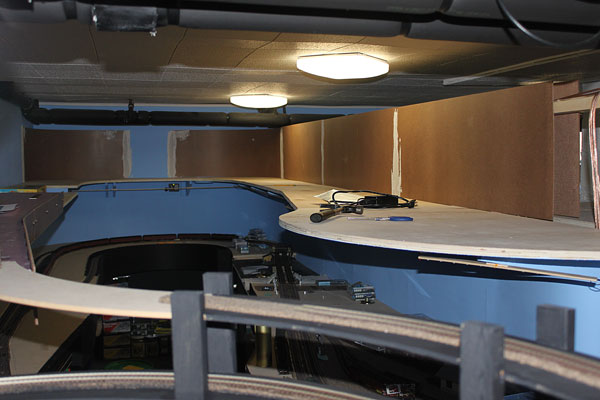
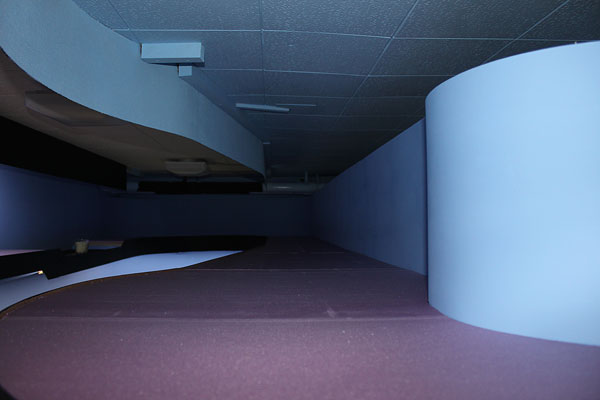
On the other side...5 sheets of hardboard are installed and getting a treatment of compound at the joints. The two ceiling lights will soon be moved to the center of the aisle. (3/8/11)
At the end of the peninsula, I used a length of aluminum flashing to make the backdrop curve, same method used as the lower level. (3/8/11)
Since I had some length of led lighting leftover from the lower level, I decided to install the rest over the upper level at Belmar. That's a 2x2 on the ceiling for mounting the valence and led's (3/8/11)
The valence is installed over the upper level above Belmar. I used the usual 1/8 inch hardboard, eight inches high, the same as the lower deck fascia. (3/8/11)
Another view of the Belmar section of the layout. The fascia and valance will be painted black, while the ceiling behind the valance will get a coat of sky blue. (3/8/11)
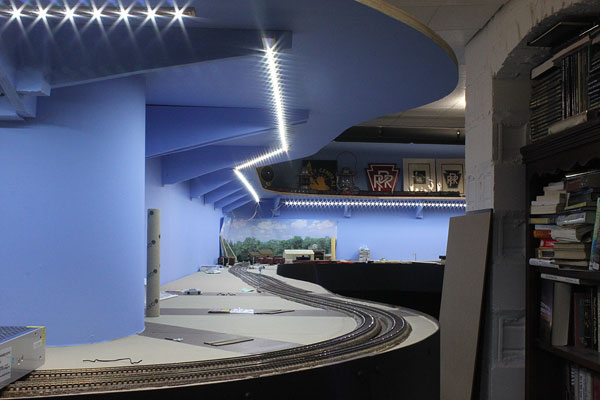
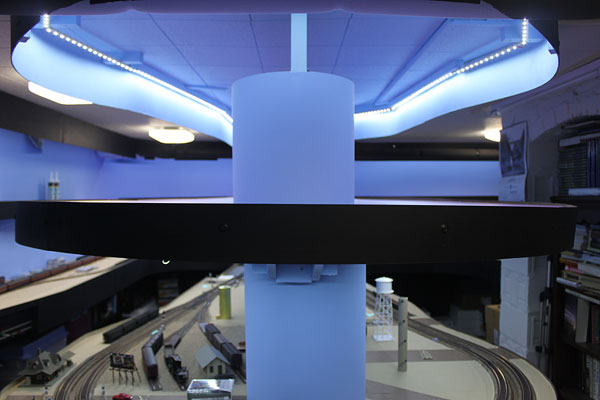
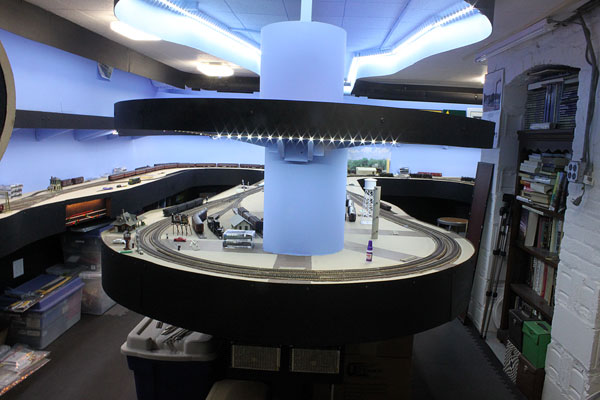
From inside the helix, this view shows this part of the layout illuminated with just the led layout lighting. The installed lighting so far consumes about 120 watts of power. Nice! (3/8/11)
Here's a view of the other end of the layout at Bay Head Junction. The led lighting lights up the entrance to the loop nicely, while the loop itself gets good illumination from the ceiling light. (3/8/11)
The 1 inch foam has now been installed over the plywood base on the entire upper level. I also installed the upper level fascia and finished the backdrop. Busy week. (3/13/11)
The basement lights which were situated over the center peninsula have also been moved to the center of the aisle. More work on the ceiling valence is next followed by more lighting. (3/13/11)
More work has been done with the ceiling valence. Even though it looks like a floating piece of 'whatever' in this shot, it really defines the upper deck and aisle. When the inside ceiling of the valence is painted sky blue, the effect should become more apparent. I can't wait for the next batch of led lighting to arrive! The regular basement lights aren't even needed any more! (3/14/11)
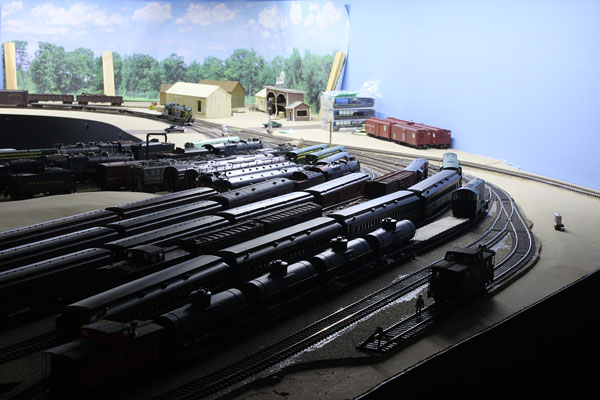
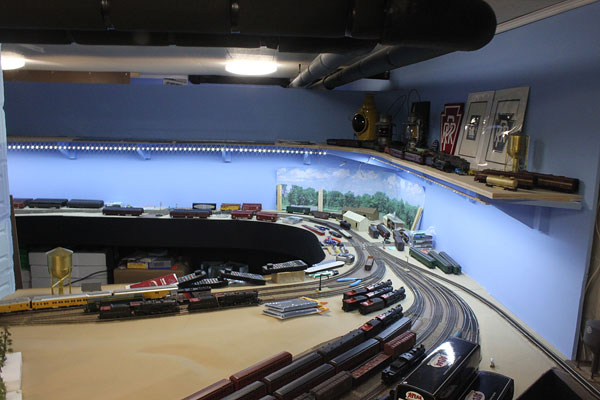
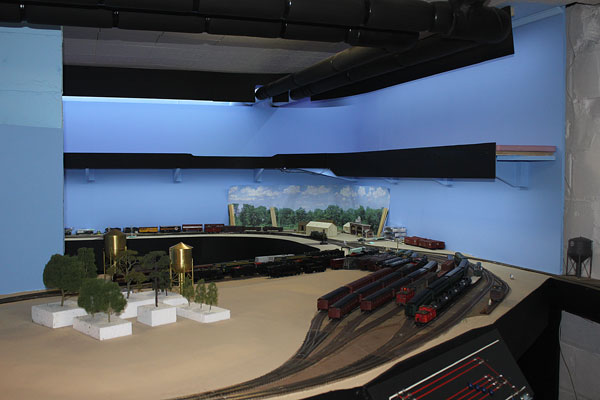
On the other quarter of the layout, the second level fascia has been completed as far as Interlaken with a portion of the ceiling valence installed. Here is Bay Head Yard silhouetted by the led lighting. Outbound PRR and CNJ commuter and freight trains wait in the coach yard. Can you spot the yardmaster heading for a hot pot of coffee? (3/14/11)
Layout work this week involved the tedious job of painting the backside of the valence sky blue...seen here over the future Neptune Yard just north of Bradley Beach. The ceiling tiles inside the valence were also painted blue in the attempt of blending everything together. (3/19/11)
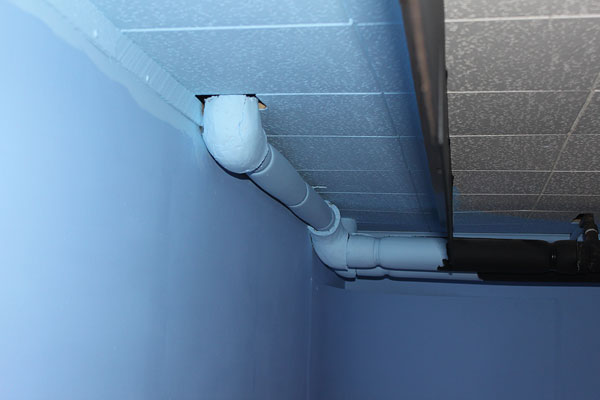
The painting project also included the insulation covering the hot water heat piping. The pipes over the aisles will remain black. With more led lighting coming next week, I hope to get the valence finished this weekend. Can't wait to get back to track laying on the upper deck! (3/19/11)
It wasn't an easy job, but the valence over the first half of the layout is now complete. As you can see, I had to do a lot of fitting of the hardboard around the existing pipes. (3/21/11)
In the future Asbury Park section of the layout, you can see where I tried to have the valence follow the contour of the lower decks. All that's left now is some paint touch-up. (3/21/11)
With the major carpentry work completed, I proceeded to glue down the 1 inch foam on top of the 3/4 inch plywood upper level shelf, starting at Belmar above. Flatness counts! (3/21/11)
The finished valence and fascias make for a pretty clean look to the layout. The remaining led lighting is next on the agenda followed by a resumption of track laying. (3/21/11)
Well, all of the led layout lighting has been installed and I'm nearly 100% satisfied with the results. Of course, I'm my worst critic and notice things that most others would not unless they're pointed out. Anyway, I think the lighting and the layout so far is what I had planned in my head. Now I need to put it down on paper and post it on the site. (3/27/11)
This is the layout at Bay Head Junction with the end of the upper level at Interlaken, NJ on the right. This will be continued when construction on the second half of the layout begins next winter. I may attach temporary staging here in the interim to get operations going in a few months. The track gangs have arrived in Belmar and are preparing to resume construction. Stay tuned! (3/27/11)
One last bit of upper level construction still had to be done...sealing the edges and seams of the foam scenery base. I used a cheap, paintable, white latex caulk for the job. The reason for this step is to keep future scenery from falling through the cracks while firming up the edges. (3/28/11)
With the caulking done, I was finally able to start laying out the trackwork on the pink foam. Here, the 180 degree curve from Belmar (left) to Bradley Beach is marked off (30 inch radius). The tracks in Belmar were also marked up and are ready for the foam sub-roadbed. (3/28/11)
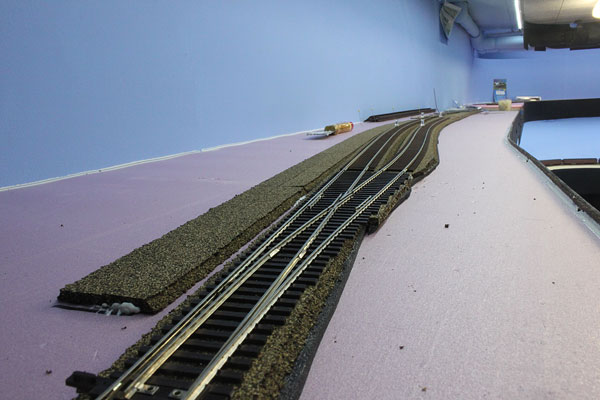
The installation of the mainline track has resumed on my NY&LB! The foam sub-roadbed and cork roadbed has been installed to the Shark River (off to the right), while the double track mainline has been started coming off the switch leading to the single track helix in the background. The Belmar passenger station will be in the foreground area with a siding to the right serving local industries, including the former Coast Gas Works and a local coal dealer. (3/29/11)
North of the Shark River (left), the sub-roadbed has been installed around the 180 degree turn and into Bradley Beach on the right. This section is where Avon By-The-Sea is located and will feature a classic wood roadway overpass (Sylvania Ave.) over the mainline and a local oil dealer (not served by rail, unfortunately) tucked into the right corner. Bradley Beach Station will be located on the extreme right at the southern end of Neptune Yard. (3/29/11)
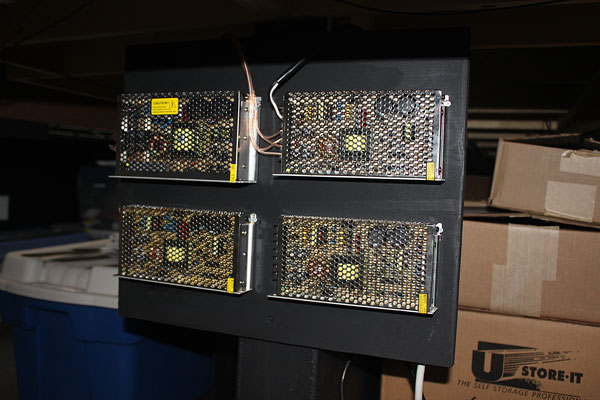
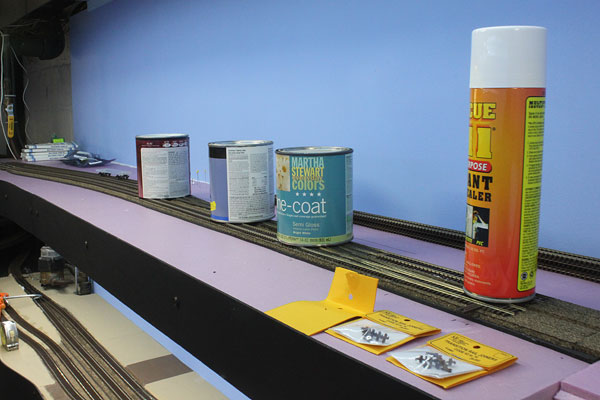
Other priorities kept me away from the layout the past week, but I continued research into the Bradley Beach/Neptune Yard section of the NY&LB. Now awaiting more supplies from Fast Tracks. Above are the 12vdc 12 amp power supplies for this half of the layout. The top two are for the led lighting. The bottom two for accessories on the upper and lower levels. (4/4/11)
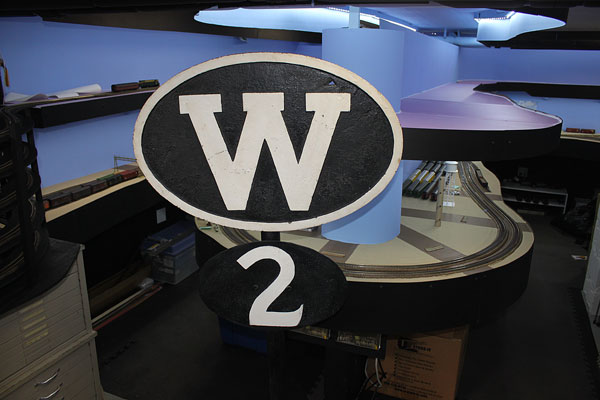
I also picked up this CNJ whistle sign from a contact in South Jersey. The sign supposedly came off the Southern Division near Winslow Junction 20+ years ago. This is the same type sign used on the NY&LB. The number 2 indicates that there are two crossings ahead to whistle for. I plan to use this as a pattern to make my own signs using Photoshop. (4/4/11)
OK...now that things on the home-front are looking a bit better, it's back to business. In order to lay out the track work for Neptune Yard, I needed to determine the placement of the mainline curve around the end of the peninsula. A 28 inch radius cutout is seen pinned here for the outer track of the double mainline. Curved turnouts on the left will run into the yard. I'm still waiting on some Fast Track supplies for crossovers and turnouts before continuing laying track. (4/10/11)
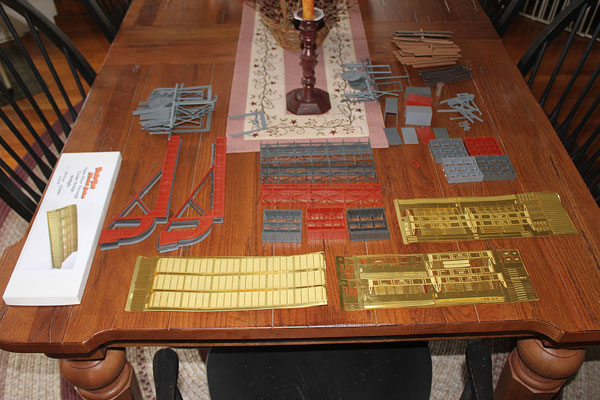
In the meantime, I spread out my options for the Shark River lift bridge on the dining room table. The plastic parts are from various Pola and AHM bridge kits which I used exclusively for the Manasquan draw. Etched brass parts are being considered for the Belmar bridge lift span which would be kit bashed with the plastic parts. This is what I wanted to originally attempt with the Manasquan bridge, but the plastic kit came out too nice and was kept. (4/10/11)

Track work continues with the camper tape foam sub-roadbed installed around the end of the peninsula. It doesn't look like it, but it's 16 feet from the far wall to the foreground curve. Some Neptune yard tracks are being positioned along with the freight house (green box). Yard tracks will occupy both sides of the mainline, like the prototype. (4/14/11)
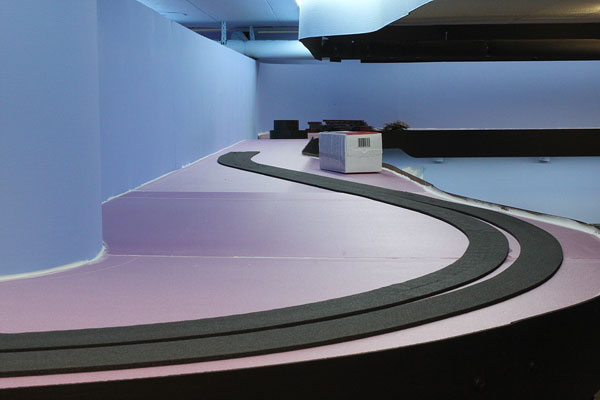
The foam sub-roadbed continues around the 28 inch radius curve and past the Asbury Park Station, being represented by the box of plaster. I'm still working on what will occupy the space inside the curve, referring to old photos and maps of the area from the 1950s. It looks like mostly small industrial buildings with commuter parking across the tracks from the station. (4/14/11)

As track construction continues, the cork roadbed has been installed over the foam sub-roadbed using the clear latex caulk. I use a pretty decent coat in this step to ensure a good bond to the foam tape. (4/16/11)
An overview of the layout shows the double track roadbed is ready for track as far north (railroad east) as Deal Lake between Asbury Park and Interlaken on the far right.. Beyond this point, construction of the layout will involve more land forming as the terrain becomes less flat. (4/16/11)
I wanted to illuminate the SG Interlocking panel at Sea Girt. My obvious solution was to install a strip of leds above the panel and hook it up to the layout lighting. (4/16/11)
The end result. These leds provide an incandescent color of light...soft and not distracting. Notice the color difference compared to the whiter layout lights. (4/16/11)
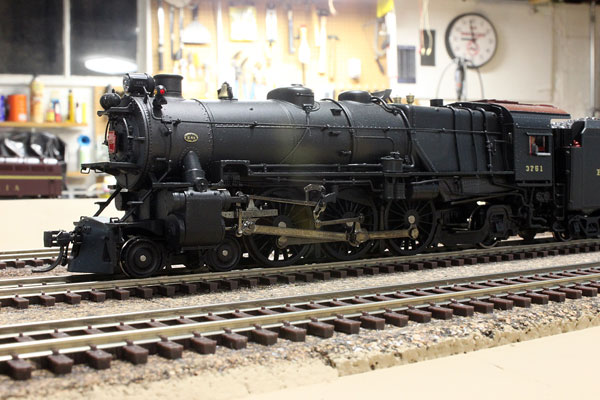
PRR K4s Pacific 3751 sits on the engine service track at Bay Head Junction waiting for some minor work...a dump of the cinders, which will need to be cleared from the track by hand...and a topping-off of the tender with water at one of two spouts tied into the 100,000 gal. tank there. (4/17/11)
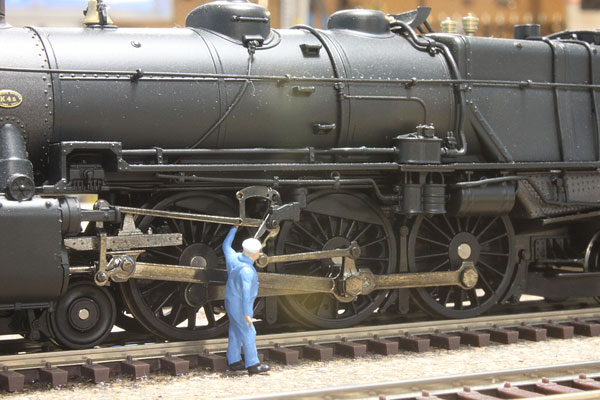
Running gear was also occasionally oiled at Bay Head, although most of this type of maintenance was done at South Amboy. Bay Head Junction also had small piles of coal trackside which could be loaded manually if needed, but this was also a rare practice by the 1950s. (4/17/11)
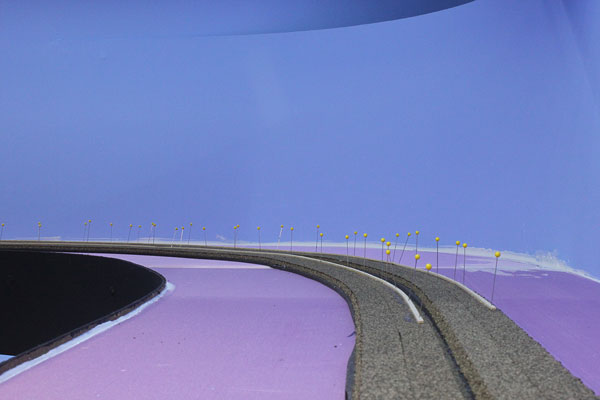
Around the 180 degree curve the tracks will be super-elevated. Using the method that worked great on the lower level curves, I glued lengths of strip wood to the cork roadbed using carpenter's glue and a lot of pins. After a few days of curing, I'll sand it all down and create feather edges at the entrances to the curve. (4/18/11)
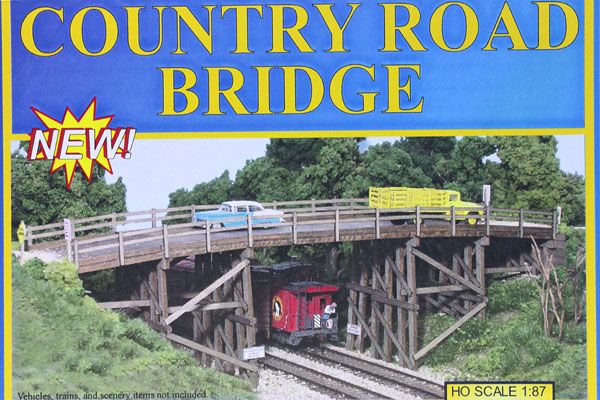
This wood overpass from Monroe Models fits the bill to a tee for the Sylvania Ave. overpass between Neptune City and Avon. The prototype was replaced in the late 1970s with a concrete span. This model is pretty faithful to the original, which I remember quite well. It will be tucked into the left quadrant of the curve heading north out of Belmar. (4/18/11)
A PRR K4s pulls into the Belmar Station heading eastbound for New York in 1955. The Belmar station was built in the 1902-06 period and is similar to other NY&LB stations of this period built of stone. On the layout, the helix would be in the distance with the backdrop on the right. (4/20/11)
A CNJ Baldwin double-ender pulls into the Bradley Beach Station heading westbound for Bay Head in 1955. The southern end of the Neptune Yard was located beyond the station in the distance. On the layout, the backdrop is on the left. The spur leads to a coal dealer. (4/20/11)
Sheets of cork have been glued down for the Neptune Yard between Bradley Beach and Ocean Grove/Asbury Park. This yard will hold 5 tracks...3 for the freight house and team tracks, 2 as passing sidings/team tracks as needed. On the east side of the mainline (left in the photo), a single passing/team track is planned. STILL waiting on fast-tracks parts for turnout const. (4/22/11)
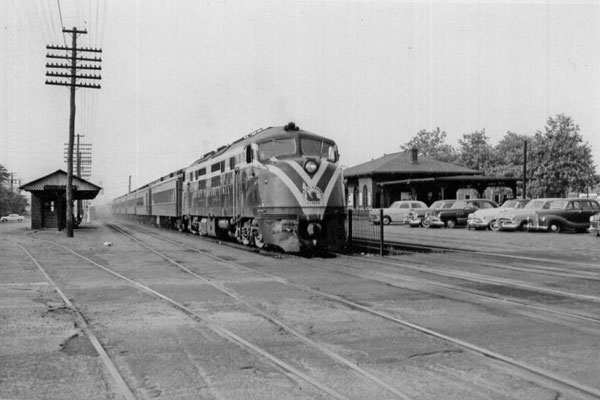
The westbound entrance to Neptune Yard is shown here. Bradley Beach station is represented by the wood box. The yard lead will come off the left turnout. The right turnout is for the passing siding. Compare this to the prototype photo above...four tracks with a local siding which will not be modeled since it was inactive by the mid 50s and there just isn't enough room to model it. (4/22/11)
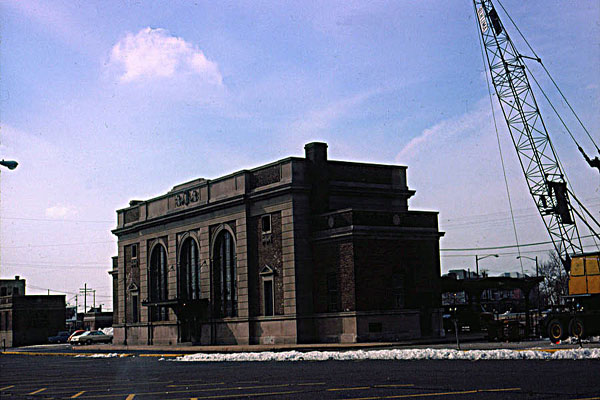
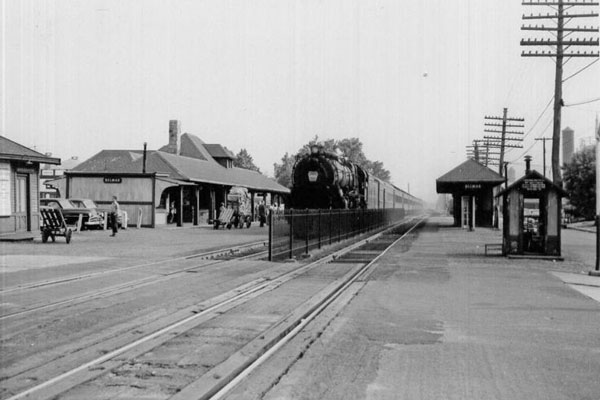
This photo is of the Asbury Park station before its destruction in 1978. The mainline is off to the right. This was the most substantial station on the NY&LB and it was a shame that it met an early demise after only 50 years. (5/10/11)
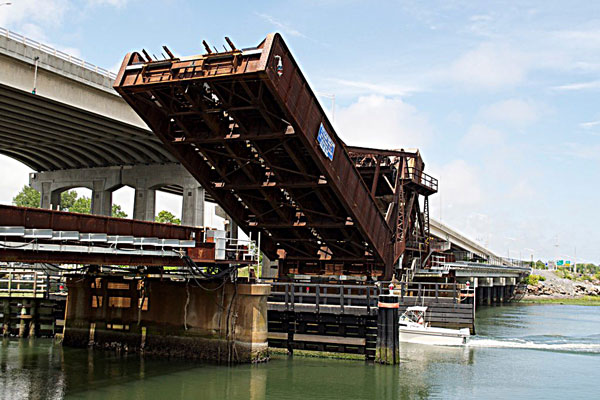
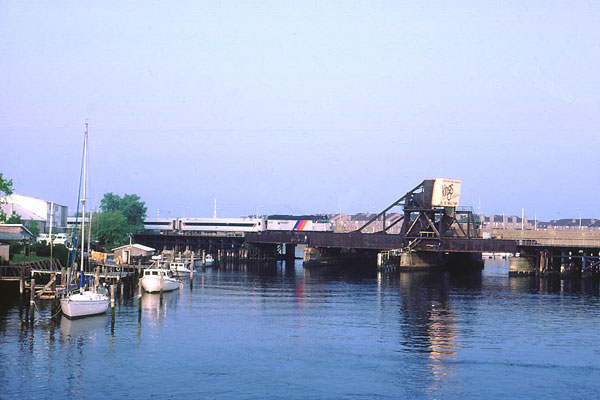
This is the rolling lift bridge over the Shark River in Belmar in recent times. The wood piling approaches have been replaced with modern concrete, but the original lift span remains. The high bridge in the background carries State Route 35 over the river. (5/10/11)
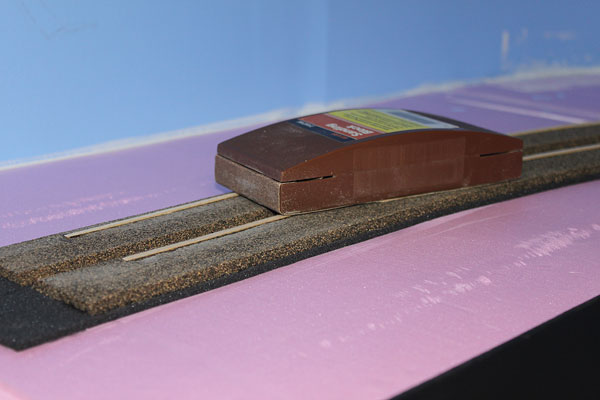
It took a bit of effort, but work on the layout has resumed after an absence of over three weeks. The first order of business was to clean up the basement a bit since construction and the resulting mess of tools and debris has been building up with all of the trackwork and related bedlam. Then it was on to sanding down the basswood strips around the far curve for the track super-elevation (above). (5/17/11)
Trackwork for the Neptune Yard at Bradley Beach is now roughed out (above). The yellow box is where the freight station will be. I'm using a B.T.S. Freight House kit for this structure. It's fairly close to the prototype and will fit nicely in the allotted space. I've been waiting for over a month for some supplies from Fast Tracks so I can build the needed crossovers. Can't lay any more track until the crossovers are ready for Belmar, Bradley Beach and Asbury Park. (5/17/11)
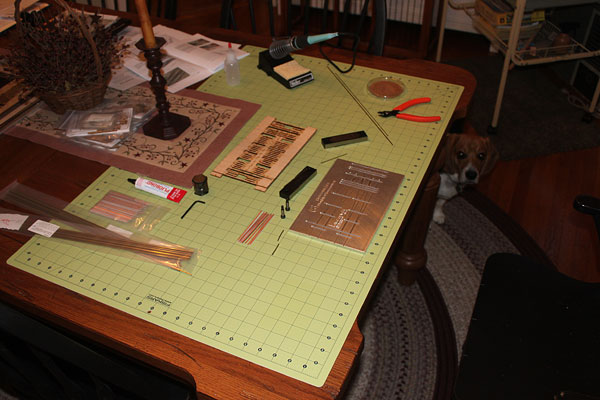
Here is a view of my new dining room work bench. The extra room and clean environment is conducive to progress. My beagle Abigail doesn't mind, though. She's peering around the end of the table. Right now, I prefer working upstairs on the various model projects. (5/23/11)
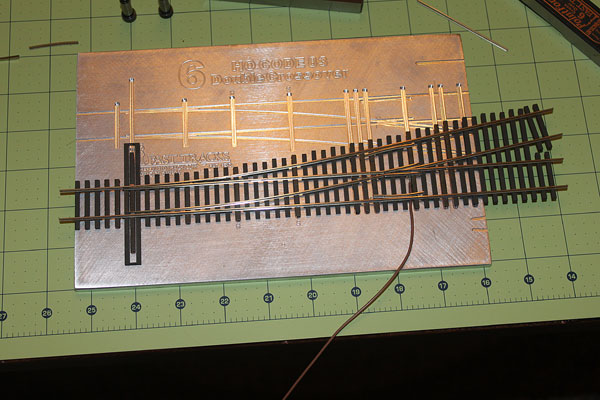
The Fast Tracks parts finally came in and here is a turnout just completed. The jig is for code 83 single or double crossovers. It can also be used to build single turnouts like the one above. I've now started building the crossovers that I need to resume track laying on the layout. (5/23/11)
Yes, I know, it's been a long time since the last update. I needed to take a break from construction and take a long, hard look at where I go from here with the half of the layout that the bench work is completed for. My first priority is to finish the track on the upper level. This involved building three crossovers as shown above for Belmar, Bradley Beach and Asbury Park. They are now finished and I'm itching to get some track down. (8/10/11)

My hard thinking also included wiring the various signal blocks, signals, crossing flashers and gates, and the switch machines where used. I also had to decide just how far to go with basic scenery for now. Generic buildings on hand will do for now until a have the luxury of bashing or scratch-building what I need. With summer winding down, construction will be picking up so I can finally start running trains! (8/10/11)
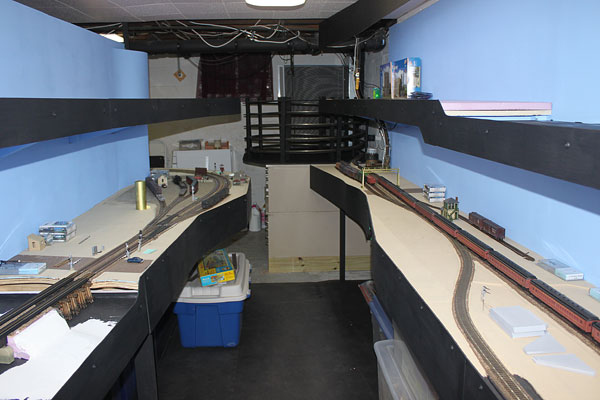
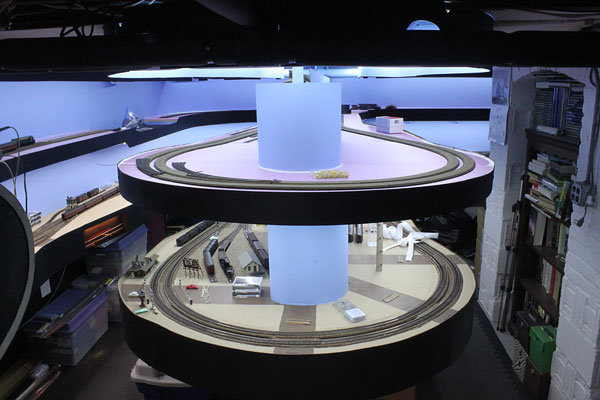
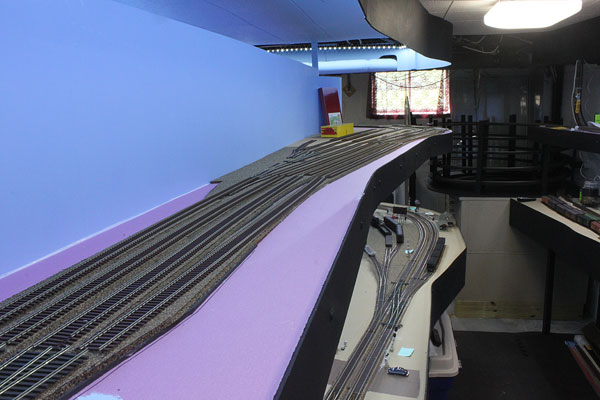
Even though I've been working on the layout off and on since August, most of the work has been on paper and in my head. Needless to say, not very conducive to photos showing what's up. So I thought I would give a visual update for everyone showing how the layout looks right now. Above shows the double decks along the center peninsula. (10/28/11)
Here is the view of the Bay Head loop and the small staging yard to the right. The center of the loop will eventually be filled with a forest of hardwoods and pines like the prototype. I will also probably add some LED lighting over the loop area so as to not rely on the general overhead basement lighting. (10/28/11)
Here we go. This is Belmar coming off the single track helix. The cork roadbed for the siding is just glued down and will get a code 70 ME track in a few days. In the distance will be Belmar station followed by the Shark River rolling lift bridge. (11/3/11)
My latest, and probably last, motive power purchase is this Baldwin DR-6-4-20 CNJ Double-Ender brass model from Overland. I plan to paint this CNJ #2000 in the toothpaste green and yellow stripe scheme. Of course, upgraded with DCC and sound. Having fun again! (11/3/11)
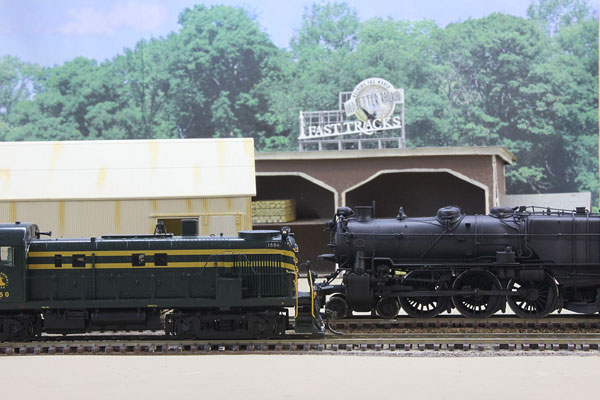
A CNJ freight drill heads into the Bay Head loop as a PRR midday passenger run pulls into Bay Head station heading Eastbound for NYC. The buildings in the background will eventually become the Ferry Lumber Company (minus the Fast Tracks billboard lol) (11/7/11)
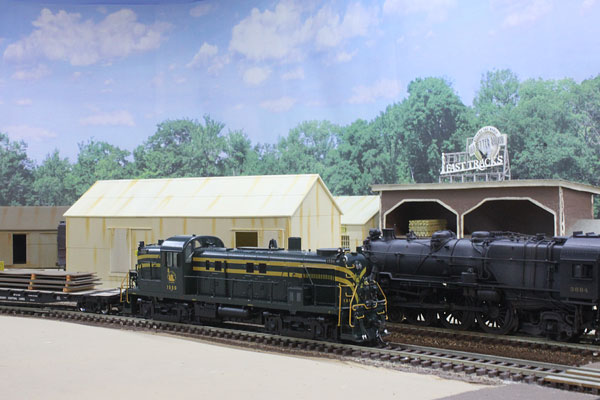
A few seconds later. The CNJ RS3 is a Overland brass model while the PRR K4s Pacific is a brass model from Precision Scale. The brown lumber shed in the background is from my first layout way back in 1972 and was scratch-built from cardstock by my father. (11/7/11)
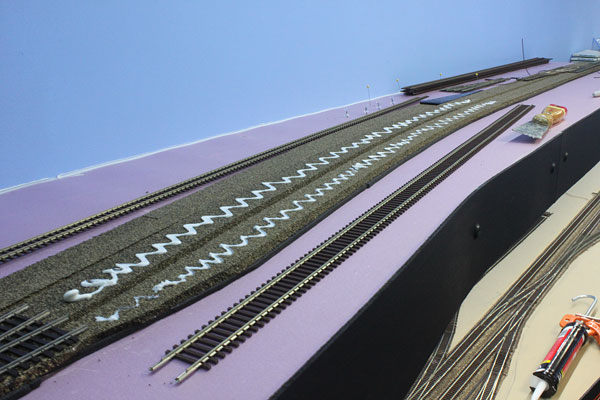
Track installation on the upper deck of the layout has commenced! A squiggly bead of DAP clear silicone adhesive has been applied to the cork roadbed leading from the helix (lower left) into Belmar. (11/21/11)
The next step is to smooth out the adhesive into a thin layer using a putty knife. The sealant is white initially but turns clear when it cures. The tracks to the right on the lower level are at Sea Girt Junction with the PRR. (11/21/11)
After smoothing out the sealant the code 83 Atlas flex track is applied and initially tacked with push pins while the track is positioned to its final contour. (11/21/11)
Finally, the track is compressed into the cork roadbed using straight/level pieces of wood or metal topped off with some weight. (11/21/11)
Track laying continues with the Belmar crossover and the Coast Gas and coal siding. The mainline is code 83 while all other trackwork is code 70 and set below the mainline grade. (11/24/11)
With the tracks reaching the Shark River, I decided to temporarily fill the river with foam pieces and come back later to bridge it. Can't let this complex detail slow me down now! (11/24/11)
The next section to be tracked is the banked curve around the back of the layout between Shark River and Bradley Beach. The interesting Neptune Yard is knocking on the door. (11/24/11)
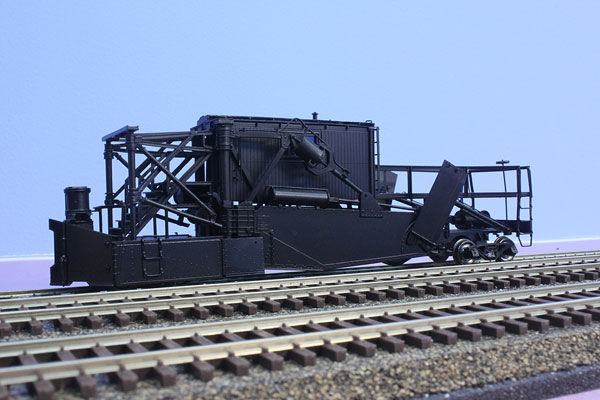
Sitting on the newly-installed Belmar siding is an old CNJ Jordan Spreader awaiting decals and weathering. This is an Overland brass model similar to what appeared on the NY&LB. (11/24/11)