Newest progress reports are at the bottom of the page
I will try and update this page with new photos at least every 3-4 days. The date at the end of the caption is when the photo was uploaded. The actual progress of the layout is a little ahead of what you see here.
December 2011 - June 2013
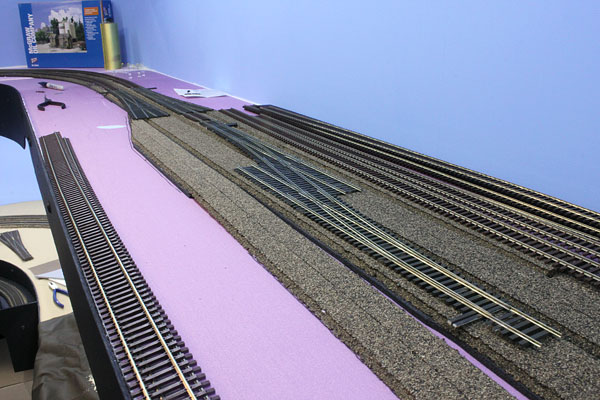
The NY&LB mainline has now reached the Bradley Beach station where the leads for the Neptune Yard begin to branch off both mainline tracks. The mainline will be completed first. (12/6/11)
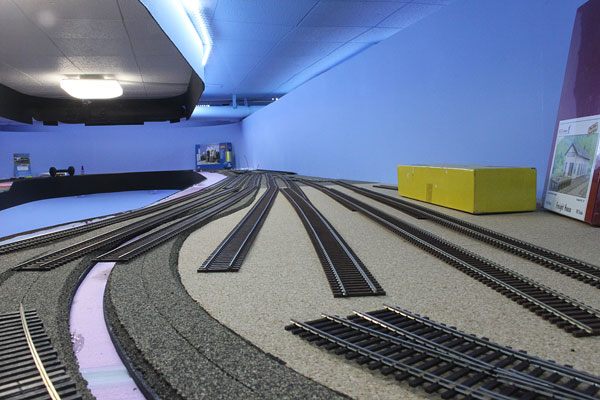
The view from the other end of Neptune Yard with Bradley Beach in the distance. The mainline roadbed is on the lower left. The yellow box is where the freight station will be located. (12/6/11)
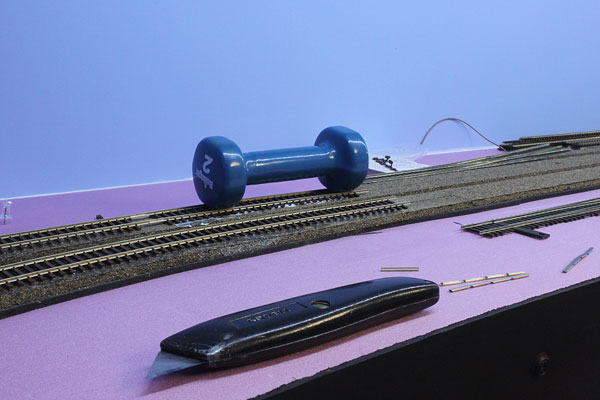
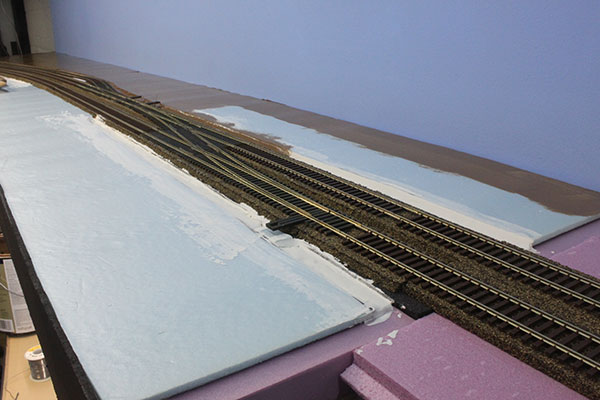
Here both tracks of the mainline branch out at the southern end of Neptune Yard using a couple of FastTracks #6 turnouts. I also used FastTracks for the Bradley Beach crossover. Note that the siding roadbed loses the foam base and realistically drops below the level of the mainline. (12/7/11)
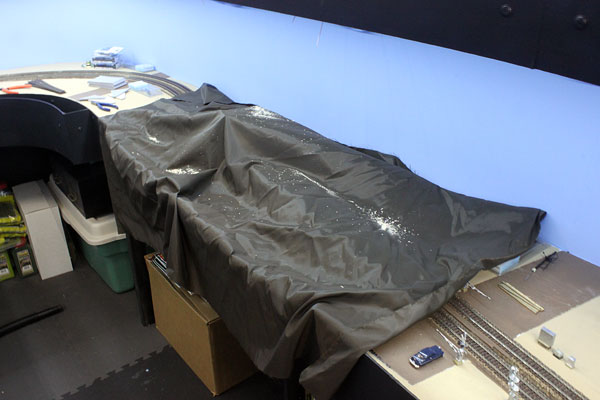
With all of the construction now going on above the lower level, I needed to protect what was already built below. Here a piece of lightweight nylon cloth covers the Manasquan River and bridge and catches the debris from the above hole drilling. Works really good. (12/7/11)
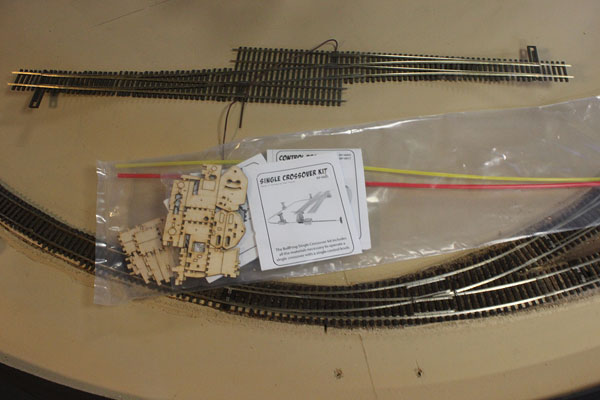
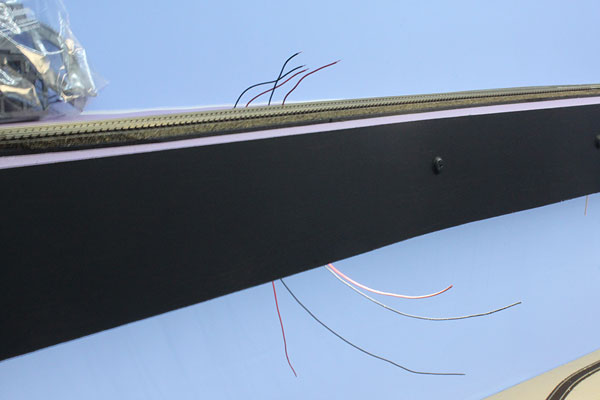
Happy Holidays everyone! It's been a busy past few weeks and even though I had nothing really interesting to post, work has been continuing, albeit at a slower pace. I decided to use the Fast Tracks Single crossover kit (above) for the upper level crossovers at Belmar, Bradley Beach and Asbury Park. The first one is almost ready for installation. (12/26/11)
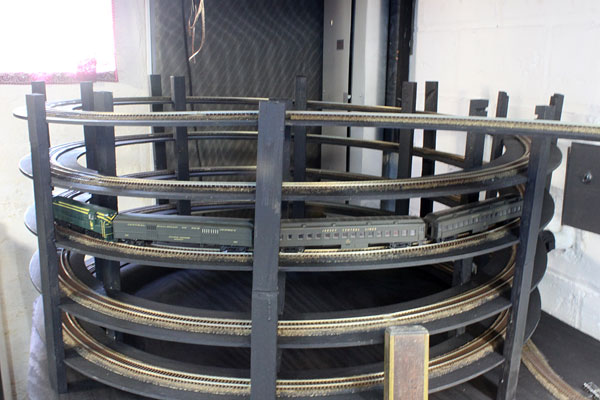
I temporarily halted mainline construction at Bradley Beach for the holiday and have been working on track tweaking. Above is an Atlas Trainmaster and some Athearn CNJ coaches on the helix. Surprisingly, the helix is giving me hardly any problems with the diesels, 4-6-2 K4s and passenger coaches despite the slight undulations, steep grade and tight radius. (12/26/11)
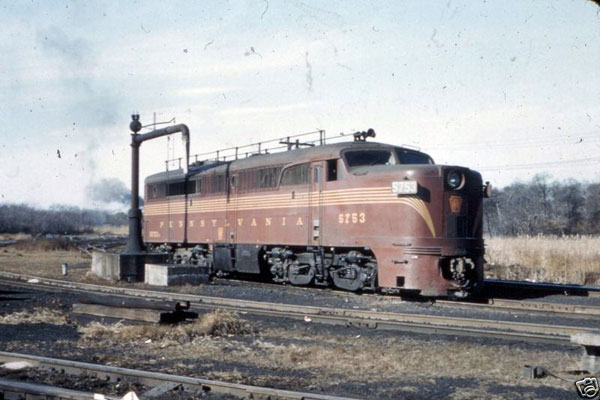
PRR Alco PA #5753 waits on the service track at Bay Head Junction in 1956. The water column is still in service as PRR K4s Pacifics still have a year of service ahead on the NY&LB. (12/28/11)
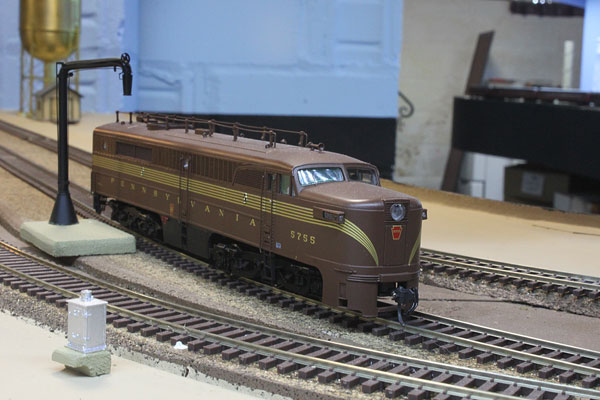
A PCM Alco PA tries to duplicate the 1956 scene in my basement. The diesel number, number boards and water column are a little off, but the effect is still apparent. Love this hobby! (12/28/11)
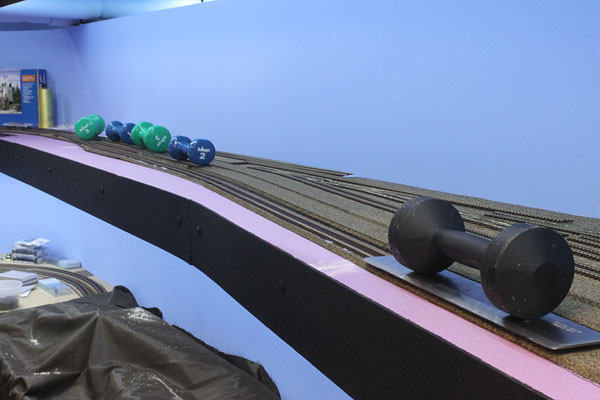
The construction pace has been picking up over the holidays. Weights hold in place the mainline and the Neptune passing siding in the foreground. (12/31/11)
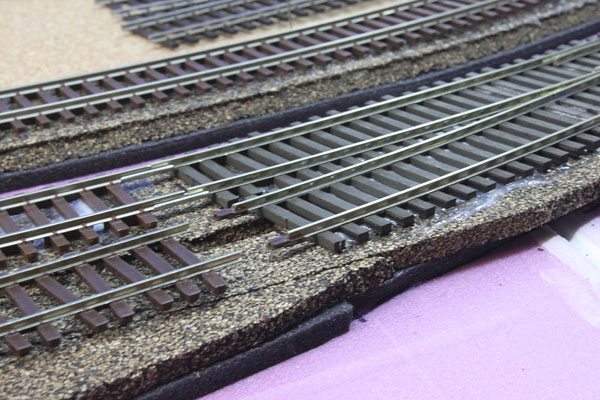
The transition from mainline to passing siding is accomplished using ME transition rail joiners. The track on the right is code 83 while the siding track on the left foreground is code 70. (12/31/11)
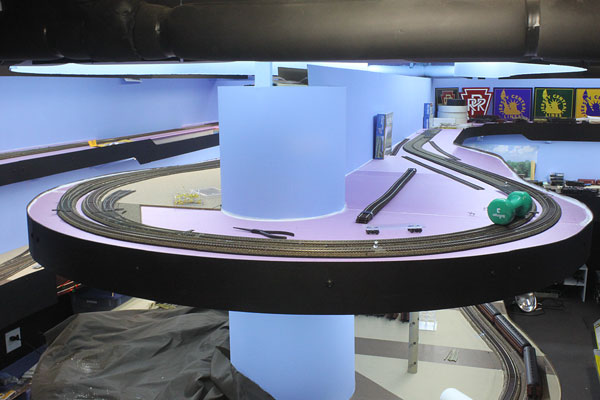
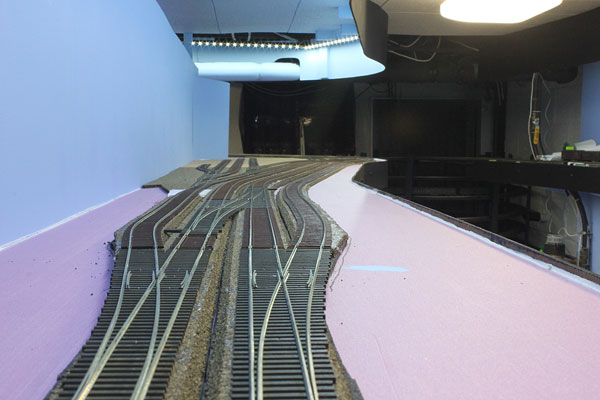
The NY&LB mainline finally reaches the 180 degree upper level turn and enters Asbury Park! The northern entrance to Neptune Yard (left) involves four curved turnouts. (12/31/11)

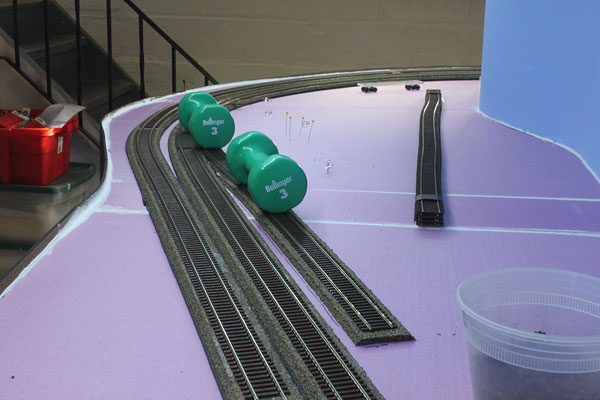
Looking down the new mainline toward Bradley Beach. The passing siding is on the left while the expanse to the right will hold Neptune yard. (12/31/11)

This network of tracks, involving three curved turnouts, is the northern entrance to the Neptune Yard. Several stub-ended sidings will occupy the space to the left. (1/2/12)
On the other side of the peninsula, the mainline is now finished through Asbury Park. This siding was a team track just south of the Asbury Park-Ocean Grove station. (1/2/12)
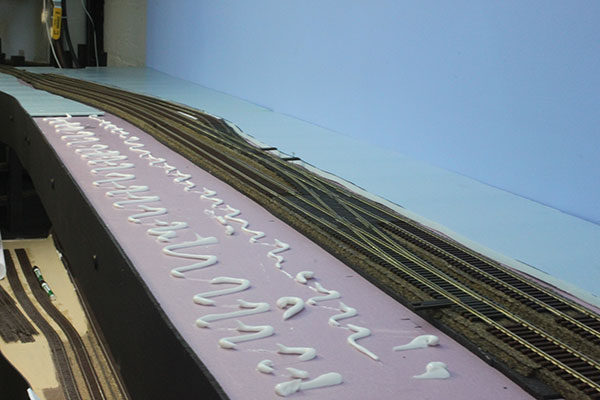
The caulk is spread and the last section of track is about to be installed on this half of the layout. Other than the tracks over the future Shark River bridge, I can rest my track-laying tools for a while and start on wiring and turnout controls. (1/9/12)
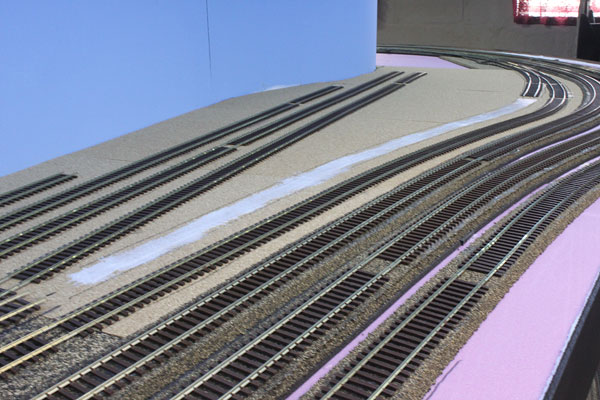
Looking north from Bradley Beach, the two track mainline branches out into the Neptune Yard with the Eastbound (north) passing siding on the right. The left track is the yard lead which ramps down below mainline grade at the white ramp in the distance. (1/9/12)
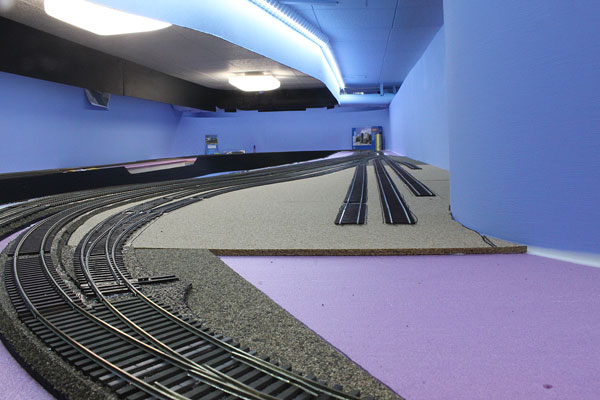
Here is the view of the yard from the end of the peninsula. The open area in the yard will be used by various local businesses to unload the team tracks on either side. Eleventh Avenue will cross the scene where the cork sheet ends. (1/9/12)
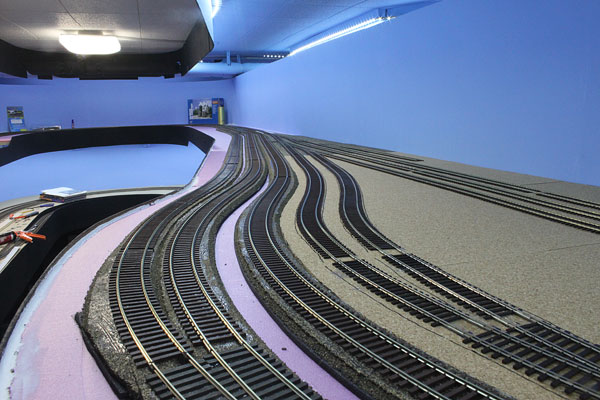
The mainline through the yard. From left is the eastbound passing siding, eastbound main, westbound main, westbound passing siding and team track #1 in the yard. The freight station will occupy the far right next to the backdrop. (1/9/12)
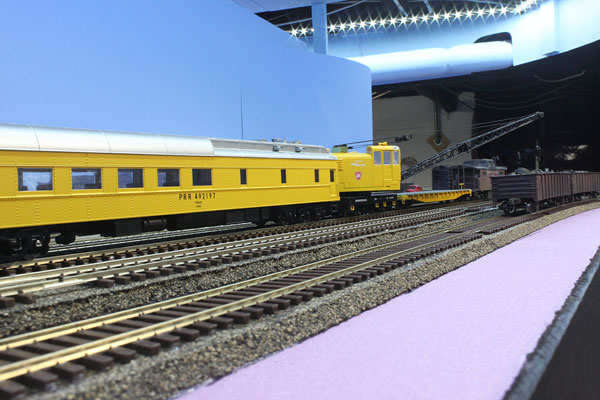
While drilling holes for the feeder wires on the upper deck, I decided to set up some freight cars in the Neptune Yard and unpack the PRR MOW cars as well. (1/20/12)
While the yard was still fairly busy with freight transfers in the 1950s, it was probably better known for holding the PRR Monmouth Park excursion trains during the summer months. (1/20/12)
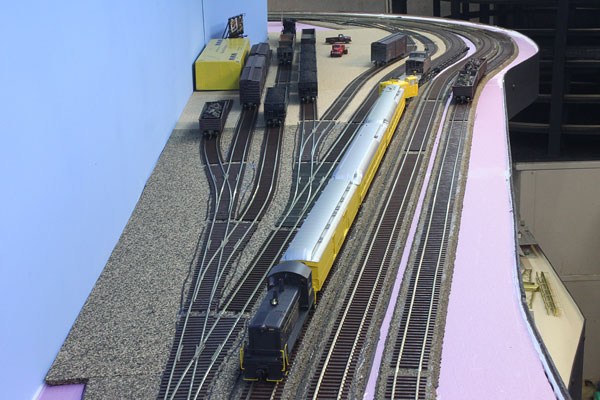
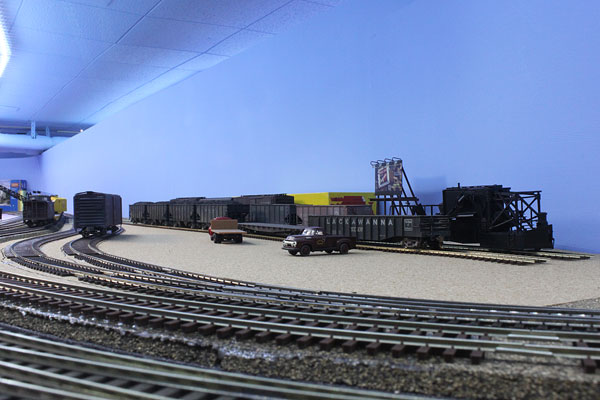
An overhead view of the yard. A scratch-built or kit-bashed freight station will replace the yellow box eventually. All yard trackage is code 70. (1/20/12)
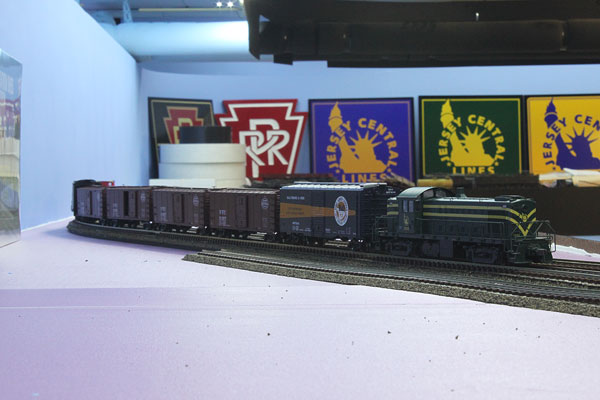
Just north in Asbury Park a CNJ drill passes the Asbury station heading the Neptune Yard. An Atlas RS1 has the honors today. (1/20/12)
Here is a view of some of the rather tedious wiring of the upper level trackwork. These feeder wires will connect the track rails to the DCC buss underneath. The turnout frogs will all be connected to Frog Juicers. Ahhh, the smell of solder and flux fumes once again! (1/26/12)
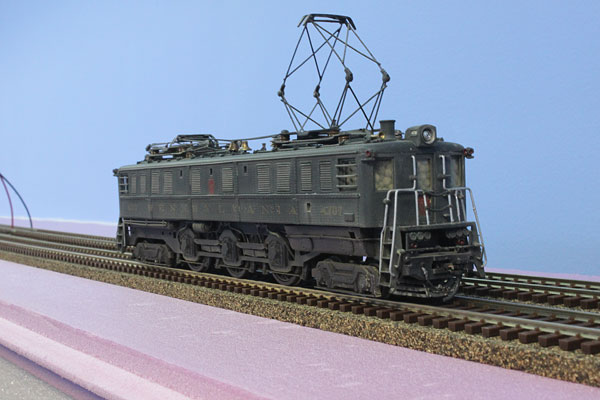
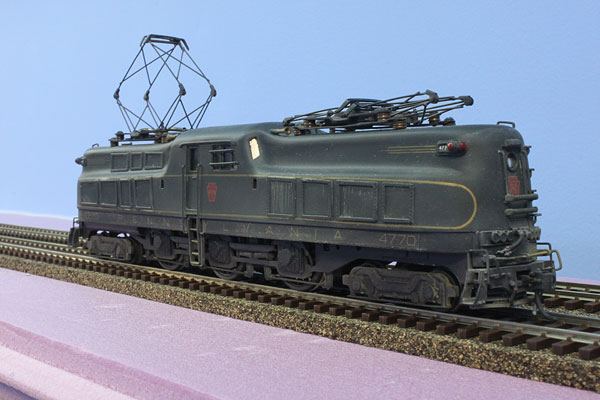
Here is an Alco brass PRR P5 Motor. Even though South Amboy is still a long way off on the layout, I'm ready to model these electrics coming off the Amboy Secondary into the motor yards during the 50s. They were pretty beat up by the 1950s and close to retirement. (1/26/12)
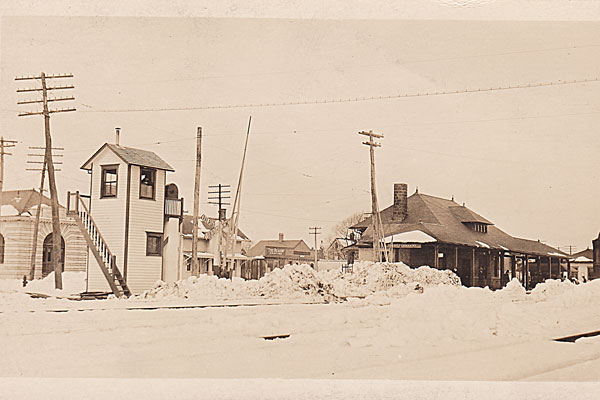
After a few requests, here is a photo of the Arnold Avenue rail crossing in Point Pleasant Beach in 1914. The two story crossing shanty was built in 1913 to CNJ specs and lasted into the 1960s. The second stone station is in the background and lasted until 1966. (1/30/12)
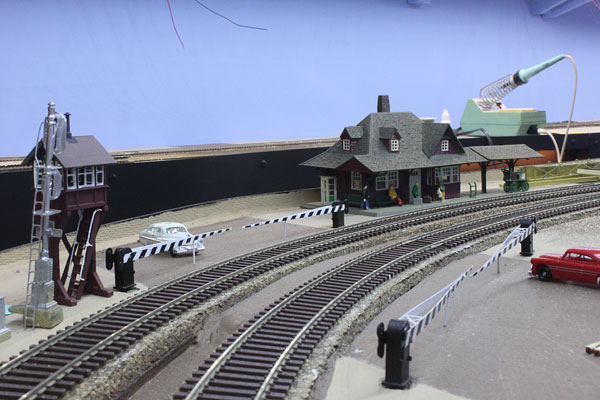
The same crossing on the layout set during the 1950s shows a couple of temporary stand-ins for the crossing tower and the Point Pleasant station. Both will need to be scratch-built eventually. That's Arnold Avenue crossing the tracks. Downtown Point Beach would be to the left. (1/30/12)
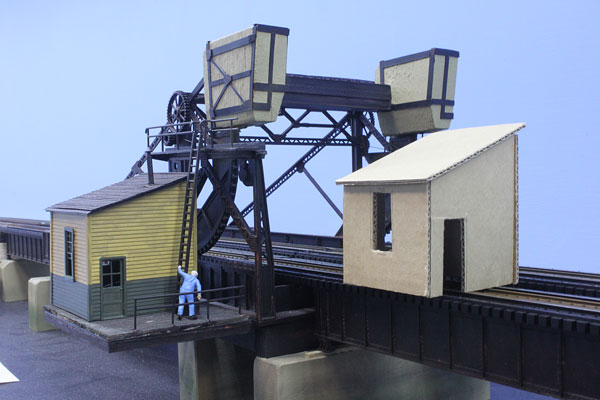
While wiring slowly continues on the upper level, I decided to populate the layout with quick and dirty cardboard buildings until I can build the real McCoys. This is the cardboard bridge tender shanty for the Manasquan River bridge I built before constructing the final shanty out of styrene. quick and dirty but does the trick I think. (2/16/12)
Wiring is a dull subject so while waiting for Frog Juicers and such in the mail I have been contemplating the eventual scenery end of things, including ballast and backdrops. Meanwhile, here is a PRR p5a modified planned for the South Amboy end of the layout. It's another Alco brass import that will need TLC and DCC/sound installed. (2/16/12)
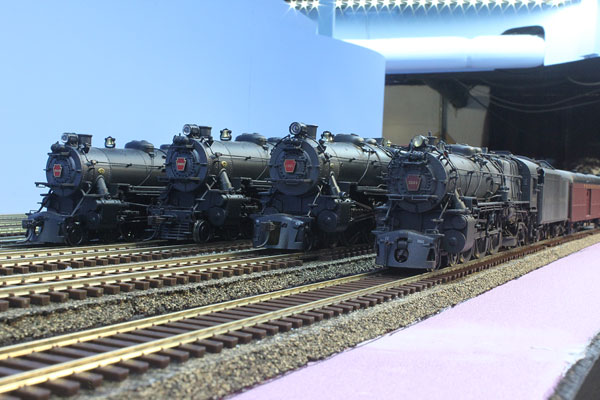
A lineup of PRR K4s Pacific Locos at the Neptune yard. The two locos on the left are BLI models, followed by a MTH model and a Precision Scale brass model on the right. The two higher center tracks are the mainline. These are just a quarter of the K4 engines waiting to pound the rails of my NY&LB line. (3/19/12)

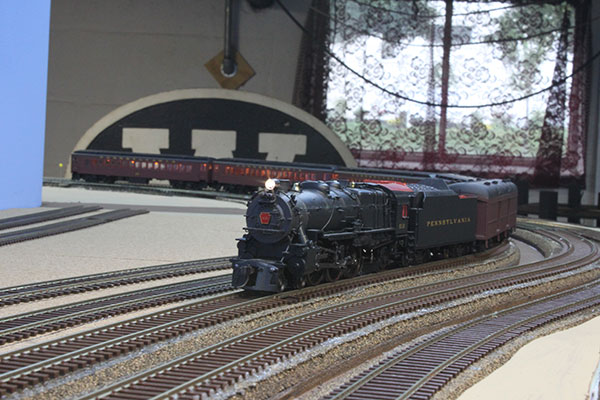
Pennsylvania RR K4s #3684 gets some attention from the Engineer on the NY&LB. Work on the layout continues at a slow but steady pace. My personal life has been on the upswing recently and the onset of spring have combined to steal precious modeling time from me. But I remain committed to moving forward with the layout. (3/19/12)

Track feeder wires poke through the roadbed as wiring continues on the layout. These wires will be cleaned up, tinned and soldered to the rails. Recent wiring also included a DC buss for the accessories. (4/2/12)
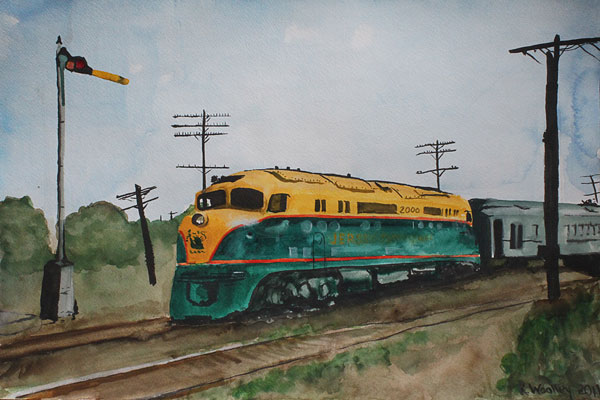
My talented daughter whipped up this watercolor painting of a CNJ Baldwin Double-ender at Bay Head in 1948 for me. Too bad this color scheme was replaced with toothpaste stripes over green by the time of my modeling era. (4/2/12)
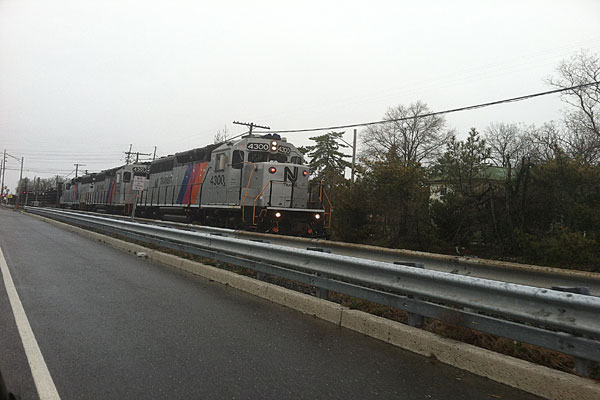
On March 25th a NJ Transit work train was in Point Pleasant Beach depositing continuous welded rail along the old NY&LB, now the Coast Line. That's three GP40-2 diesels heading the 1,900 foot long train! This project is replacing the existing worn out welded rail on the line. (4/2/12)
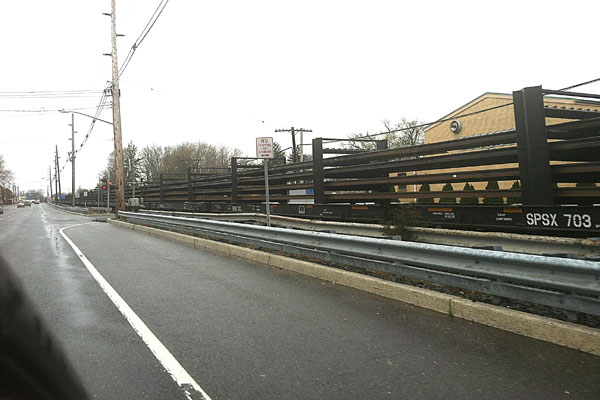
Route 35 North runs along the tracks and I was able to get some great shots of the cars loaded with the rails. I then made a second run down the highway and shot a video of the entire train which consisted of 28 flat cars with special brackets to hold the rails. (4/2/12)
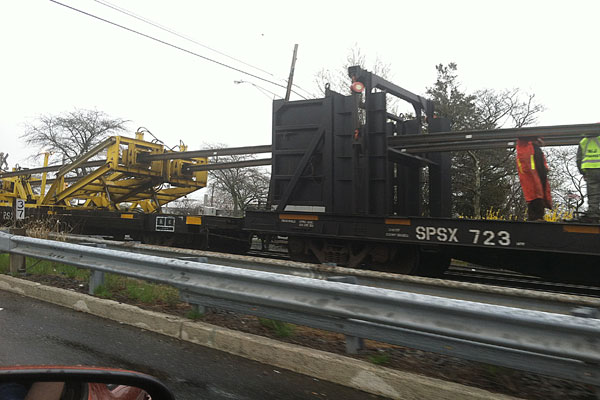
After the last flat car the rail was fed into a puller/spreader that guided the rails to the outside of the existing tracks (left). The process was pretty noisy when the rail was pulled. (4/2/12)
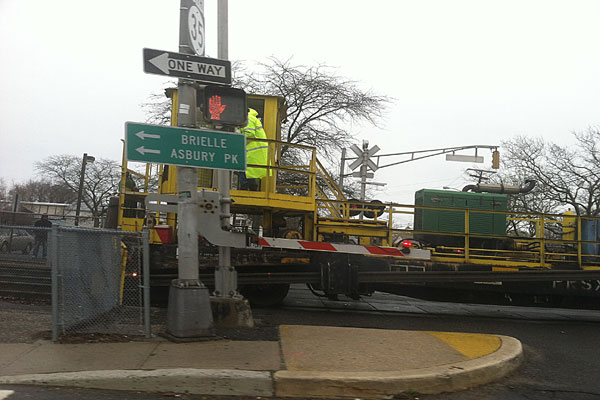
The final car on the train lowered the rails to the ground. Workers with cutting torches had to cut the rails at each grade crossing such as this one at Arnold Avenue. Fascinating stuff. (4/2/12)
Well it has been a while since the last construction update but work on the layout has proceeded. I was waiting for an upgrade to my photo-editing program and now everything is hunky-dory. Above is the circuit breaker for the upper level district. (5/24/12)
The upper level track wiring is now complete and I can now run trains over the whole damn thing! Scotchlock connecters above tie the Neptune Yard and mainline tracks to the DCC buss. In the background is a Hex Frog Juicer. Still need to tidy up the wiring a bit. (5/24/12)

Various engine test runs have been going on over the layout to check track integrity. Here a CNJ DR-6-4-20 double-ender enters the upper level from the helix. There are a few track issues that are marked to be addressed, but overall everything is looking pretty good. (5/24/12)
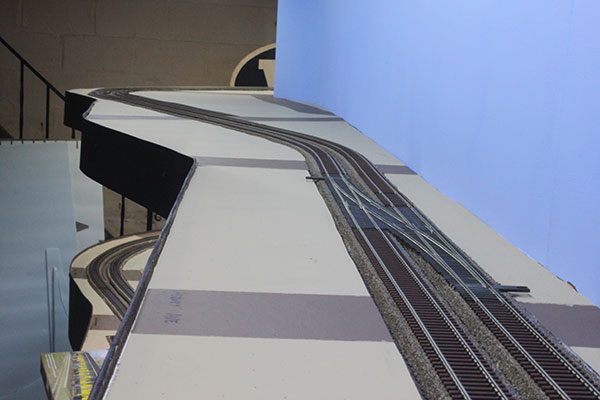
As seen above, a small part of the upper level is still waiting for track. This section will be done once I decide on the final plan for the other half of the basement which will include the NY&LB from Interlaken to South Amboy. Turnout controls are next on the agenda! (5/24/12)
While track testing and adjustments have been ongoing, I was finally able to start finishing off the upper level with the same method as the lower level....1/4 inch foam. This is Belmar. (6/25/12)
The blue foam is down and the ditches along the ROW have been roughly formed in the Belmar section. The foam gets two coats of paint....dark brown first then a coat of sand color. (6/25/12)
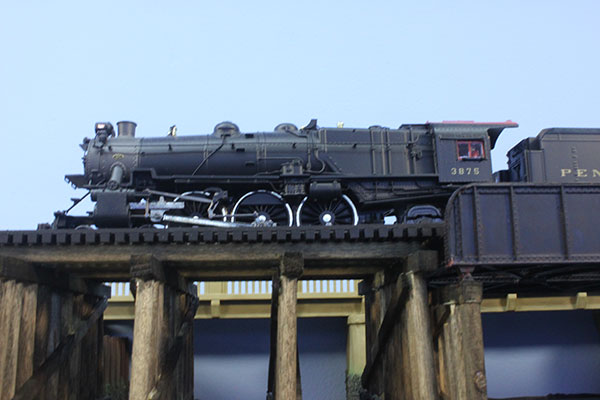
A PRR Commuter train heads westbound circa 1954. The foam topping is installed and painted. The modeled roads were left a dark brown for future reference. (6/25/12)
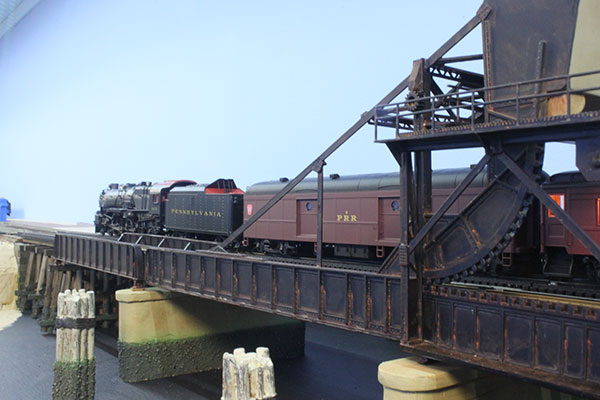
The same train has reached the Manasquan River draw and will soon be in Point Pleasant Beach. I'm itching to build the next bridge on the layout over Shark River in Belmar. (6/25/12)
This is the present far end of the layout at Asbury Park. Notice the cross-roads and the Asbury crossover. Point Pleasant Beach is on the lower level on the left. (6/25/12)
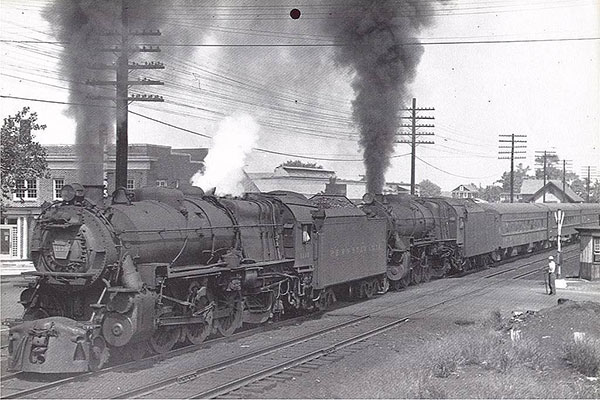
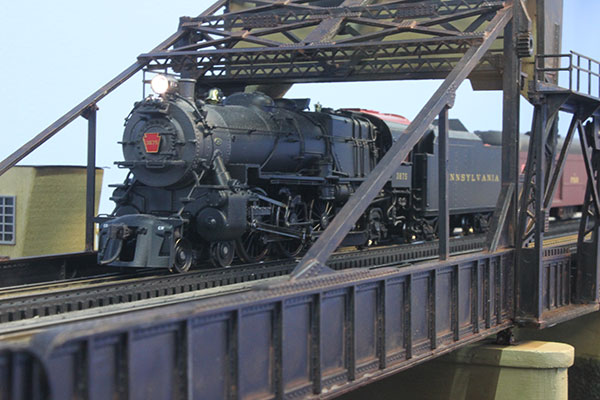
PRR #1138 double headed K4s Pacifics head westbound toward Bay Head in September 1954. Taken in Belmar, the freight station is above the coaches on the right. (6/25/12)
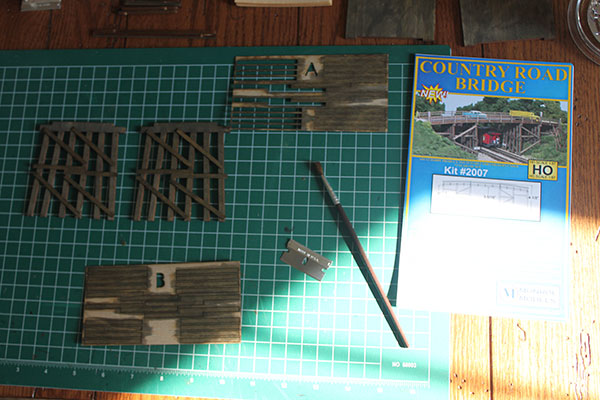
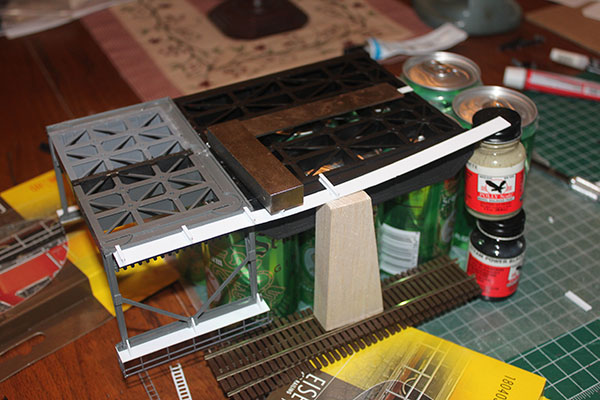
Well, it's back to the dining room table for construction of the wood Sylvania Avenue overpass, which carried the main road between Neptune and Avon over the NY&LB. This bridge lasted until the mid 1970s when it was replaced with the present modern concrete bridge. (7/12/12)
The Monroe Models Country Road bridge takes shape. I washed the basswood and micro-plywood pieces with an alcohol-india ink mix followed by a brown weathering wash from MicroMark. The Shark River movable bridge is next on the construction schedule. (7/12/12)
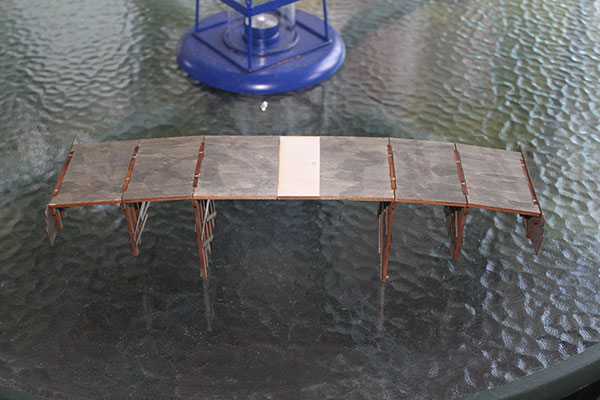
The plywood deck is complete.. I had to lengthen the span by an inch to accommodate the fact that the bridge is spanning curved track. (7/23/12)
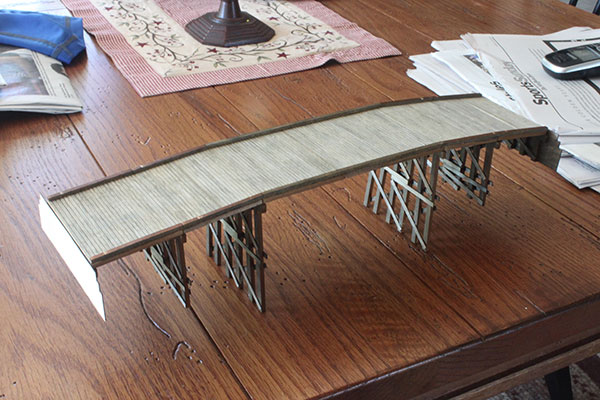
Next came the scribed plank deck sheets followed by the wood curbing. Since the bridge is longer, the wood railings also needed to be lengthened. (7/23/12)
The completed bridge now is ready for the land around it to be built up with foam layers. (7/23/12)
The Sylvania Avenue bridge. Work will now commence on the Shark River Bridge. (7/23/12)

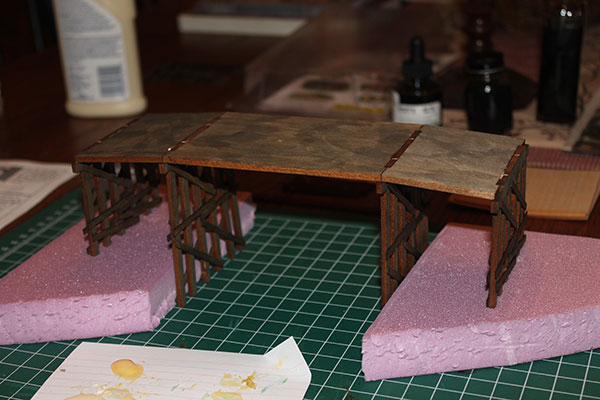
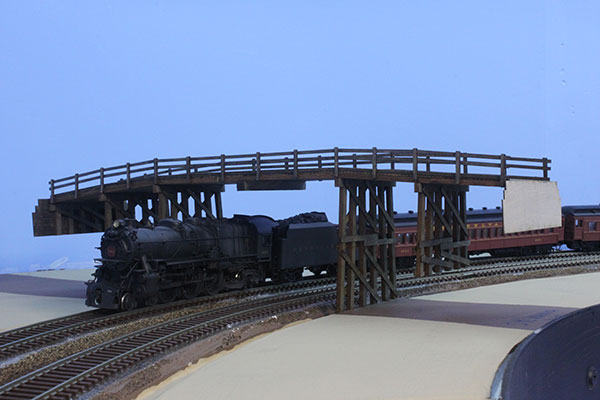
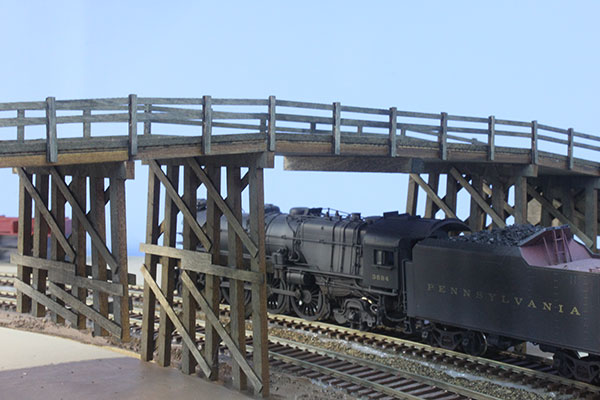
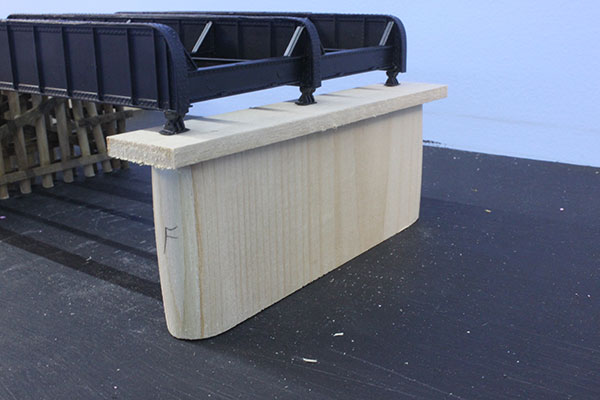
Sandwiched 1 inch foam was used to build up the land on both sides of the overpass. This was a shallow cut that was later built up to accommodate the first overpass here. The modeled bridge above was the second one built taking Sylvania Avenue over the tracks. The next step is to glue the foam together and carve it into the final shape. (7/28/12)
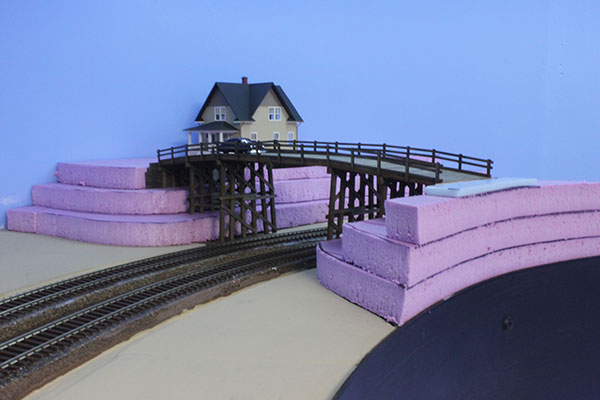
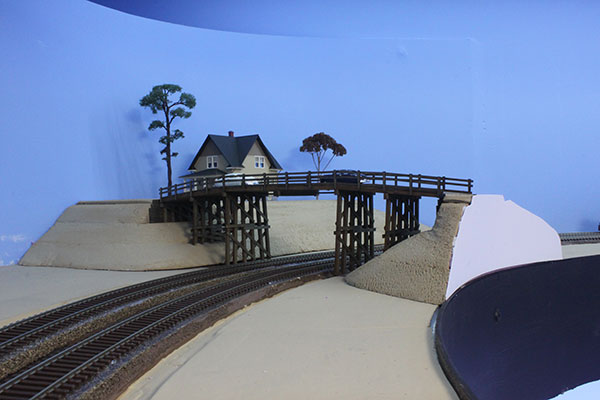
Another view. The model house is nearly identical to the real house that sat on the hill near the overpass and can be easily seen in various films shot in this area in the 1950s. The house was torn down in the mid 1970s when the cut was widened. The original house had forest green trim which this one will also sport. (7/28/12)
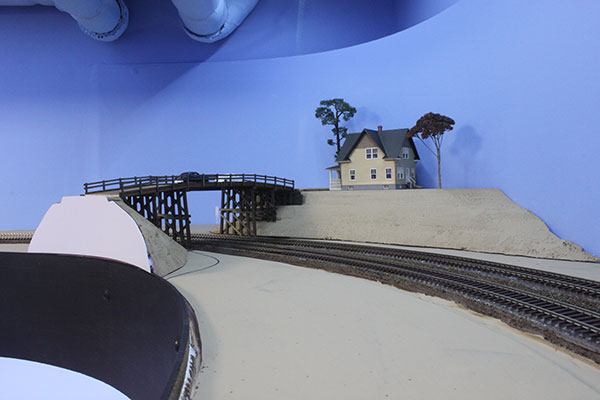
The same scene as above with the foam carved, sanded and painted. I embellished the scene with some trees....the one on the right is a dried sedum blossom. The left one is a JTT tree. I'm really enjoying finally working on some real scenery! What a difference it already makes! (7/30/12)
The same scene as above showing the carved foam landforms. The styrene facing will be painted black to blend in with the fascia. The foreground will be grassy fields. The Avon station (which isn't being modeled) would be to the lower right. (7/30/12)
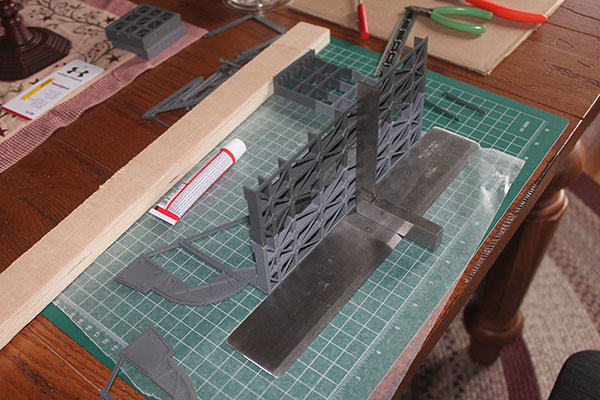
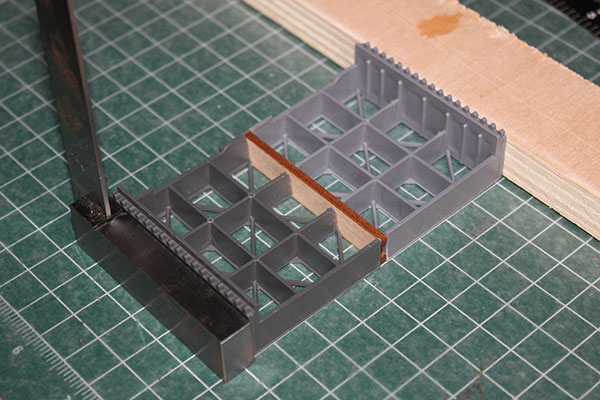
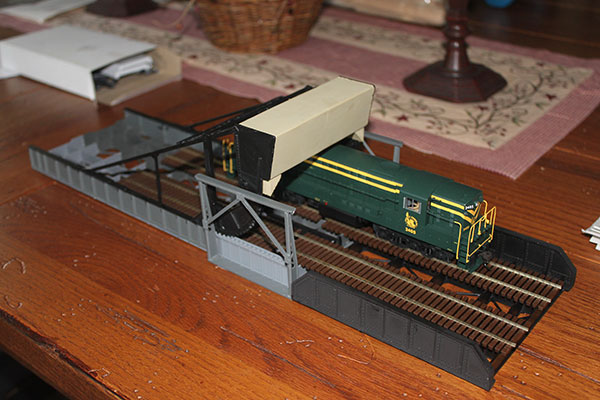
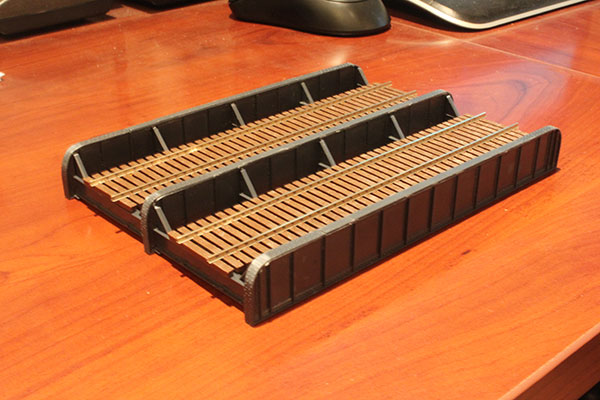
Construction of the Shark River Schertzer rolling lift bridge is under way. To build a double track bridge I had to combine two single track kits as you can see by the different plastic colors. A straightedge and square hold everything while the glue dries. (8/14/12)
The Shark bridge was a later design by some 20 years compared to the Manasquan and Morgan bridges on the NY&LB. One of the main differences was the single concrete counterweight verses the split design on the earlier bridges. A more impressive look. (8/14/12)
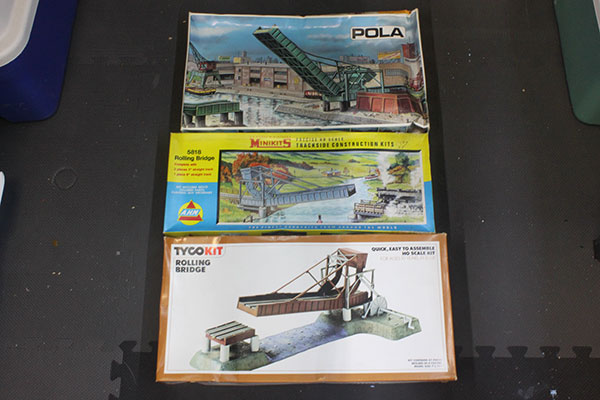
The plastic kits I'm using for these bridges are all from the 1960s and 70s. All were single track spans put on the market by several manufacturers. Fortunately all used the same tooling so the parts are all interchangeable. (8/14/12)
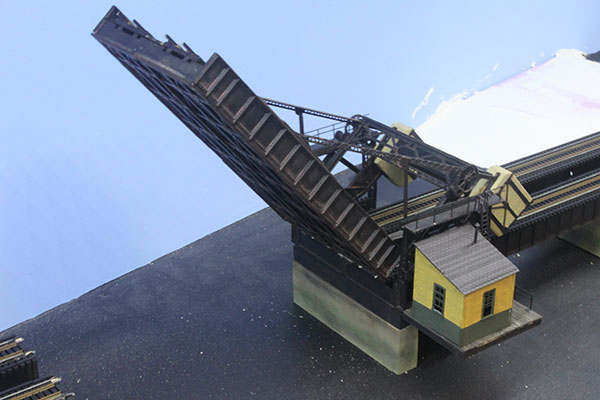
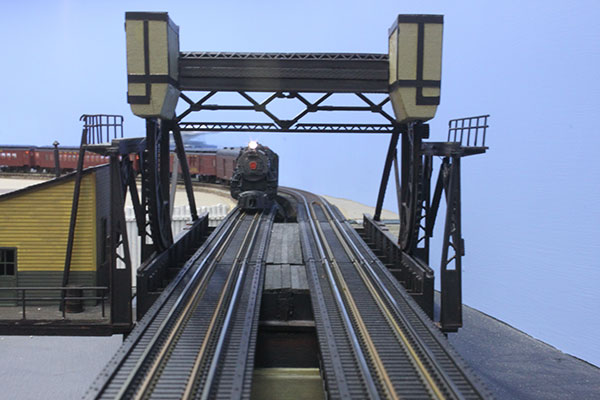
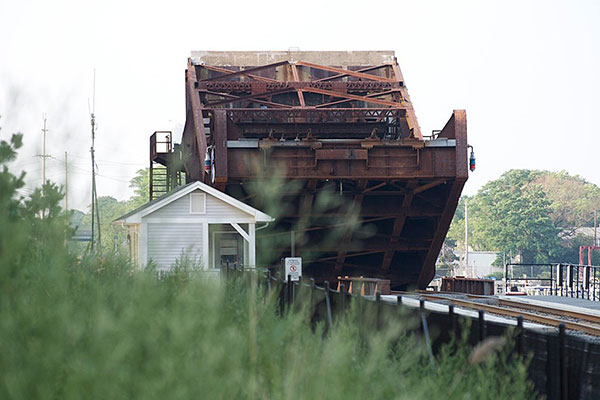
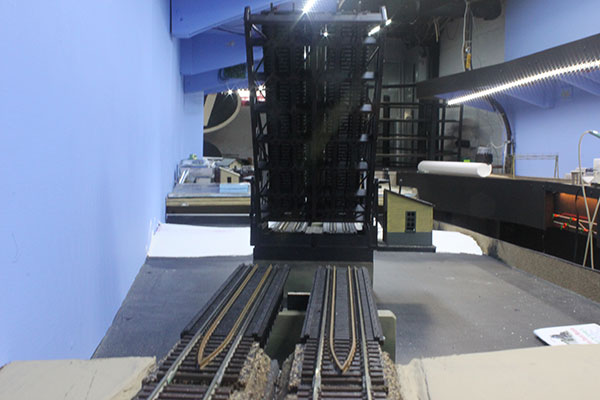
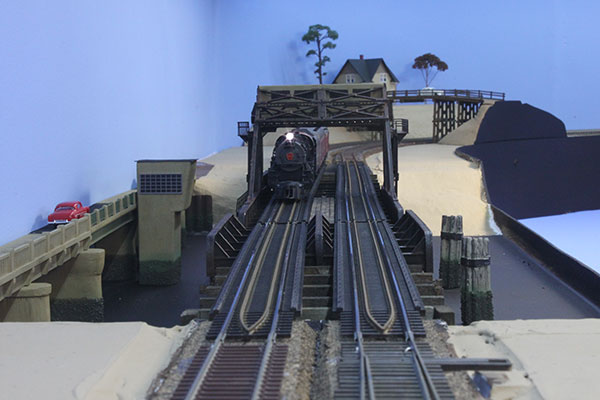
The Manasquan River bridge is in its normal position which is raised for boat traffic. The channel which runs through here is part of the Intracoastal Waterway and the bridge, with a mean 3 foot clearance, must remain open unless a train is approaching. (8/14/12)
The open Manasquan River bridge from the north or Brielle shore. (8/14/12)
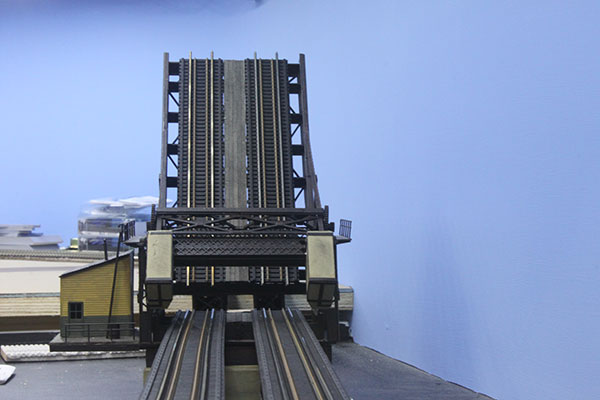
The open Manasquan River bridge from the south or Point Pleasant Beach shore. (8/14/12)
Shark River bridge construction continues with the rack base structure. (9/3/12)
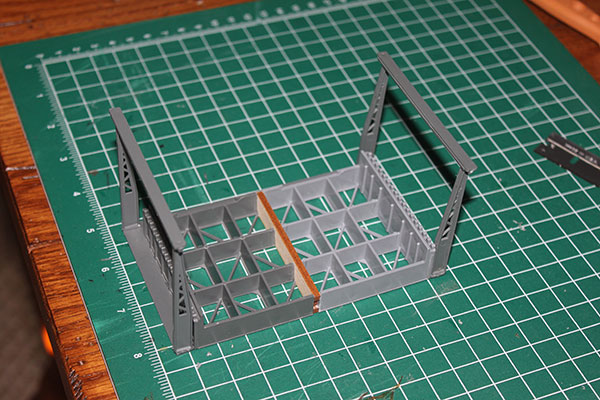
The support towers for the bridge racks are added. (9/3/12)
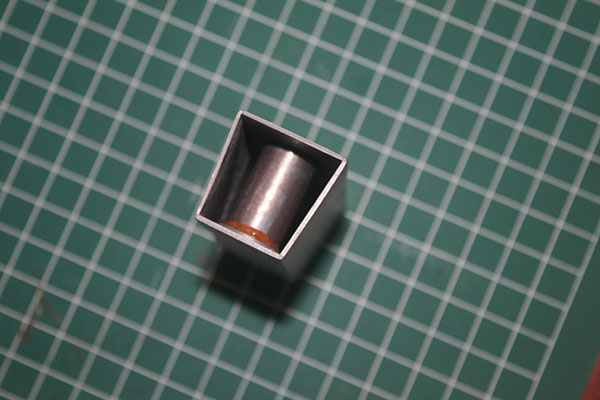
I was planning to scratch-build the bridge counterweight but started playing around with the kit counterweight and decided it was as good as anything I could possibly make myself. Two metal weights are shown here glued inside the assembly. (9/8/12)
Because the bridge is built from two single track kits the counterweight also had to be combined. After a lot of sanding of the joints, its glued into place and nicely balances the bridge just like the real thing. (9/8/12)
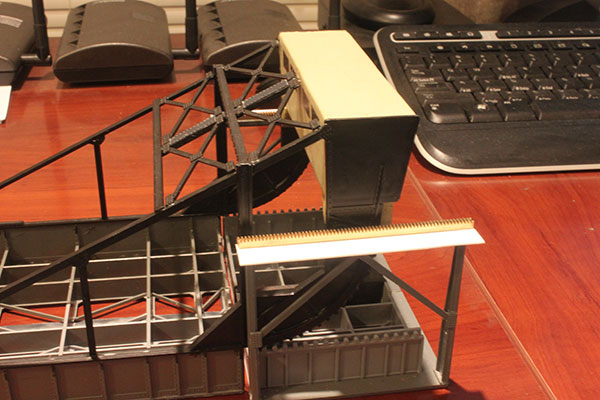
I built this short girder span for the north approach and threw some track on to check for clearances with a Trainmaster. The clean-looking concrete counterweight will be heavily weathered as will the entire bridge. (9/10/12)
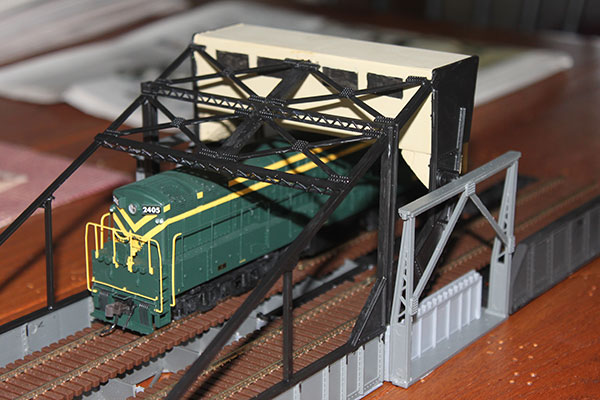
The structural cross beams and girders here are pretty faithful to the prototype (see the photo five rows above). The black openings in the counterweight are where the weight was fine-tuned when the bridge was built. Initial painting has begun. (9/10/12)
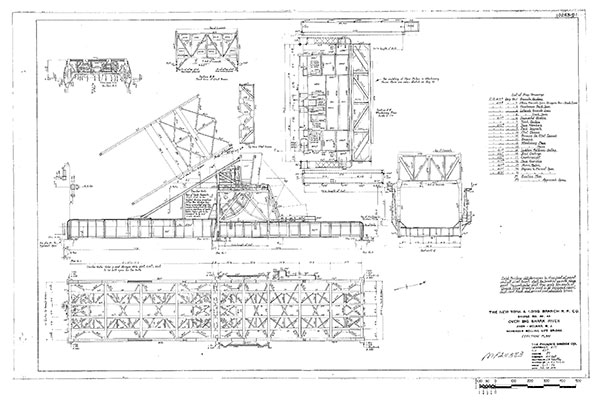
Work is continuing sporadically on the Shark Bridge and the layout in general. Above is a copy of the original erection plans for the Shark River bridge from 1937. (9/23/12)
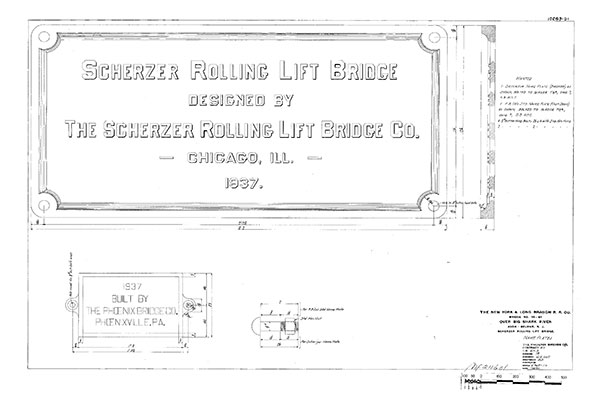
Above is the nameplate plan. These plans are valuable as they show details not apparent from available photographs. (9/23/12)

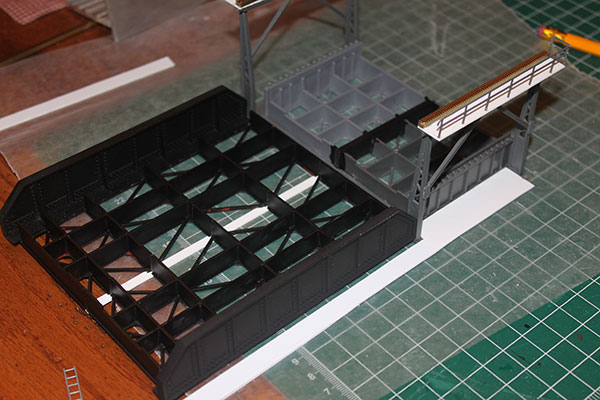
I finally found some free time this week to work on the Shark River Bridge. Here is the south girder span under construction. This is the ME 50' thru girder bridge kit for double track. (10/8/12)
The kit went together pretty easily and is shown here with some track thrown on. All that's left is a paint job and some weathering...and bridge shoes too. (10/8/12)
The main lift bridge assembly got a bunch of rivet plates installed as well as cat walks and pinion racks shown above. (10/8/12)
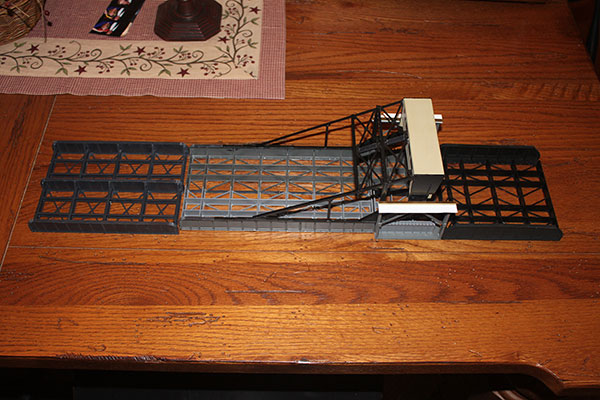
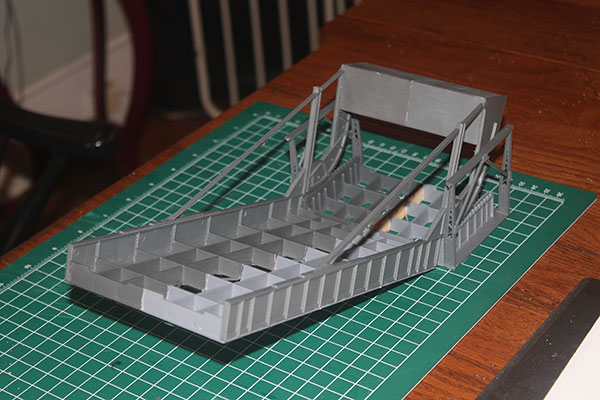
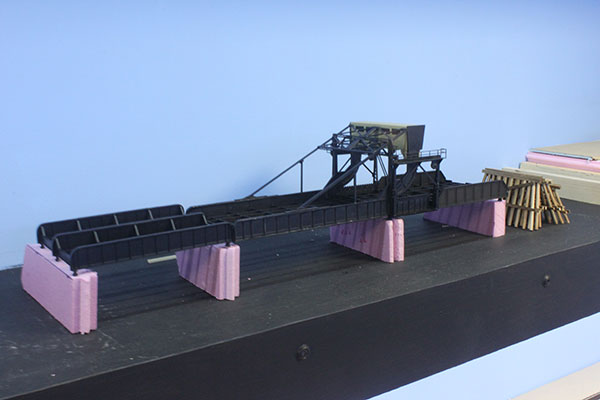
This is how everything will soon come together on the layout. The overall length of the steelwork above is 25 inches with wood trestle approaches for each end yet to be built. (10/8/12)
Pipe railings have been installed on the rack cat walks. An access walkway is taking shape along the side of the bridge. The two bridge structures here were also glued together to make one unit like in the prototype. (10/10/12)
Sometimes you just have to use whatever is handy to get the job done. The upside-down bridge rests on a six-pack of ginger ale, while paint bottles, balsa and track hold up the walkway as I- beam supports and bracing are glued in place. (10/10/12)
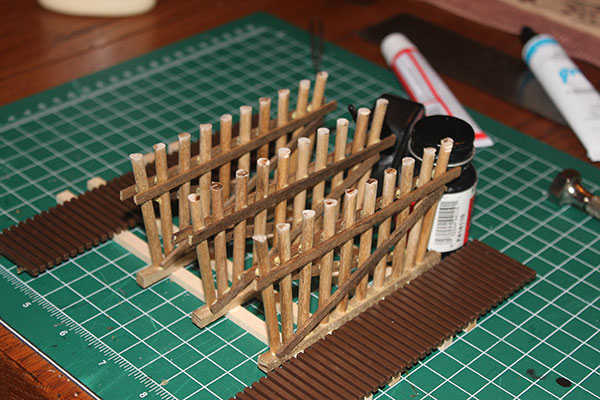
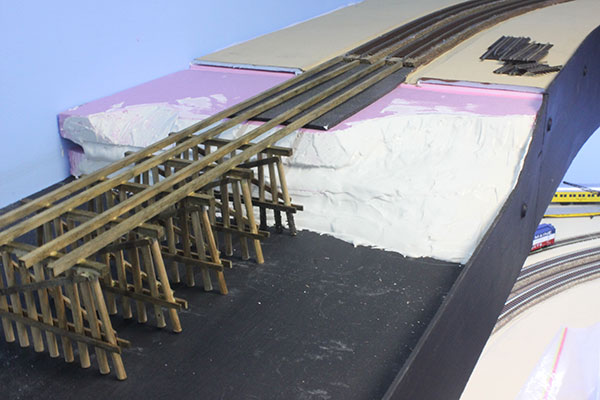
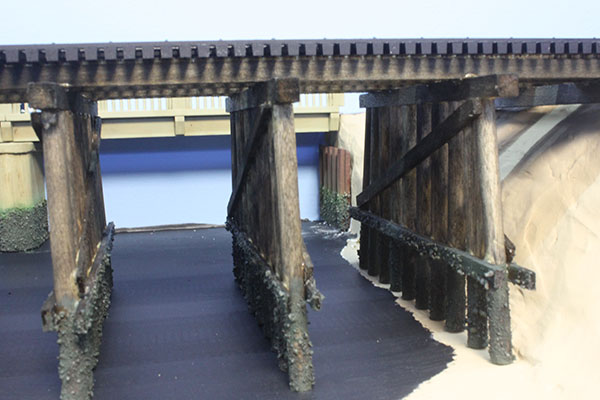
During the 1950s the approach trestles were of wood construction on the Shark River bridge. Here is the assembly of the southern approach. (10/19/12)
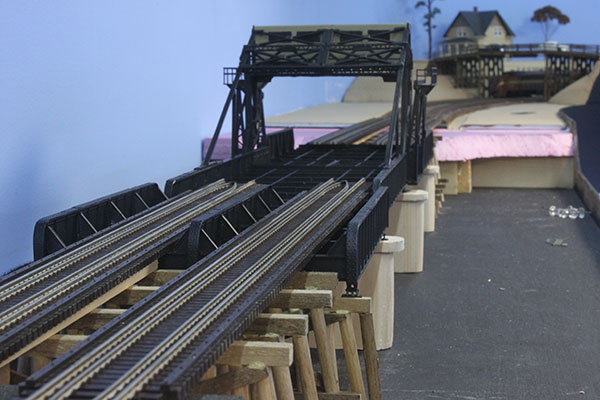
The steel bridge is essentially complete except for weathering and sits on temporary supports on the layout. Wood bents await construction of the north approach. (10/19/12)
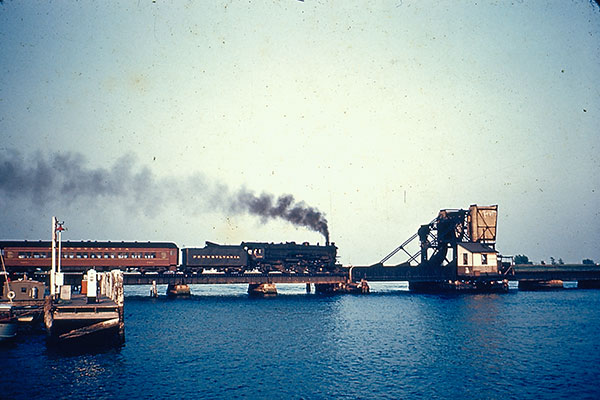
A PRR commuter train passes over the Manasquan bridge heading into Point Pleasant Beach in 1956. Hurricane Sandy halted construction on my NY&LB layout for the past two weeks while I dealt with a five day power failure and a lot of cleanup, not to mention helping my parents with their flood/power/cleanup issues. All is getting back to normal and construction is resuming this week on the layout. Thanks everyone for all the emails showing your concern! (11/13/12)

A classic shot of a PRR K4s taking water at the Bay Head loop in 1957. Hurricane Sandy's storm surge flooded the entire Bay Head facility of the North Jersey Coast Line. It also hurled boats onto the tracks at the Manasquan River, damaged the Morgan bridge and washed out parts of the line between Morgan and South Amboy. The entire coast line is still out of service and will be for the foreseeable future I'm afraid. (11/13/12)

I've been working slowly on the layout, specifically the Shark River Belmar bridge. Above are the timber bents and stringer beams assembled and ready for staining. The lower bent supports the approach girder bridge. I placed the track and CNJ caboose on the assembly to give it some scale. I'm hoping to get this project completed soon so I can resume running trains! (11/27/12)
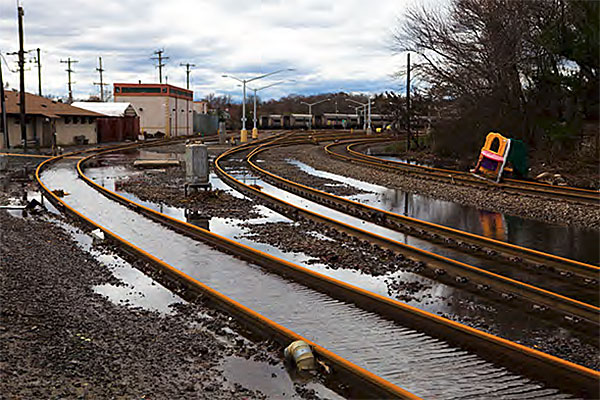
Flood water was still receding from the Bay Head yard two days after Hurricane Sandy. The yard was the victim of extensive flooding. Note the stored coaches in the distance and the play gym on the tracks. This view is opposite from the 1950s one above. The concrete pad for the water column is still there just to the left of the silver relay box. (11/27/12)

Ok, ok, I know it's been a long time since the last update. Not to make excuses, but the holidays snuck up on me and my fiancée and I have been busy planning out June wedding. Yes that's right!!But the layout is safe for now since we will be living here. It just amazes me how life takes turns and twists. And Debbie loves my layout and fully supports it. She also is intrigued by garden layouts, so maybe that might be in out future too. (2/4/13)
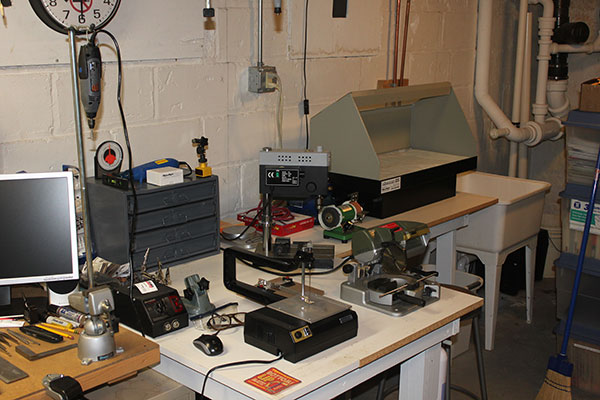
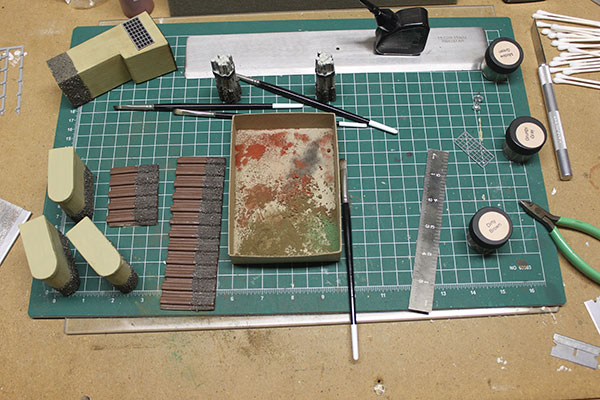
Getting back to the layout....I found that my cluttered work area was becoming detrimental to the whole construction progress so I decided after the holidays to clean up and organize the other half of the basement. My main work bench (above left) got de-cluttered and storage bins added. My old darkroom tables now hold my modeling power tools and paint booth (above). There is still work to be finished and the layout progress should move quicker with these improvements. (2/4/13)
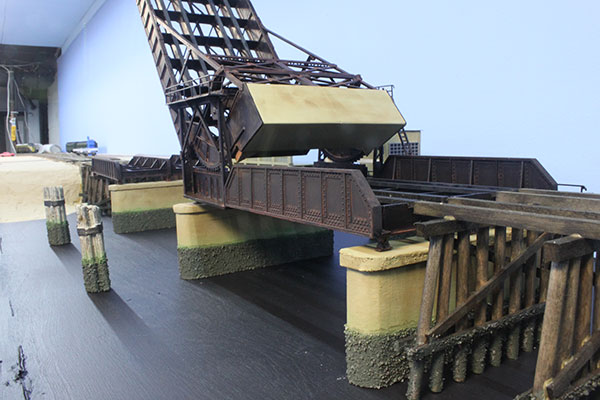
Construction has resumed on the Shark River Rolling Lift Bridge with the concrete piers cut and waiting to be shaped with rounded ends. Bridge track is on order while a Eastbound CNJ baby face double ender has to stop due to no track! Where's my smash board? (2/6/13)
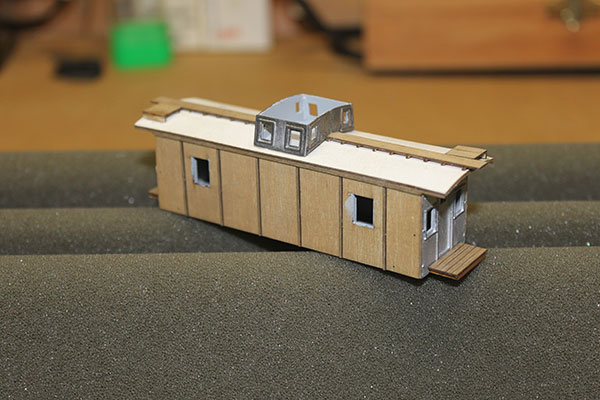
With my work area re-organized, I have been re-visiting some earlier projects such as this Sparrows Point CNJ board & batten caboose kit. It's really a gem and hopefully will be on par with my OMI brass CNJ plywood caboose when completed. (2/6/13)
I rounded the ends of the concrete piers for the Shark River bridge by sanding the ends after sawing off the corners of the block of wood. A 1/8 inch piece of basswood will serve as the cap, which has yet to be shaped using the same method. (2/11/13)
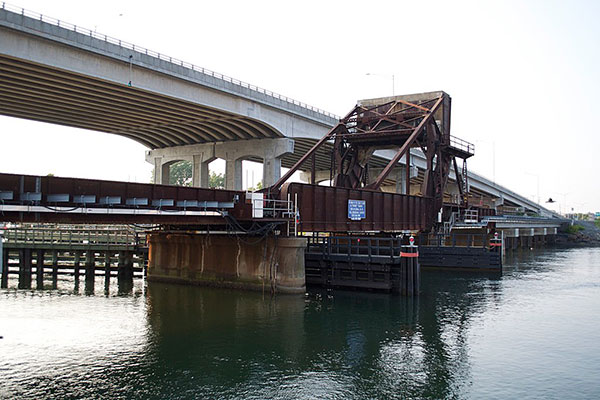
This present day view of the prototype bridge shows the original concrete piers and timber fenders which will also be modeled. The recent high-level hwy bridge didn't exist in the 50s. But the old low-level Rt 35 bridge will be in the background right next to the railroad bridge. (2/11/13)
Construction continues on the Shark bridge. The three concrete piers are taking shape and both wood trestle approaches are completed. (2/14/13)
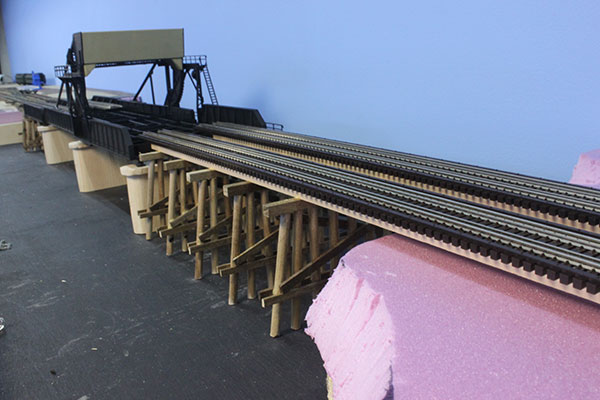
On the north side I had to build out the shore with foam. Rusting of the steel structure is next as well as staining and weathering the wood trestles. (2/14/13)
The north shore of the Shark River begins to take shape with the first layer of goop over a foam base. 1/3 of the Route 35 Hwy bridge will be on the extreme left against the backdrop. (2/18/13)

The south shore is also taking shape. A bulkhead will be under the trestle and highway bridges. The concrete bridge piers continue to be worked on with much sanding still ahead. (2/18/13)
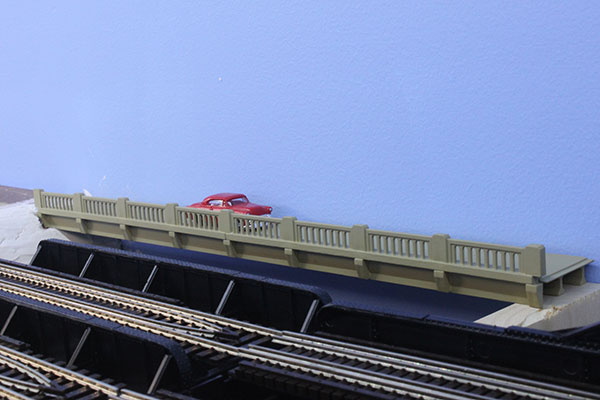
The old Route 35 Highway bridge is now under construction on the layout. It paralleled the rail bridge. Only the east half of the bridge will be modeled from three Rix kits. (2/23/13)

The remaining major construction of the rail bridge involves the bridge tender shanty, shown here in recent times. This building will be built from scratch. (2/23/13)
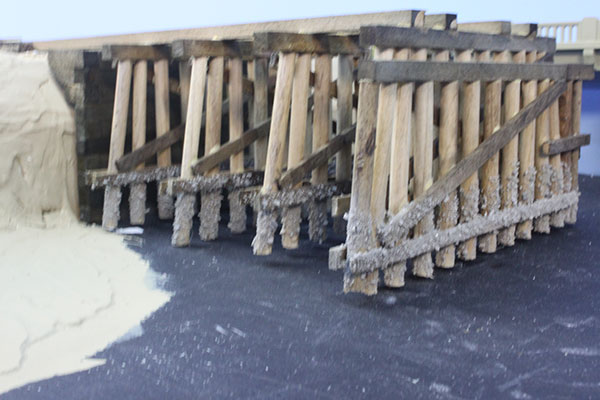
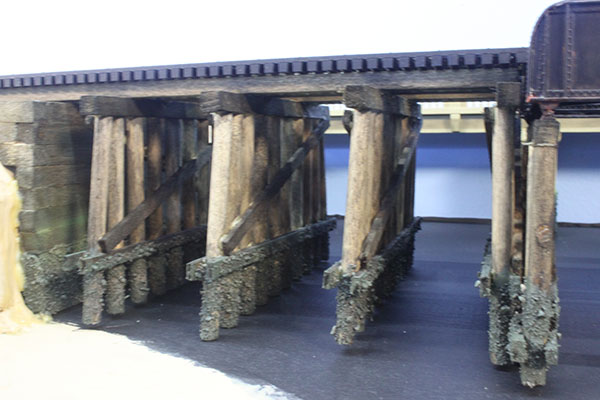
Modeling continues on the Shark bridge. To simulate the seashore buildup of various salt-water sea creatures on the trestle pilings, I coated the lower inch with glue and spread ballast over the pilings. These creatures consist mostly of mussels and barnacles. (3/6/13)
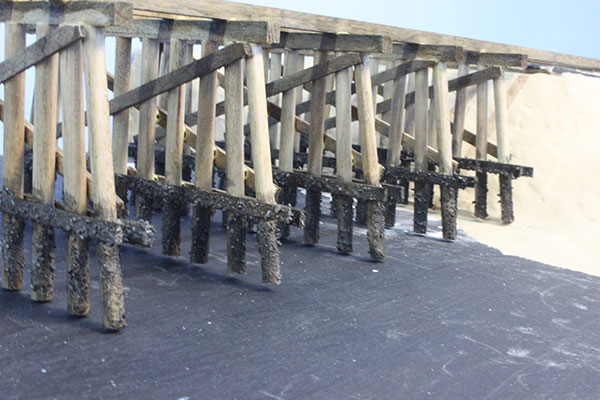
After everything dried, I gave the pilings below mean tide a wash of a mixture of black India ink and alcohol. This same process will be used for the concrete piers, shoreline bulkheads and bridge fenders. (3/6/13)
Parts of the highway bridge are shown here at the workbench...piers, piling, steel bulk heading and bridge tender house. The box is my chalk mixing area. (3/13/13)
The bridges are nearing completion. Weathering is done and installing the track, building the fenders as well as some minor details are all that's left before trains can cross. (3/13/13)
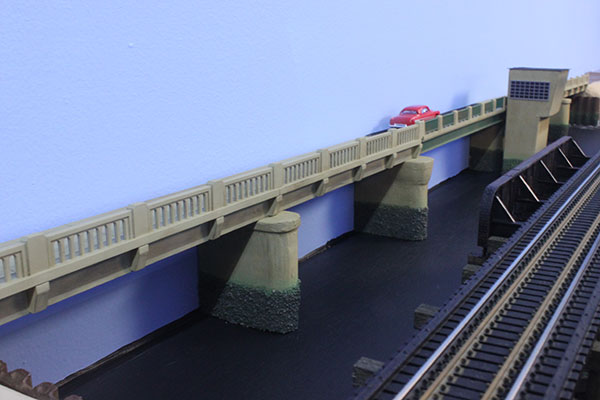
Except for some detailing and further weathering, the Shark River bridges on the upper level are completed. The southern half of the State Highway Rt. 35 bascule bridge is above. (3/21/13)
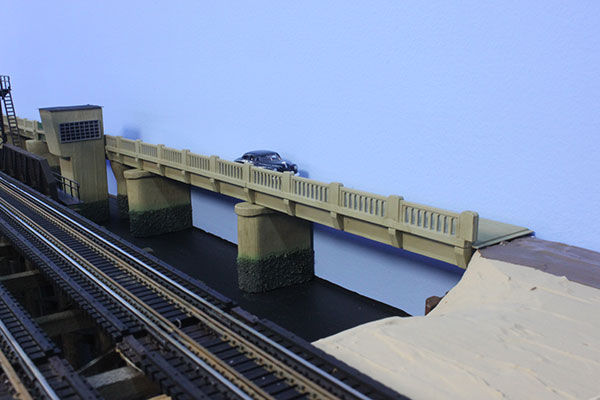
The northern half. As a background structure, I modeled only the northbound lane of the bridge which was built in the 1920s and replaced with the present bridge ten years ago. (3/21/13)
A close-up view of the NY&LB timber trestle at the north bank of the Shark River. Note the sheet steel bulkhead under the highway bridge and the soft shoreline. (3/21/13)
The south shore trestle. The as-yet to be built bridge tender shack will be located in the background. About 3/8 inch of Envirotex 'water' will soon fill this scene. (3/21/13)
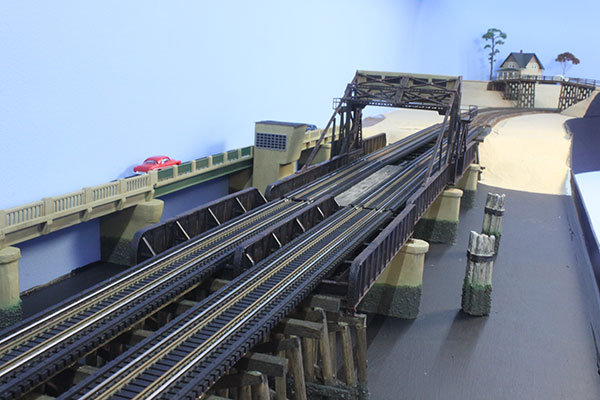
An overall view of the bridges from the south. Bridge fenders still need to be built and the river bottom painted a few shades of green to dark blue. (3/21/13)
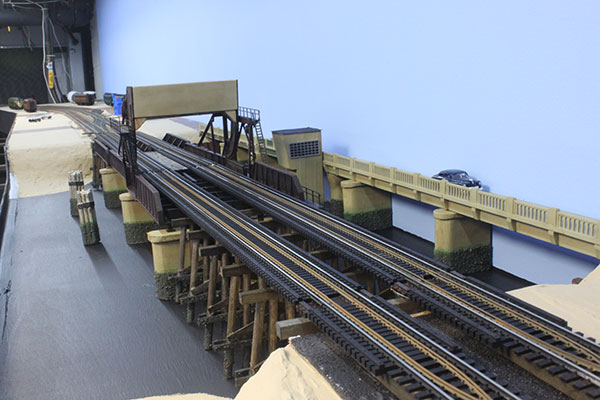
An overall view of the bridges from the north. I still need to add planking between the tracks here and add more weathering to the concrete counterweight. (3/21/13)
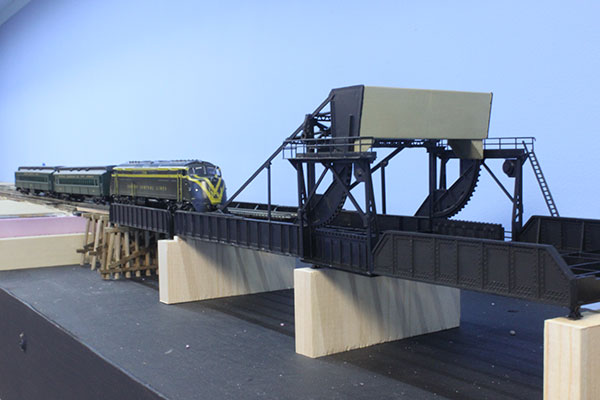
The first train crosses the Shark River Rolling Lift Bridge! A PRR K4s pulls a short midday commuter train toward Belmar station. (3/21/13)
The Pacific passes under the counterweight structure. Rustall was used to weather the steel and I used chalks and india ink for everything else. (3/21/13)
The train heads south (railroad westbound) into Belmar. Bridge fenders and the Tender Shanty are next before moving on to other projects. (3/21/13)
From a boaters point of view....following common sense, I need to complete the upper level scenery before moving to the lower level scenery. (3/21/13)
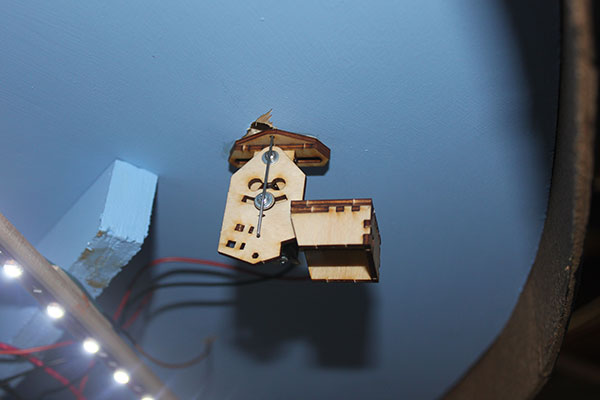
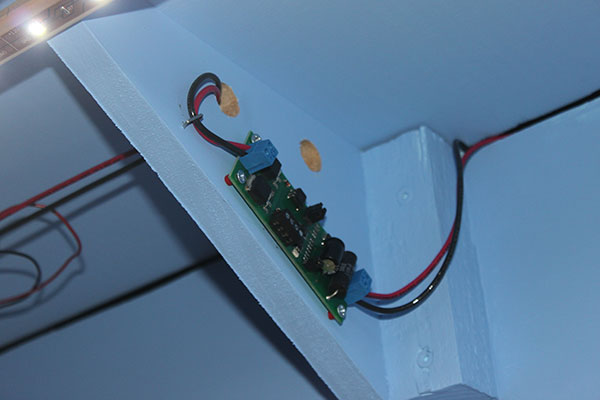
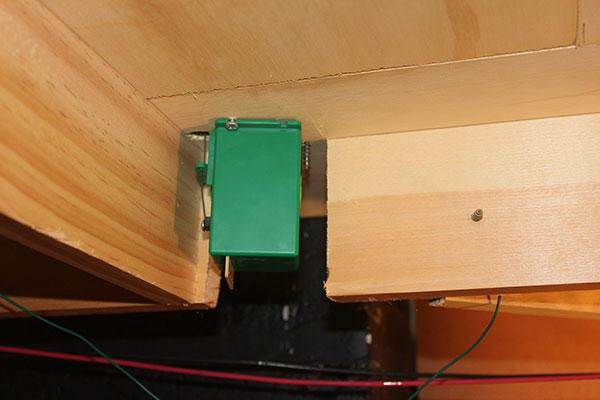
I've turned my efforts now to turnout control on the upper level. Here is a Fast Tracks Bullfrog assembly mounted under the layout. All wood and very simple design. (3/23/13)
Up on top a clamp holds the actuating wire until the glued-on lower assembly dries and gets screws. It took a total of 20 minutes to build and mount the Bullfrog. (3/23/13)
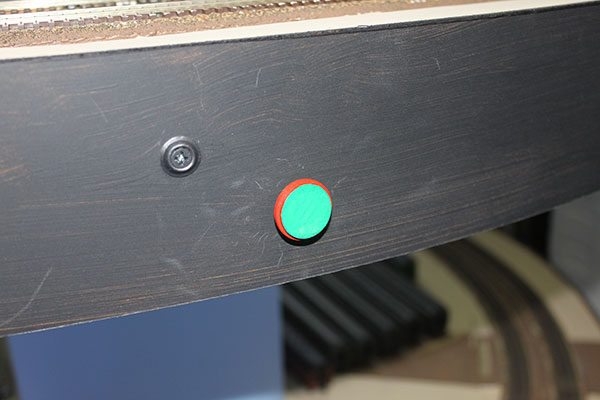
Turnout control installations continue.....Here is an actuating knob mounted on the fascia. Green (pulled out) is for the mainline and red (pushed in) for the siding. (3/31/13)
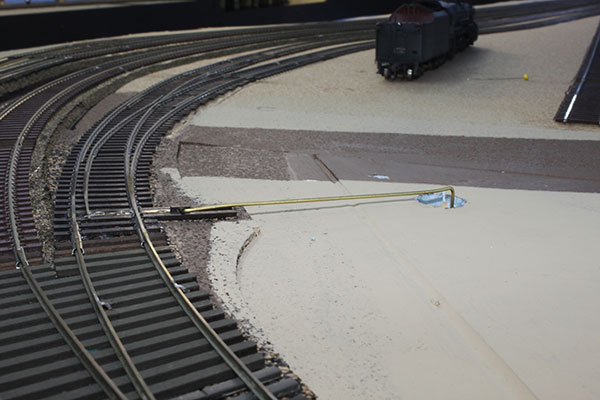
This turnout at the entrance to Neptune Yard is located right over a support beam. So I had to offset the control a few inches away and make a linkage from brass wire. (3/31/13)
While turnout controls continue to be installed, here is a shot of PRR K4s 646 at Bay Head Yard ready to head for South Amboy in October 1956. (4/8/13)
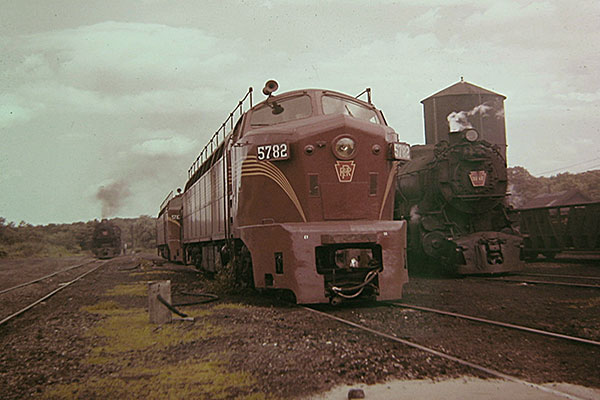
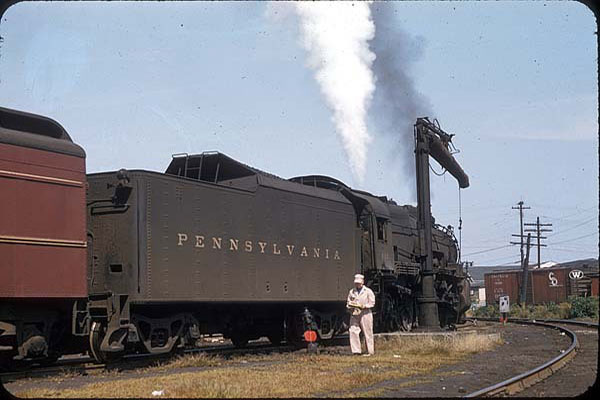
PRR Baldwin Shark BP-20 5782 and K4s 3247 wait on the Bay Head engine tracks in 1957. The 100,000 gallon PRR standard water tank is in the background. (4/8/13)
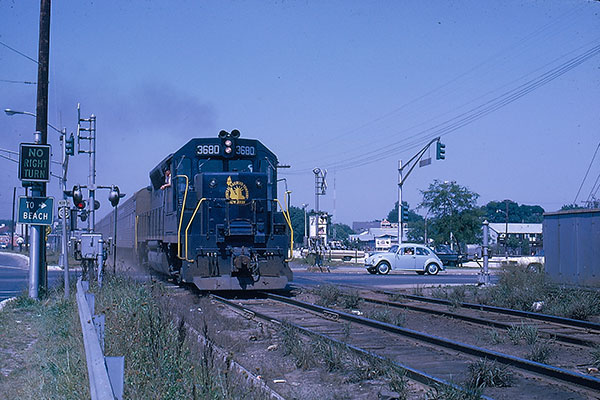
It's the mid 1970s and CNJ GP-40 3680 pulls out of Point Pleasant Beach Station toward Bay Head. The NY&LB row had become neglected as is evidenced above. (4/28/13)
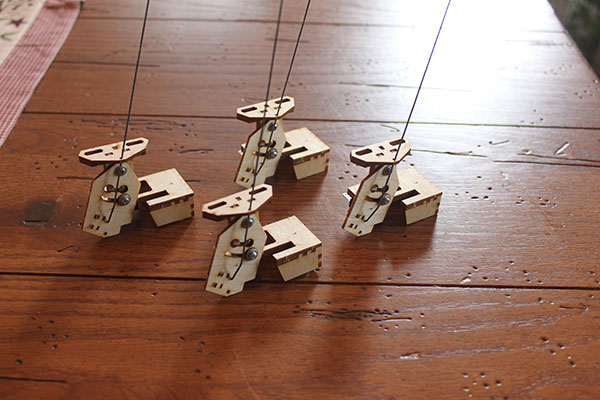
Layout controls continue to be built and installed. The upper deck is almost completed. Here are four Fast Tracks Bullfrog Turnout throws waiting their turn. (4/28/13)

All of the upper level turnout controls have been installed. The above knobs control the Neptune Yard turnouts. All of the upper level turnouts are operated this way except for one ... the Asbury Park team track which has a manual throw. (5/3/13)
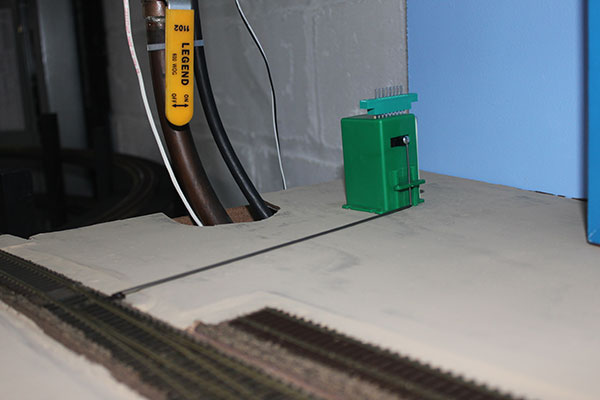
Since the helix is single tracked, I had to coordinate the upper and lower level turnouts to a single toggle switch labeled Westbound or Eastbound. These turnouts are controlled using a pair of surface mounted Tortoise switch machines. Above is the upper level linkage. (5/3/13)

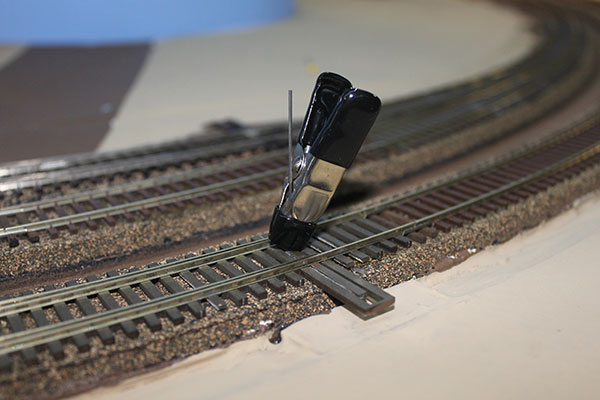
Except for the SG interlocking and Bay Head Yard, all of the lower level turnouts are manually operated using Caboose Ind. ground throws. On the Micro Engineering turnouts I had to insert a pin in the throw bar to connect the manual throw. (5/3/13)
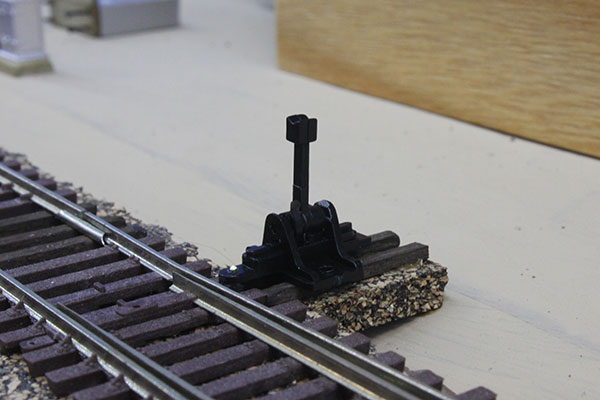
Here is the throw connected to the ME turnout using the brass pin. The molded pins on the throw were too large. This throw is the smaller N Scale model which works just fine with the Micro Engineering and fast tracks turnouts. (5/3/13)
Work has started on the installation of 17 Tortoise switch machines in the Bay Head Yard section of the layout. These, along with six electromagnet uncouplers, will be tied in to the yard control panel. (5/7/13)
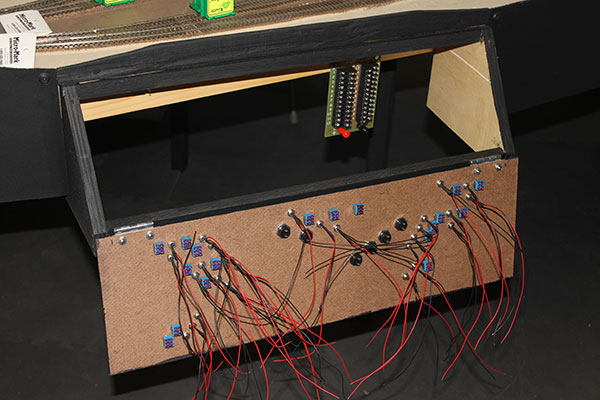
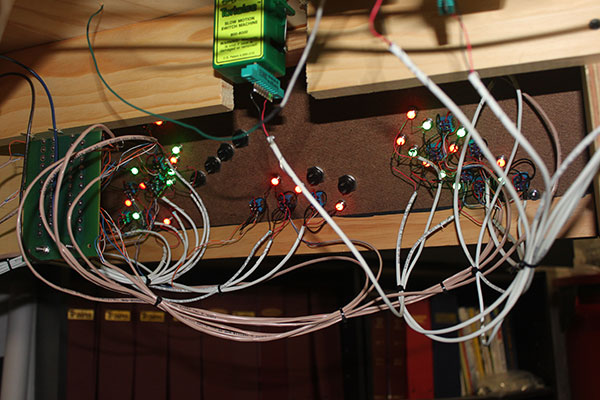
It's been over two years since I built this control panel for the Bay Head Yard and now wiring resumes. The front panel is swung open showing the LED leads, turnout switches and uncoupler push buttons. (5/7/13)
Having so many turnouts connected to Tortoise switch machines in a rather compact area, it was inevitable that the benchwork would get in the way of a few. Simple solution.....just cut out the girders. This was a simple job since I didn't glue the girders and plywood top together. (5/13/13)
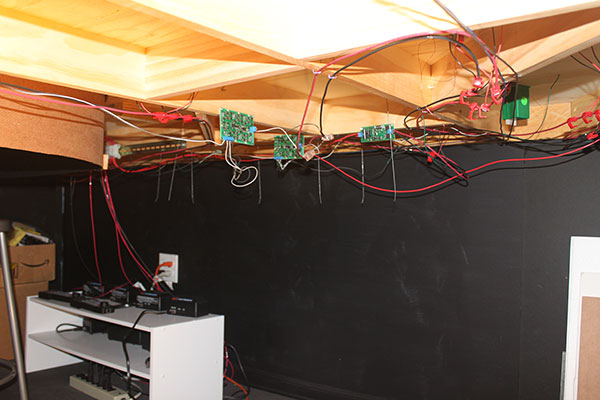
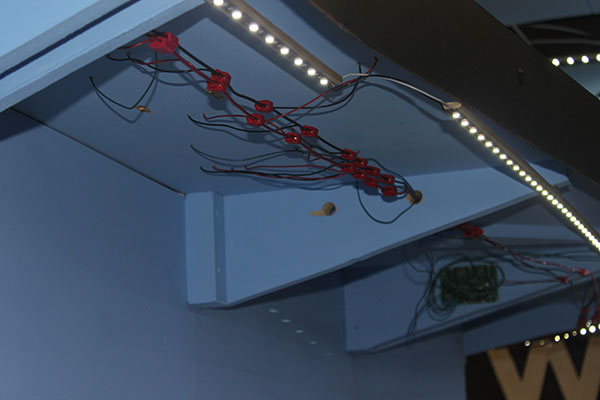
At this point, nine turnouts are now automated with eight to go. The remaining switch rods are dangling under the yard above. After these are wired I'll clean up the spaghetti of wires. The turnouts already done work very well and I can't wait to finally put the yard into service. (5/13/13)

The Bay Head Loop control panel has been completed (almost) with all of the turnouts now automated with toggle switches and bi-color LED indicator lights. Waiting for a 16VAC power supply so the electromagnetic uncouplers (blue buttons) can be wired. (5/26/13)
This is a view of the backside of the control panel from under the layout. The 12VDC power distribution block is on the left. The panel still will need to be labeled but at least the turnout controls for the first half of the layout have now been completed. Hurray! (5/26/13)
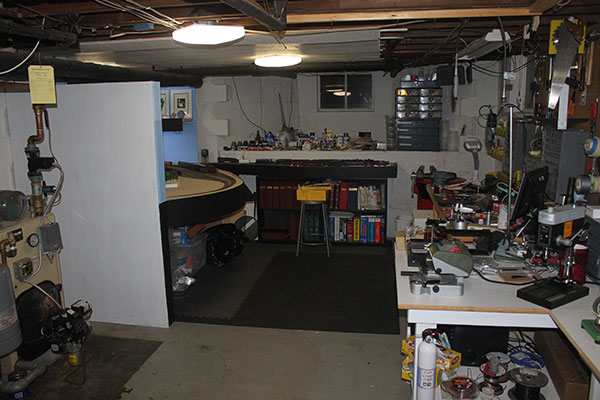
The future of my model NY&LB lies in the other half of my basement. I have been spending the past few weeks organizing and removing years of clutter. Bay Head Loop is to the left. (6/14/13)
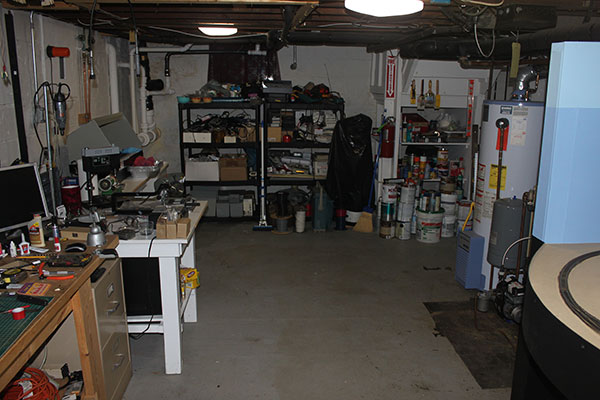
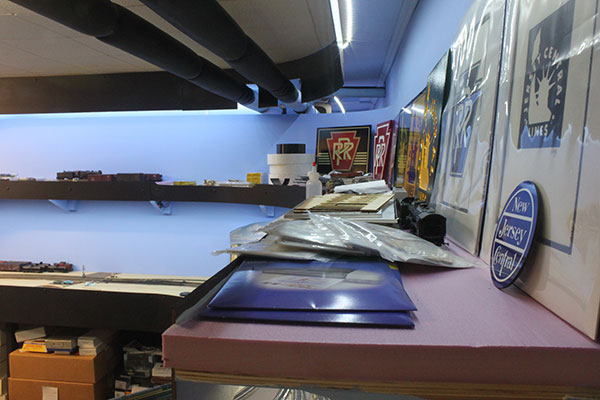
The view from the other side shows what I'm up against. The shelving will go as well as most of the benches, but I'll still need a working area. A lot of planning is ahead! (6/14/13)

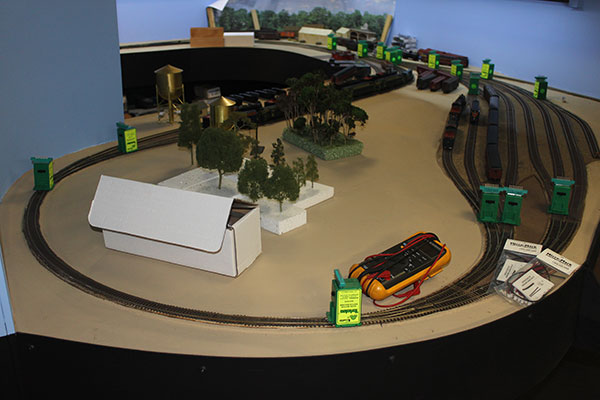
Bay Head Yard is completed and now awaiting scenery. The staging yard to the right is also operational. Still working out track demons, especially at the turnouts. (6/14/13)
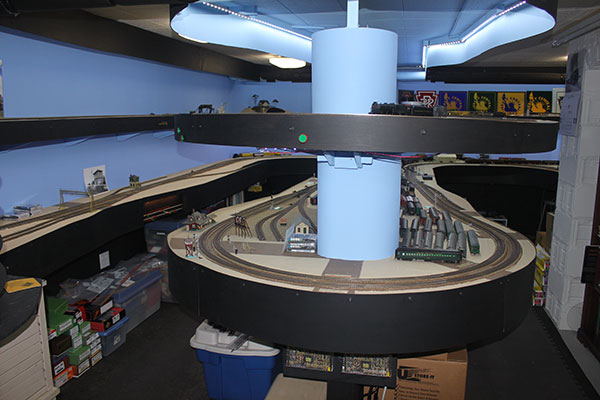
An overview of the other half of the basement. The helix is off to the left. I would say that over 95 percent of the layout is trouble free and I'm working hard to reach at least 99 percent! (6/14/13)